A GitHub App Would Like to Act on Your Behalf
An inaccurate warning when authorizing GitHub was a concern for some of dAppling’s users. We got around this by using a dual-auth approach: OAuth for log in and App authentication for repo access.
The GitHub App Warning
When authorizing a GitHub App, the user is presented with a warning stating our app would like to “act on your behalf”. This warning is accompanied by a link about GitHub Apps acting on your behalf. While this is true for some actions GitHub apps can perform, this warning shows up when requesting only read access to the user’s profile. This has been understandably concerning for some of our users.

GitHub Authentication
Ultimately we want to do two things: allow the user to log to dAppling with their GitHub account and build their specified repositories into a decentralized application. For logging in, GitHub provides OAuth as well as GitHub App authentication. For repo access, GitHub App authentication is the only reasonable option, although there are other more inconvenient options. As you might have guessed, using GitHub App authentication for both log in and repo access would work. It would also trigger the warning. Therefore, we decided to use GitHub’s OAuth for the log in and GitHub’s App authentication for repo access.
Flow Overview
- User Clicks “Log In” and are routed through the Next Auth sign in flow via GitHub OAuth.
- If they are a new user, they are prompted to provide authorization.
- They receive a token and are redirected to the Auth Check page.
- The path diverges based on whether or not they have the app authorized.
If they do not have the app installed:
- Since they are most likely new, they are sent to /new
- The user will be shown a button to connect to the GitHub App Authentication
- A popup, which, upon completion, will redirect to /auth/connection
- The middleware will intercept the call to /auth/connection, and using the code passed back, a GitHub App token is stored in the session
- The Auth Connection Page pop-up is closed and the session is refreshed with
update
If they have the app installed:
- They are directly attempted to App Re-Authentication via GitHub’s app auth flow
- Upon completion, they are redirected to /auth/connection
- The middleware will intercept the call to /auth/connection, and using the code passed back, a GitHub App token is created and stored in the session
- Hitting the Auth Connection Page, the user is redirected to their /projects page
Celebrate! The user now has both the githubAppAccessToken and githubOauthAccessToken until logging out
GitHub OAuth
Using GitHub’s OAuth app is surprisingly straight-forward since we are using Next Auth, but this should be similar for other platforms. Using the Client ID and Secret, allow the user to log into the OAuth provider and GitHub will return an access token. If you notice, the access token is named specifically to separate the OAuth access token from the GitHub App access token. The following is a simplified version of our config.
export default NextAuth({
providers: [
GithubProvider({
clientId,
clientSecret,
}),
],
callbacks: {
jwt({ token, profile, account }) {
token.githubOauthAccessToken = account.access_token;
return token;
},
session({ session, token }) {
session.githubOauthAccessToken = token.githubOauthAccessToken;
return session;
},
},
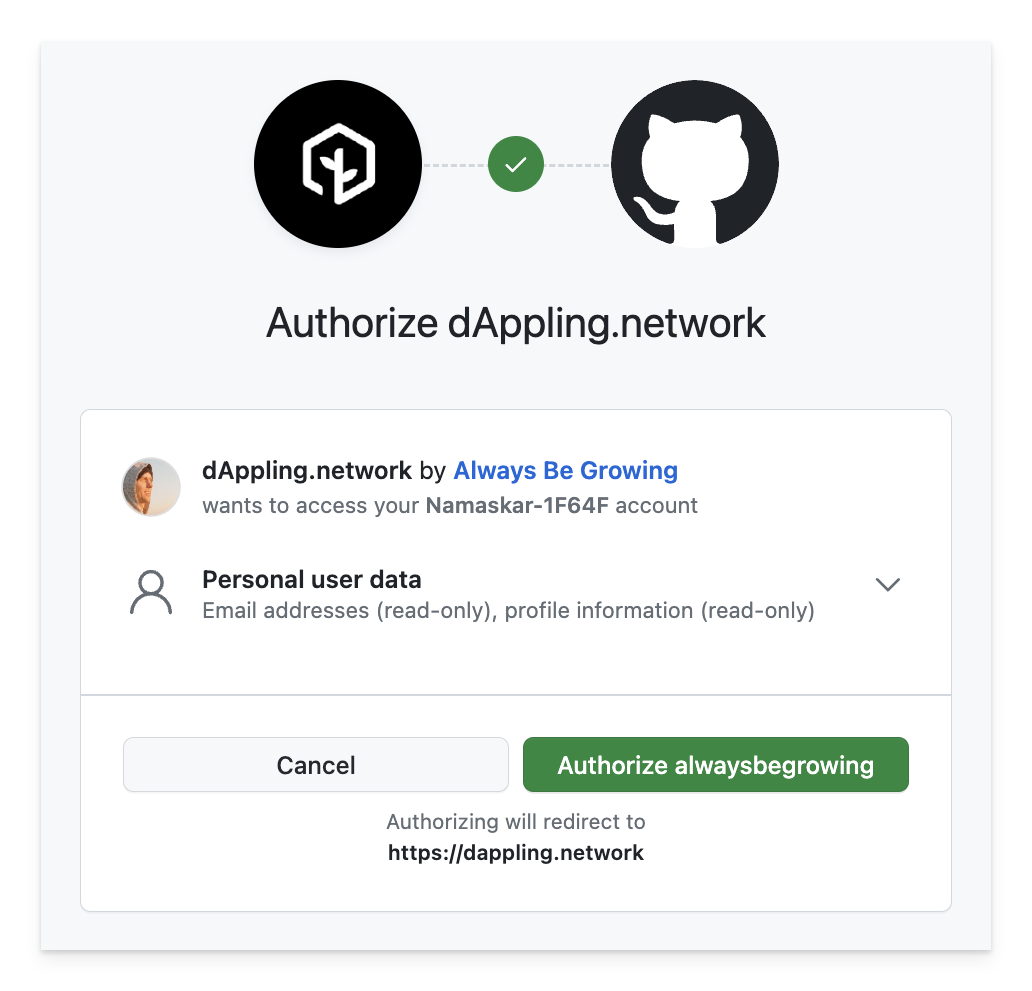
});Now, when the user logs in, they are presented with a nicer looking prompt. You can see the scary warning is not present, and if you don’t need the profile, request only “email” by changing the authorization scope.
Auth Check Page
Once the user has an OAuth token, we can check if they have the app token and redirect them accordingly. This is done in a Next.js page. Since it is not possible to see if a user has given the app authorization, we separate our users into two categories: most likely new and most likely returning. The signal we use is if the user has any projects. If they do, assume they are returning and immediately try to run App Re-Authentication. If not, we redirect them to the new project page and allow them to go through regular App Authentication. The following is a simplified version of our AuthCheck function.
async function AuthCheck() {
  const session = await getServerSession();
  if (session.githubAppAccessToken) {
    /*
      This should only happen if the user has acquired the githubAppAccessToken
      from the JWT token. This should be the case only if they hit this page directly,
      as the preview user, who has the token added directly, or if they had the accessToken
      from the previous JWT.
    */
    redirect('/projects');
  } else if (await hasProjects(session.user.id)) {
    /*
      Redirect to GitHub's auth flow to get a new token for our app. Then,
      GitHub will redirect the user to the /auth/connection page, which will upgrade
      the token and redirect to the projects page.
    */
    redirect(GITHUB_AUTHORIZATION_URL, RedirectType.replace);
  } else {
    redirect('/new');
  }
}
GitHub App Authentication
So the user has logged in to our app and we can query the GitHub API, but we need more permissions since we need to build code and report changes off of the website. That is where the GitHub App authentication comes in. Head over to create a GitHub app. There is one very important option to check: “Request user authorization (OAuth) during installation”.
At this point, we have a gho token for the user. From GitHub’s blog post on token formats, you can see this comes from the OAuth flow. After the user goes through the App flow, we will have a ghu token. This is the GitHub App token which will allow our app to access the repos granted by the user.
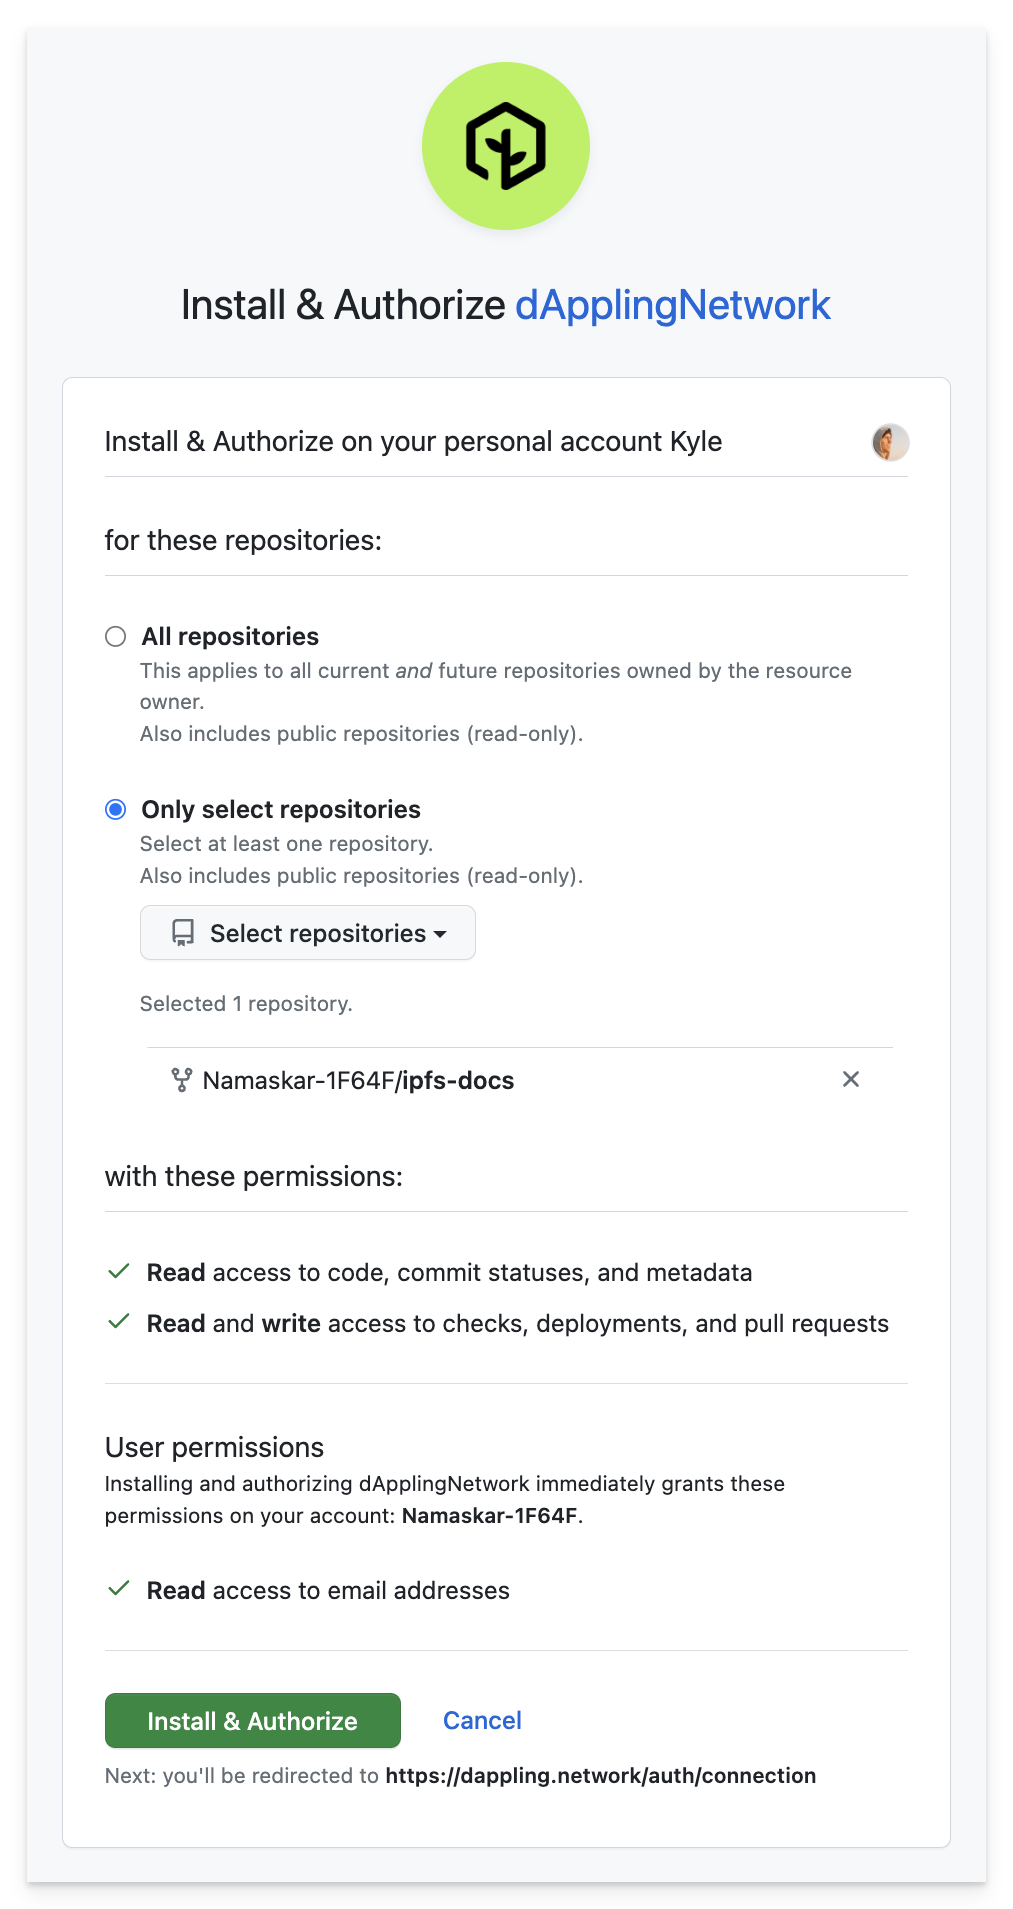
What’s nice is you can now see the permissions our app is requesting as well as limiting which repos the app can access. Funnily enough, the warning about acting on the user’s behalf is missing. After this step, we will now have an app token which we can also store in the cookie. Our new callbacks will look like the code below. Note, the githubAppAccessToken is set in the middleware. More on that later.
jwt({ token, profile, account }) {
  token.githubOauthAccessToken = account.access_token;
  return token;
},
session({ session, token }) {
  session.githubOauthAccessToken = token.githubOauthAccessToken;
  session.githubAppAccessToken = token.githubAppAccessToken;
  return session;
},
App Re-Authentication
Great, so we have the app token, but what happens when a user logs out? Both tokens are thrown into the bin and lost to the void. On the next login, a new OAuth token is generated, but the App token must also be retrieved. How we got the token the first time was through the installation process. Since we would rather not show the installation window every time the user logs in, we can use the convenient GitHub Authorization URL.
https://github.com/login/oauth/authorize
?client_id=${clientId}&state=${state}
additionally, we use the client_id and state parameters to identify our app and which flow the user is in. More on the state later.
What’s cool about using the authorize URL is if the app is already authorized, which you can see over at your GitHub Authorizations, the app token can be generated and stored securely without presenting extra pages.
Middleware
To do this, we use Next.Js Middleware. I’ve created a gist of our full middleware.ts, but a simplified version of the relevant parts is below. This was taken mostly from a GitHub discussion on the issue of setting a session cookie.
function updateCookie(token) {
  response.cookies.set(NEXT_AUTH_COOKIE_NAME, token);
}

const upgradeOauthTokenWithCode = async (code) => {
  return await appOctokit.auth({
    type: 'oauth-user',
    code,
  });
};

const addAppTokenToCookie = async (request, response) => {
  const code = url.searchParams.get('code');
  const githubAppToken = await upgradeOauthTokenWithCode(code);
  const token = await encode({
    githubAppAccessToken: githubAppToken,
  });
  updateCookie(token);
};

function middleware(req) {
  if (req.url.pathname === '/auth/connection') {
    addAppTokenToCookie();
  }
}
The basic idea is to trigger this middleware on the callback of the GitHub App authorization. The code is passed back from GitHub and we use it to generate the app token. This token is then stored in the cookie. Since this happens in the middleware, the cookie will be set by the time the user hits our following react components to ultimately render their projects.
Auth Connection Page
Alright so we’re almost there. The user has logged in and we have both of the tokens, but what does the component look like when the user is re-directed from the GitHub App? You might have noticed the /auth/connection path, which for our Next.js project is a page. This page is server side rendered and takes the state I mentioned earlier to either continue completely server side and redirect the user, in the case of a login, or to update the user’s session and close the pop-up in the case of an install. Again, a simplified version of the relevant parts is below.
async function AuthPage({ searchParams: { code, error, state } }) {
const session = await getServerSession();
if (session.githubAppAccessToken) {
/*
If the githubAccessToken is set, there is no need to continue. The
user is in a correct state.
*/
if (state === AuthState.LOGIN) {
/*
The LOGIN state comes from the /login page which will not be a pop-up
so the page should be redirected.
*/
return redirect('/projects');
} else if (state === AuthState.INSTALL) {
/*
This is the other case where the state is from the install pop-up.
The AppConnection page will update all windows with the new token and close.
*/
return <AppConnection />;
}
} else {
return <AppConnection error={error} />;
}
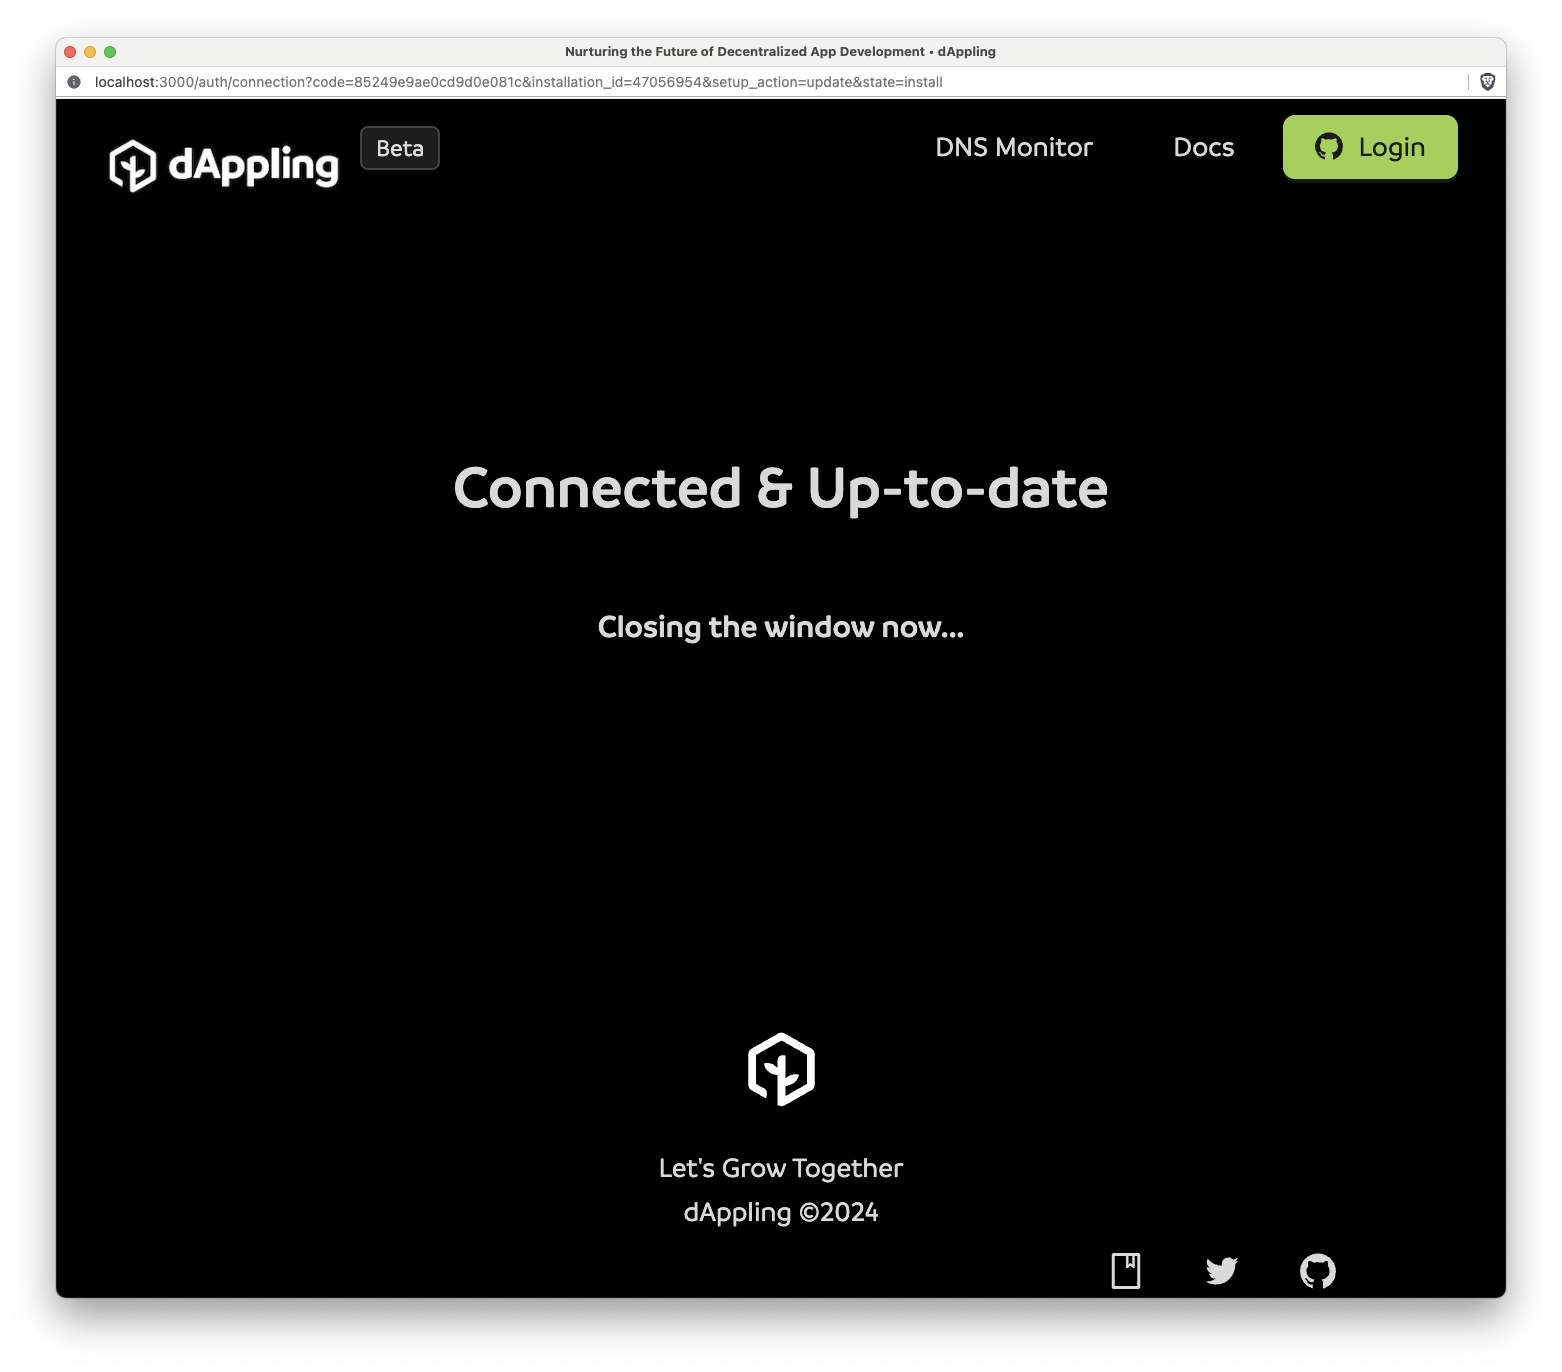
}Finally, in the case of the pop-up, the simplified AppConnection component is rendered. Here we want to simply show the user that they are connected and up-to-date. If there is an error, we show the error. If there is no error, we close the window after a short delay.
function AppConnection({ error }) {
  useEffect(() => {
    setTimeout(() => window.close(), 2000);
  }, []);

  return (
    <>
      <Image src={logo} />
      {error ? (
        error
      ) : (
        <Space>
          <Title level={2}>Connected & Up-to-date</Title>
          <Title level={5}>Closing the window now...</Title>
        </Space>
      )}
    </>
  );
}
Conclusion
While this does work, is it worth the effort? For our security conscious users at dAppling, being explicit about permissions authorized apps have is important.
We have found that using the dual-auth approach of OAuth for log in and App authentication for repo access is a good compromise. It allows us to use the GitHub App token for the necessary permissions while avoiding the inaccurate “act on your behalf” warning.
If you have any questions or need help setting this up yourself, feel free to reach out to me on Twitter.