Simple Site Building and IPFS Deployment with dAppling
In this walkthrough, we will explore how to deploy your site using dAppling and try out the features that make it a tool you’ll want to use. At the end of this walkthrough, you will have a project on dAppling that will:
- automatically update on GitHub code changes
- be hosted on the InterPlanetary File System (IPFS)
- be live on a dappling.network subdomain
- be live on a dappling.eth subdomain
- receive an automatically updating IPNS key
If you run into any problems, want to connect, or just say hi, my DMs are open on 𝕏. I would love to hear your feedback and help you get your project deployed.
What dAppling does
Literally, the word is a portmanteau of “dApp”, a term short for decentralized application, and “sapling,” because nature is wonderful 🌱. However, we support all kinds of web projects, not just dApps: landing pages, blogs, or even a simple page of content arguing against the usage of acronyms.
Basically, we take your code, build it, and host the resulting files on IPFS. But what makes us special are the features we provide to make your experience easier. Even if you have an existing site, you can use dAppling to create a resilient “alternative frontend” that is hosted on IPFS.
The Walkthrough
I will guide you step by step through the process of deploying a project on dAppling. I will be using a blog template, but you can use any code that you want to deploy.
The final project, on the dAppling platform, will be accessible at a URL like hello-ipfs-blog.dappling.network.
Let’s start exploring!
Find a Project
To begin, find a project that you would like to deploy to the decentralized web. This project should be able to be statically exported, and luckily the major frameworks like Next.js, React, and Svelte are supported. However, we cannot build projects with a backend, such as a database, server, or serverless functions. This means you can still use dAppling for your project, but you’ll need to host your backend separately.
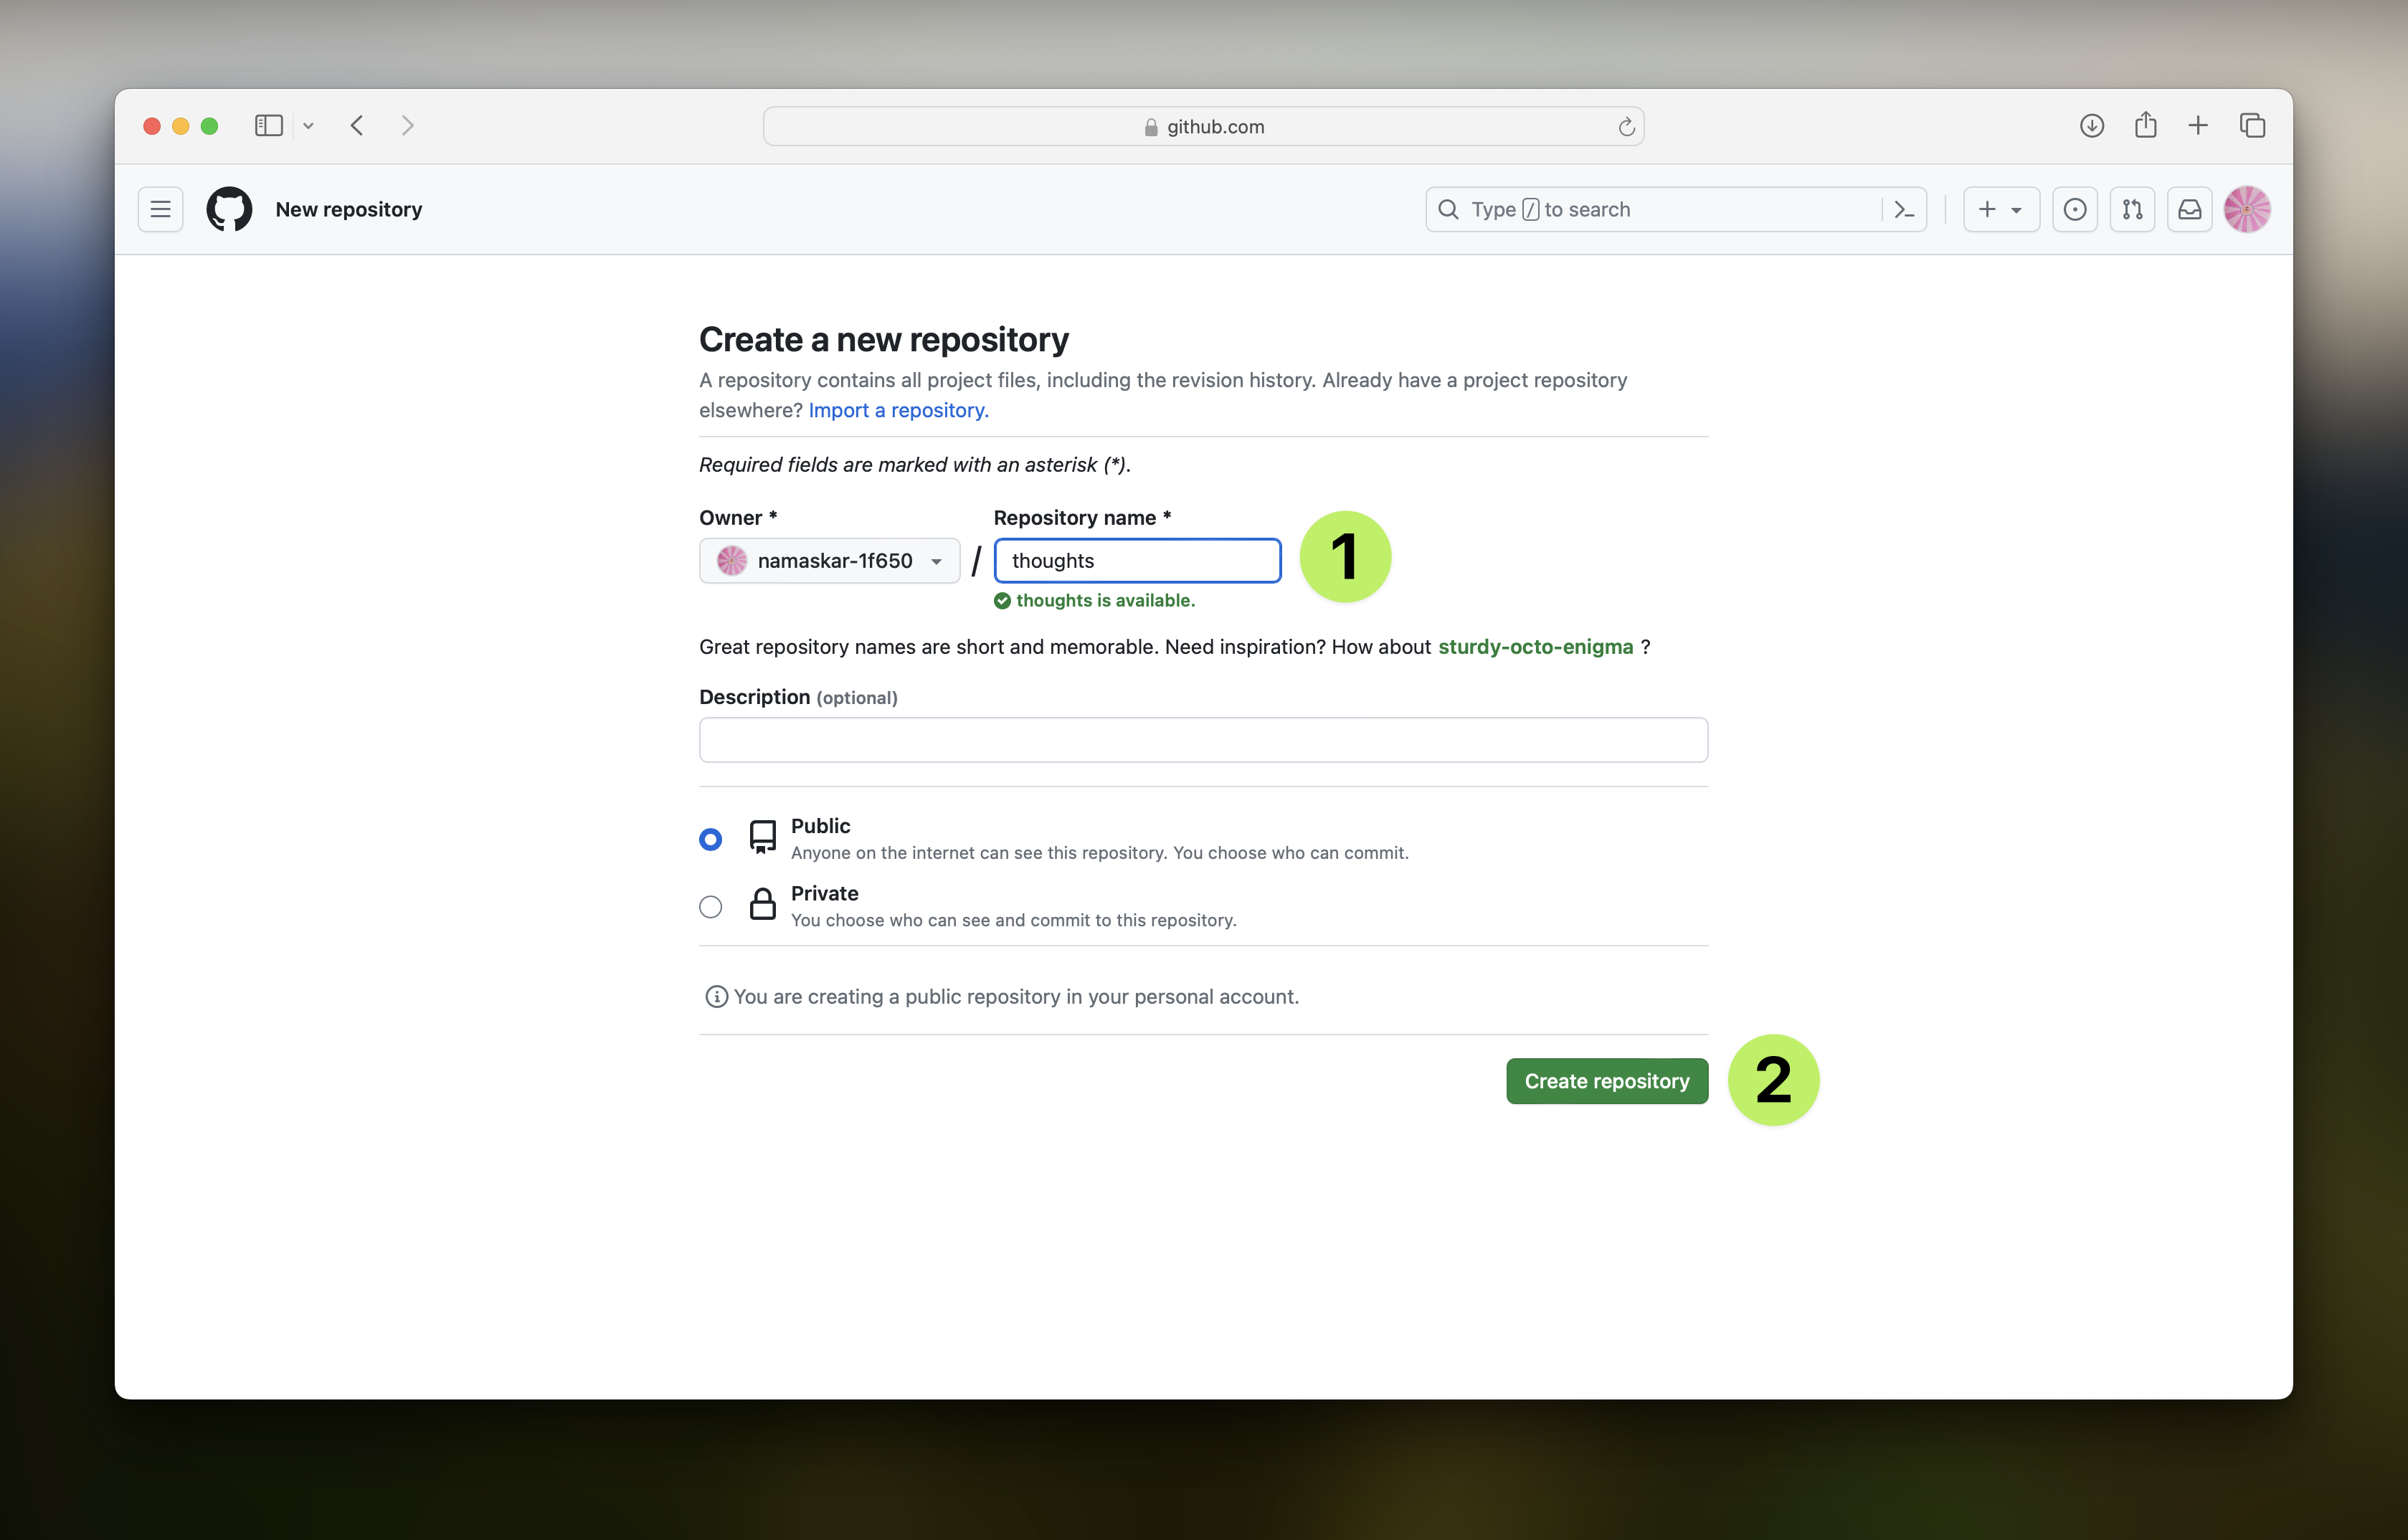
If you can’t think of a project, I would recommend forking a nice blog template to get started. Click on the “Use this template” button, then “Create a new repository”. This will bring up another screen confirming the fork.

Name your new blog something. I chose thoughts because one of my favorite quotes is “Thoughts become things”. I also decided to make it public, but you can make it private if you’d like. Then click “Create repository”. This will take you to the repository page, but we should head back to dAppling.network.
Create your First dAppling Project
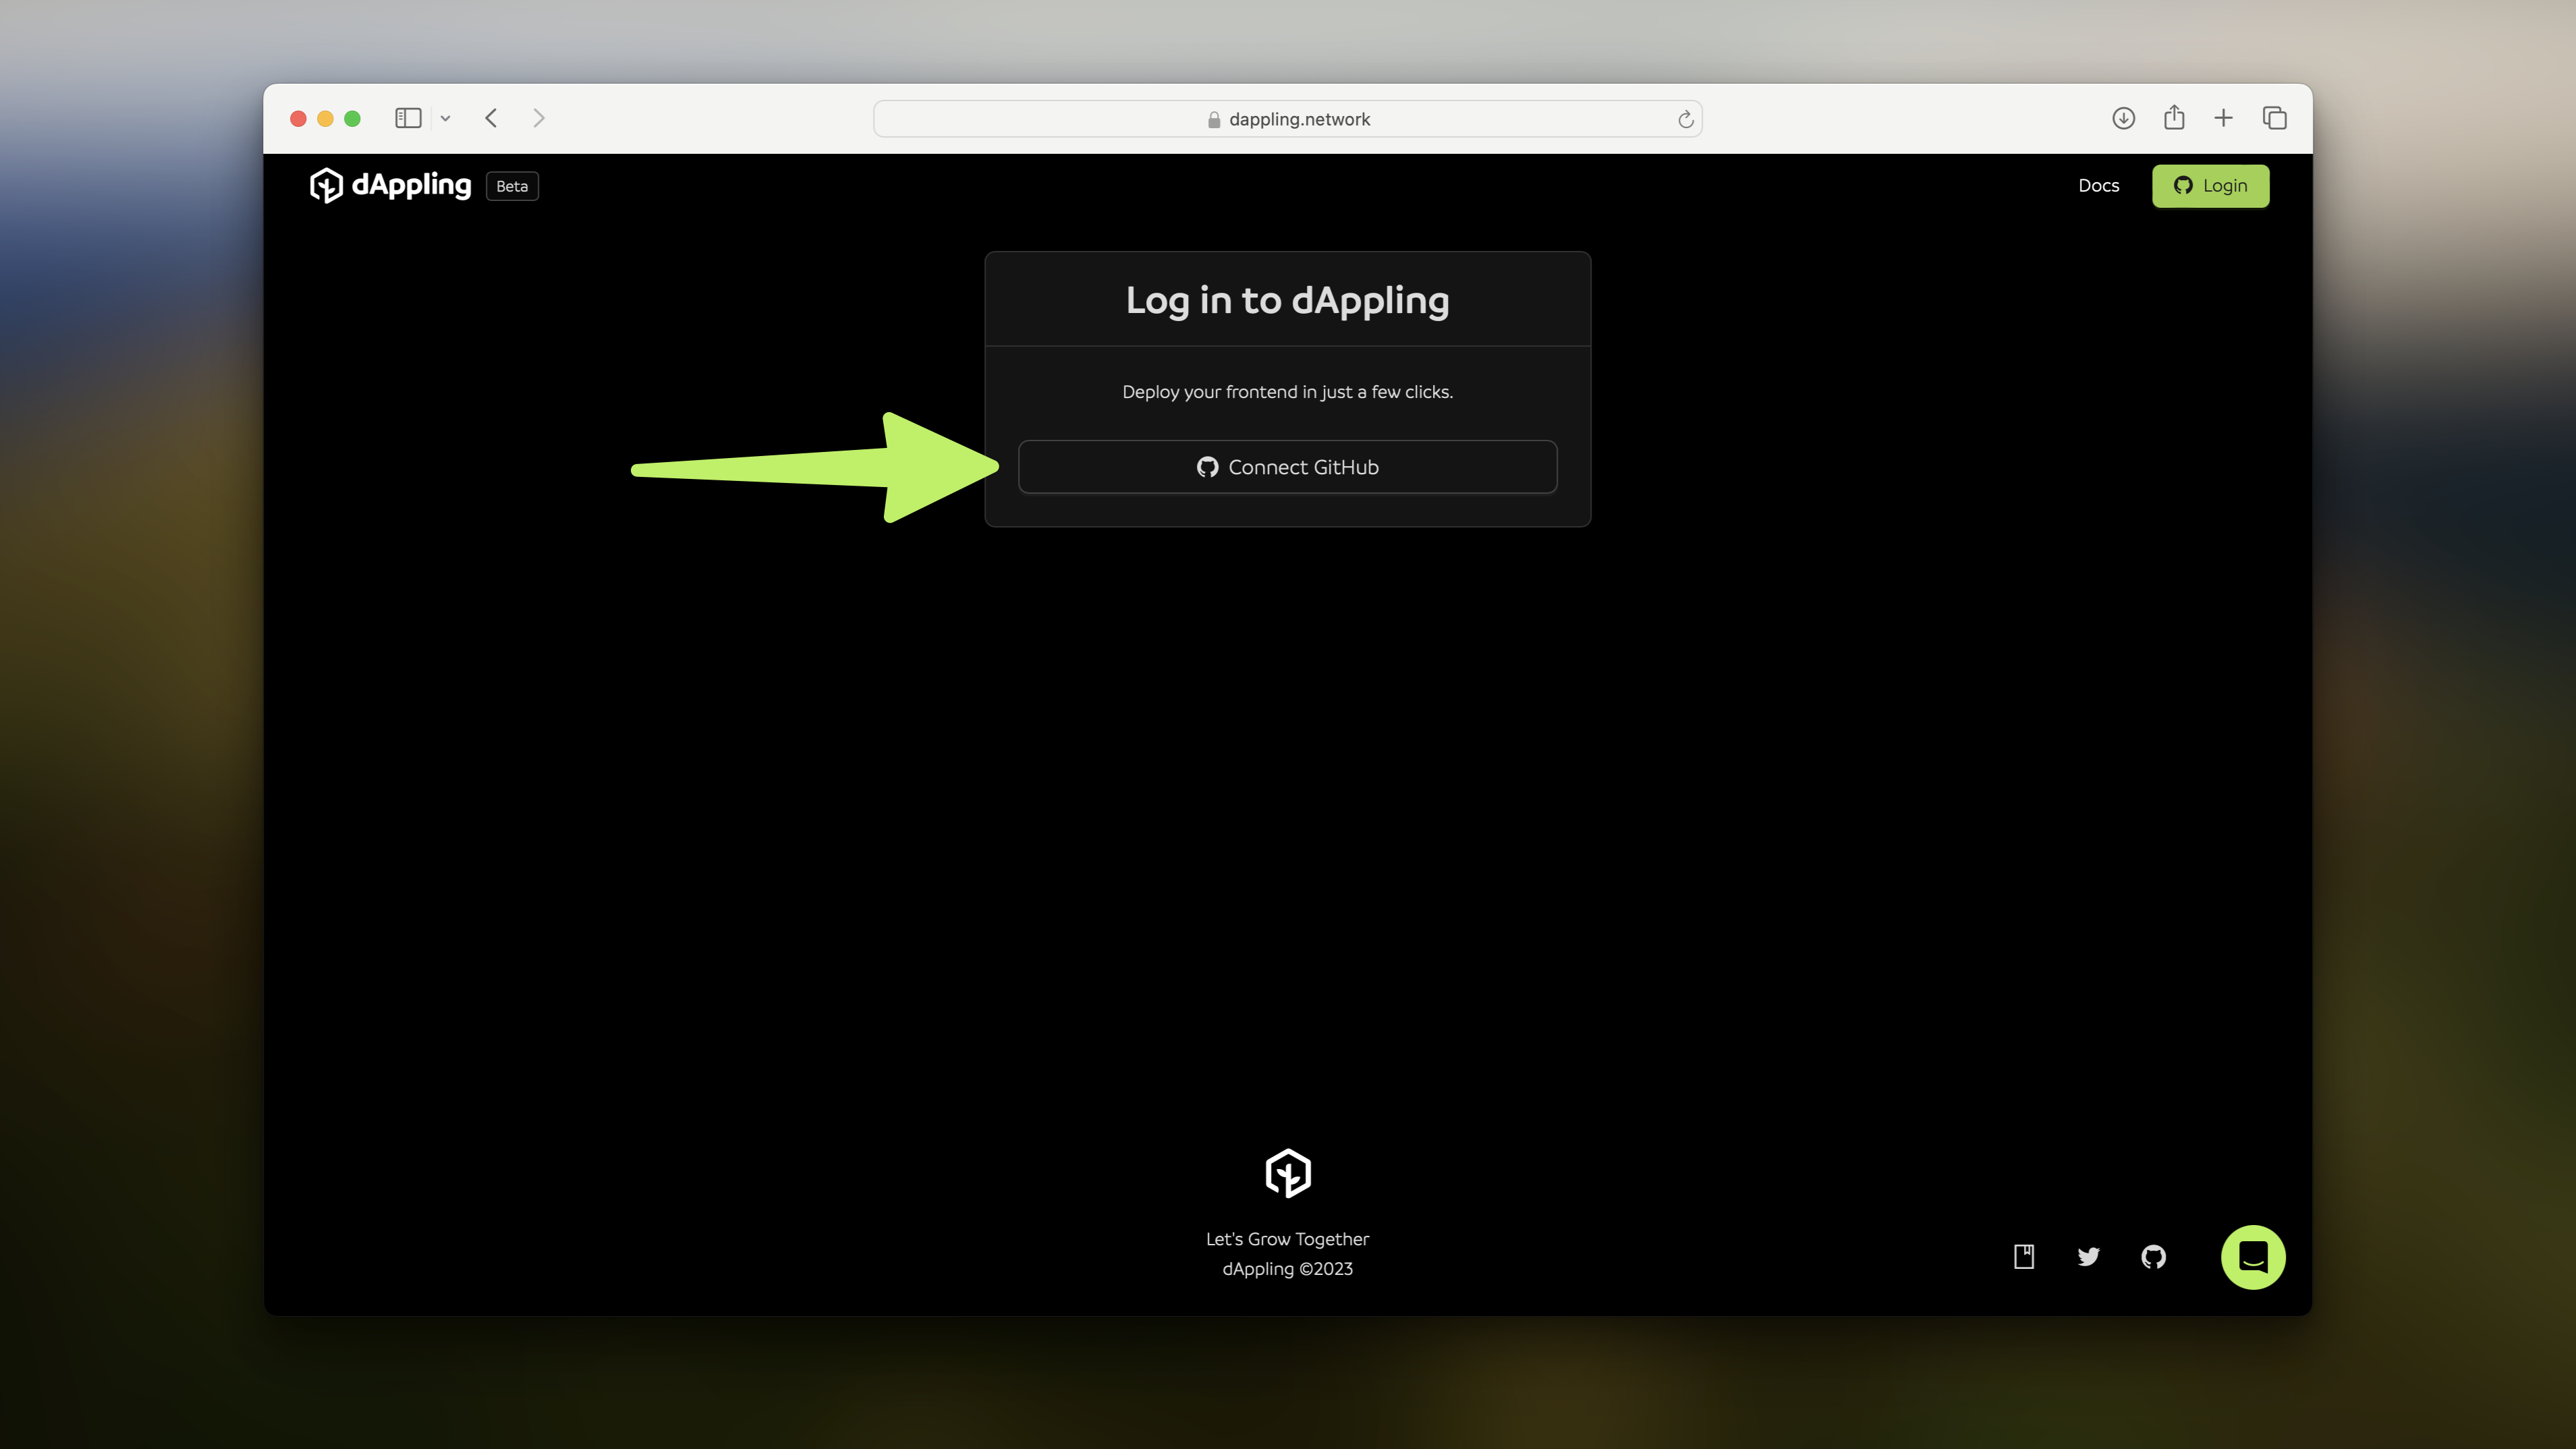
Now that we have the code to use, head over to dAppling.network and click on “Deploy Frontend”. This will take you to the page to log in to GitHub.

Connect your GitHub Account
Press this “Connect GitHub” button, and you will be redirected to GitHub to authorize dAppling to access your account.
What happens when you press “Authorize dApplingNetwork” is that we collect the email associated with your account and associate it with your dAppling account. We do not store your GitHub password or any other information. This page should redirect you to your projects page on dAppling.

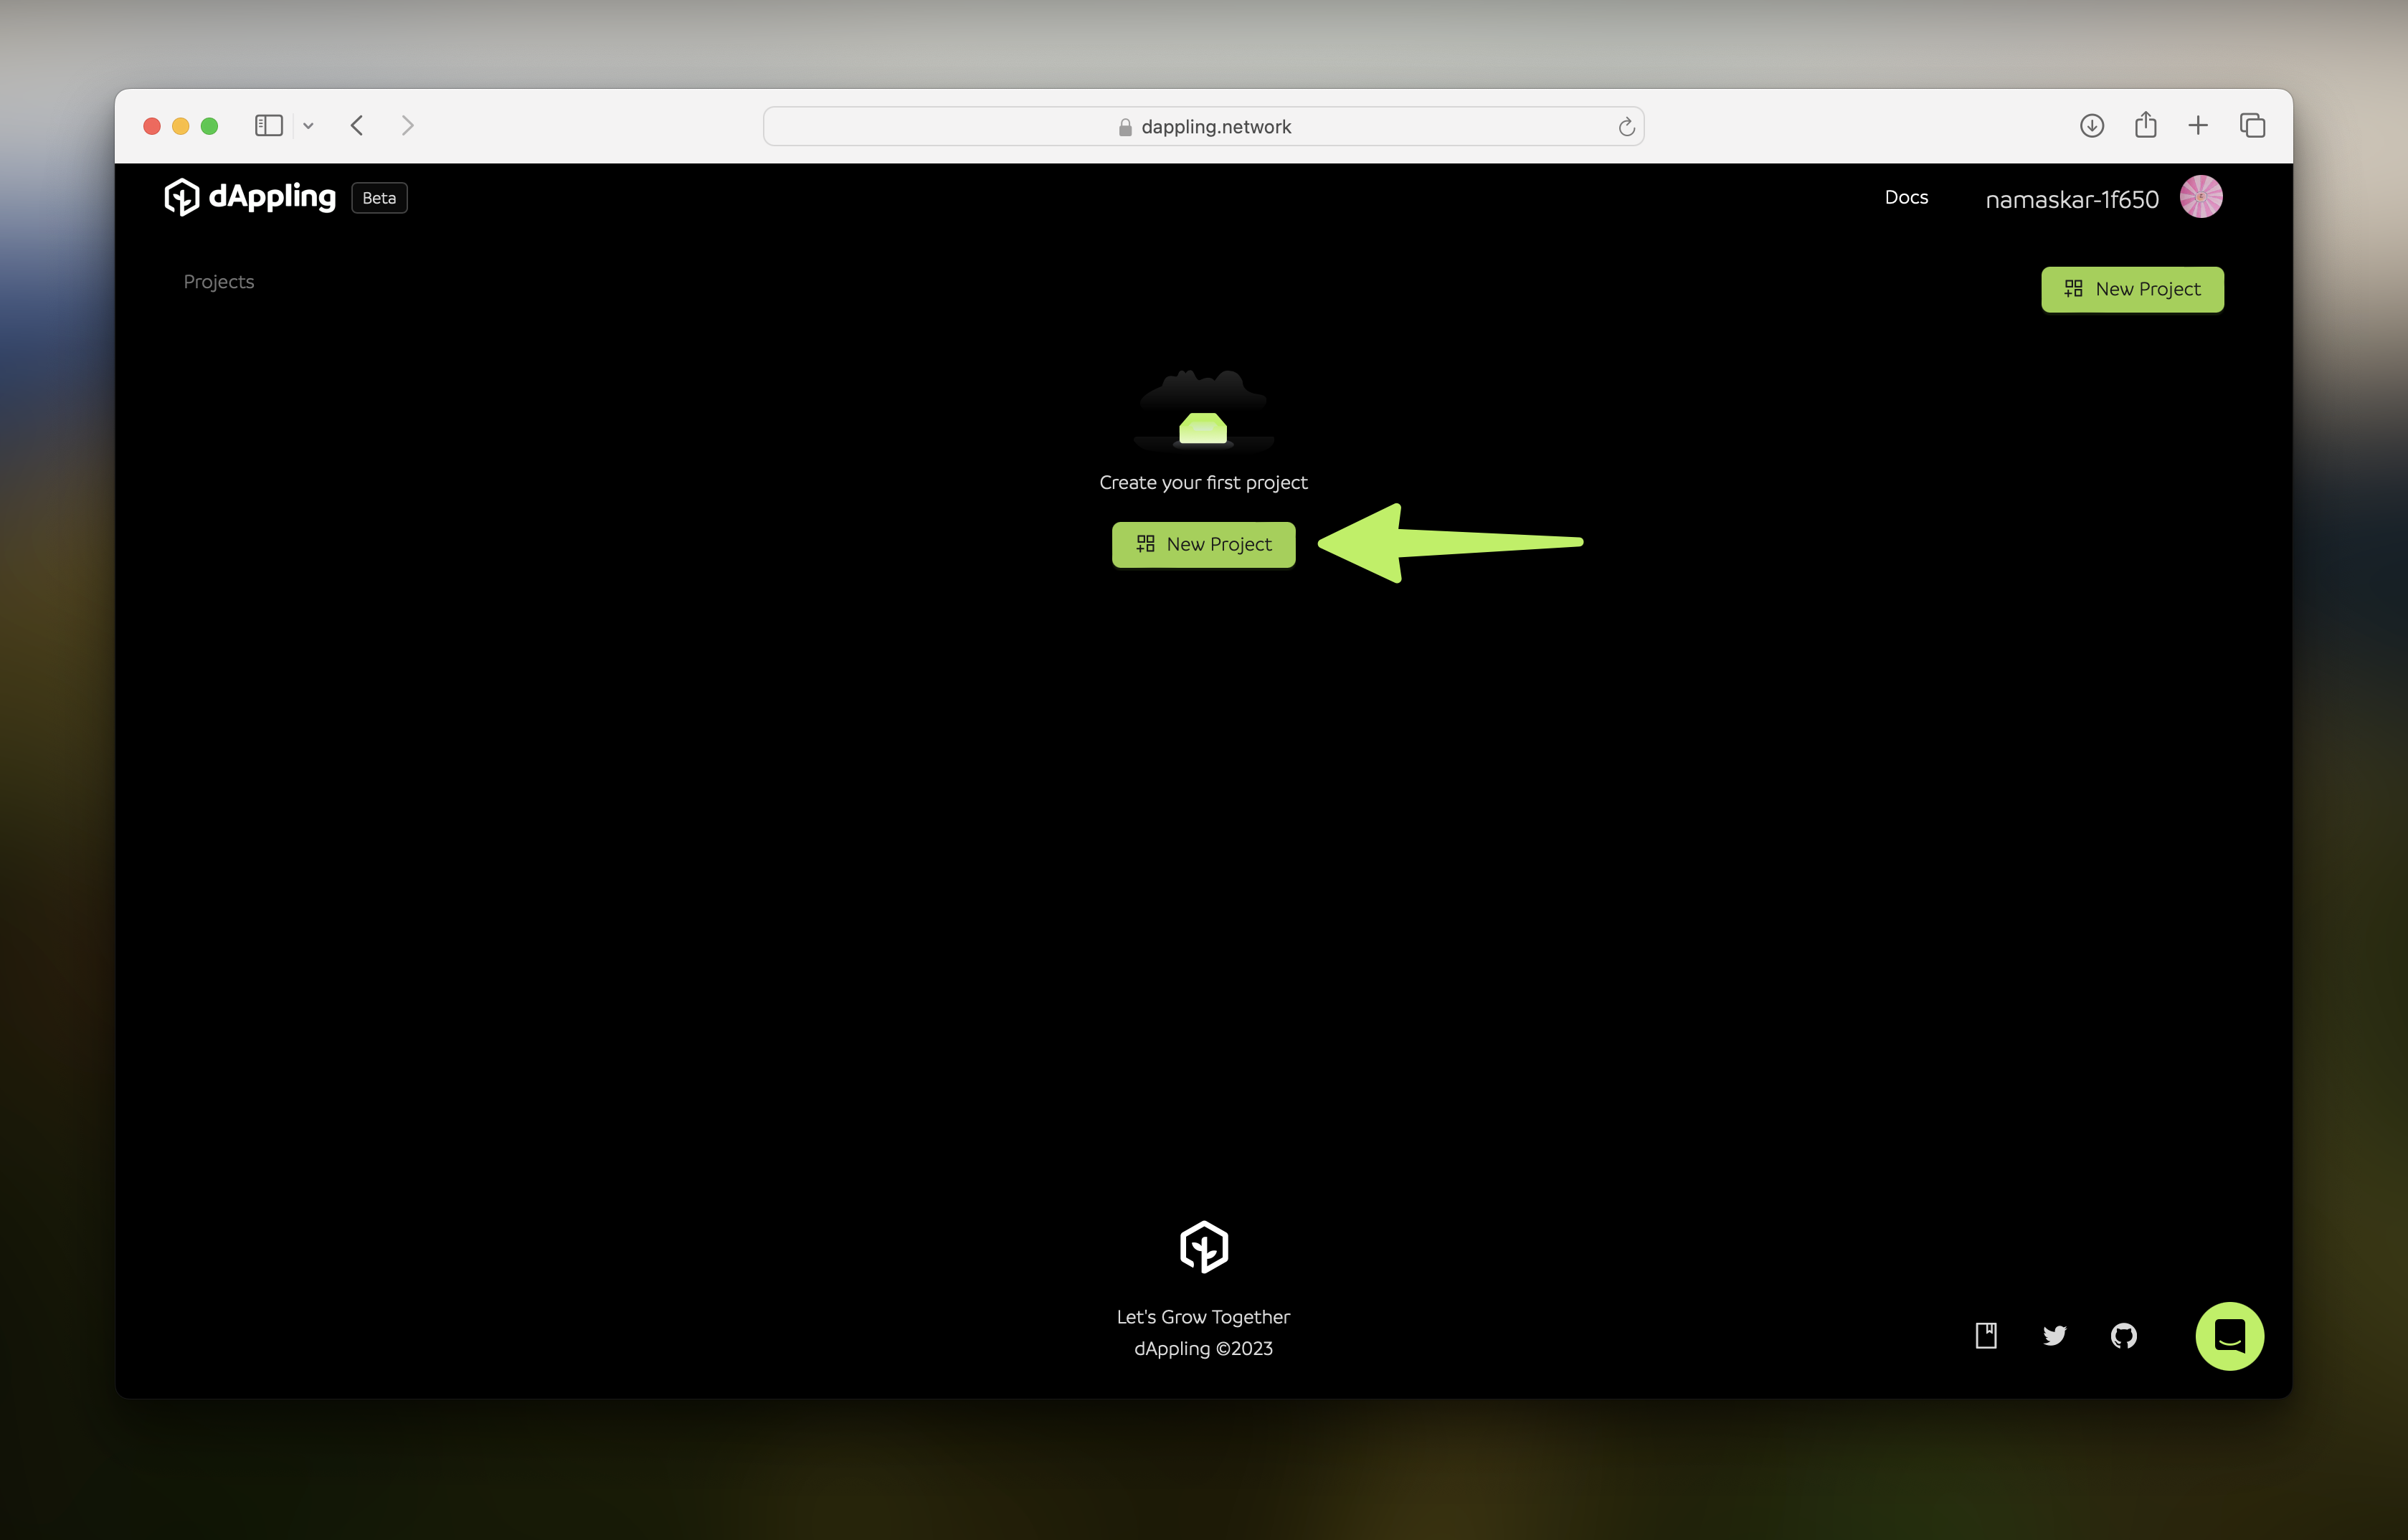
Deployment Steps
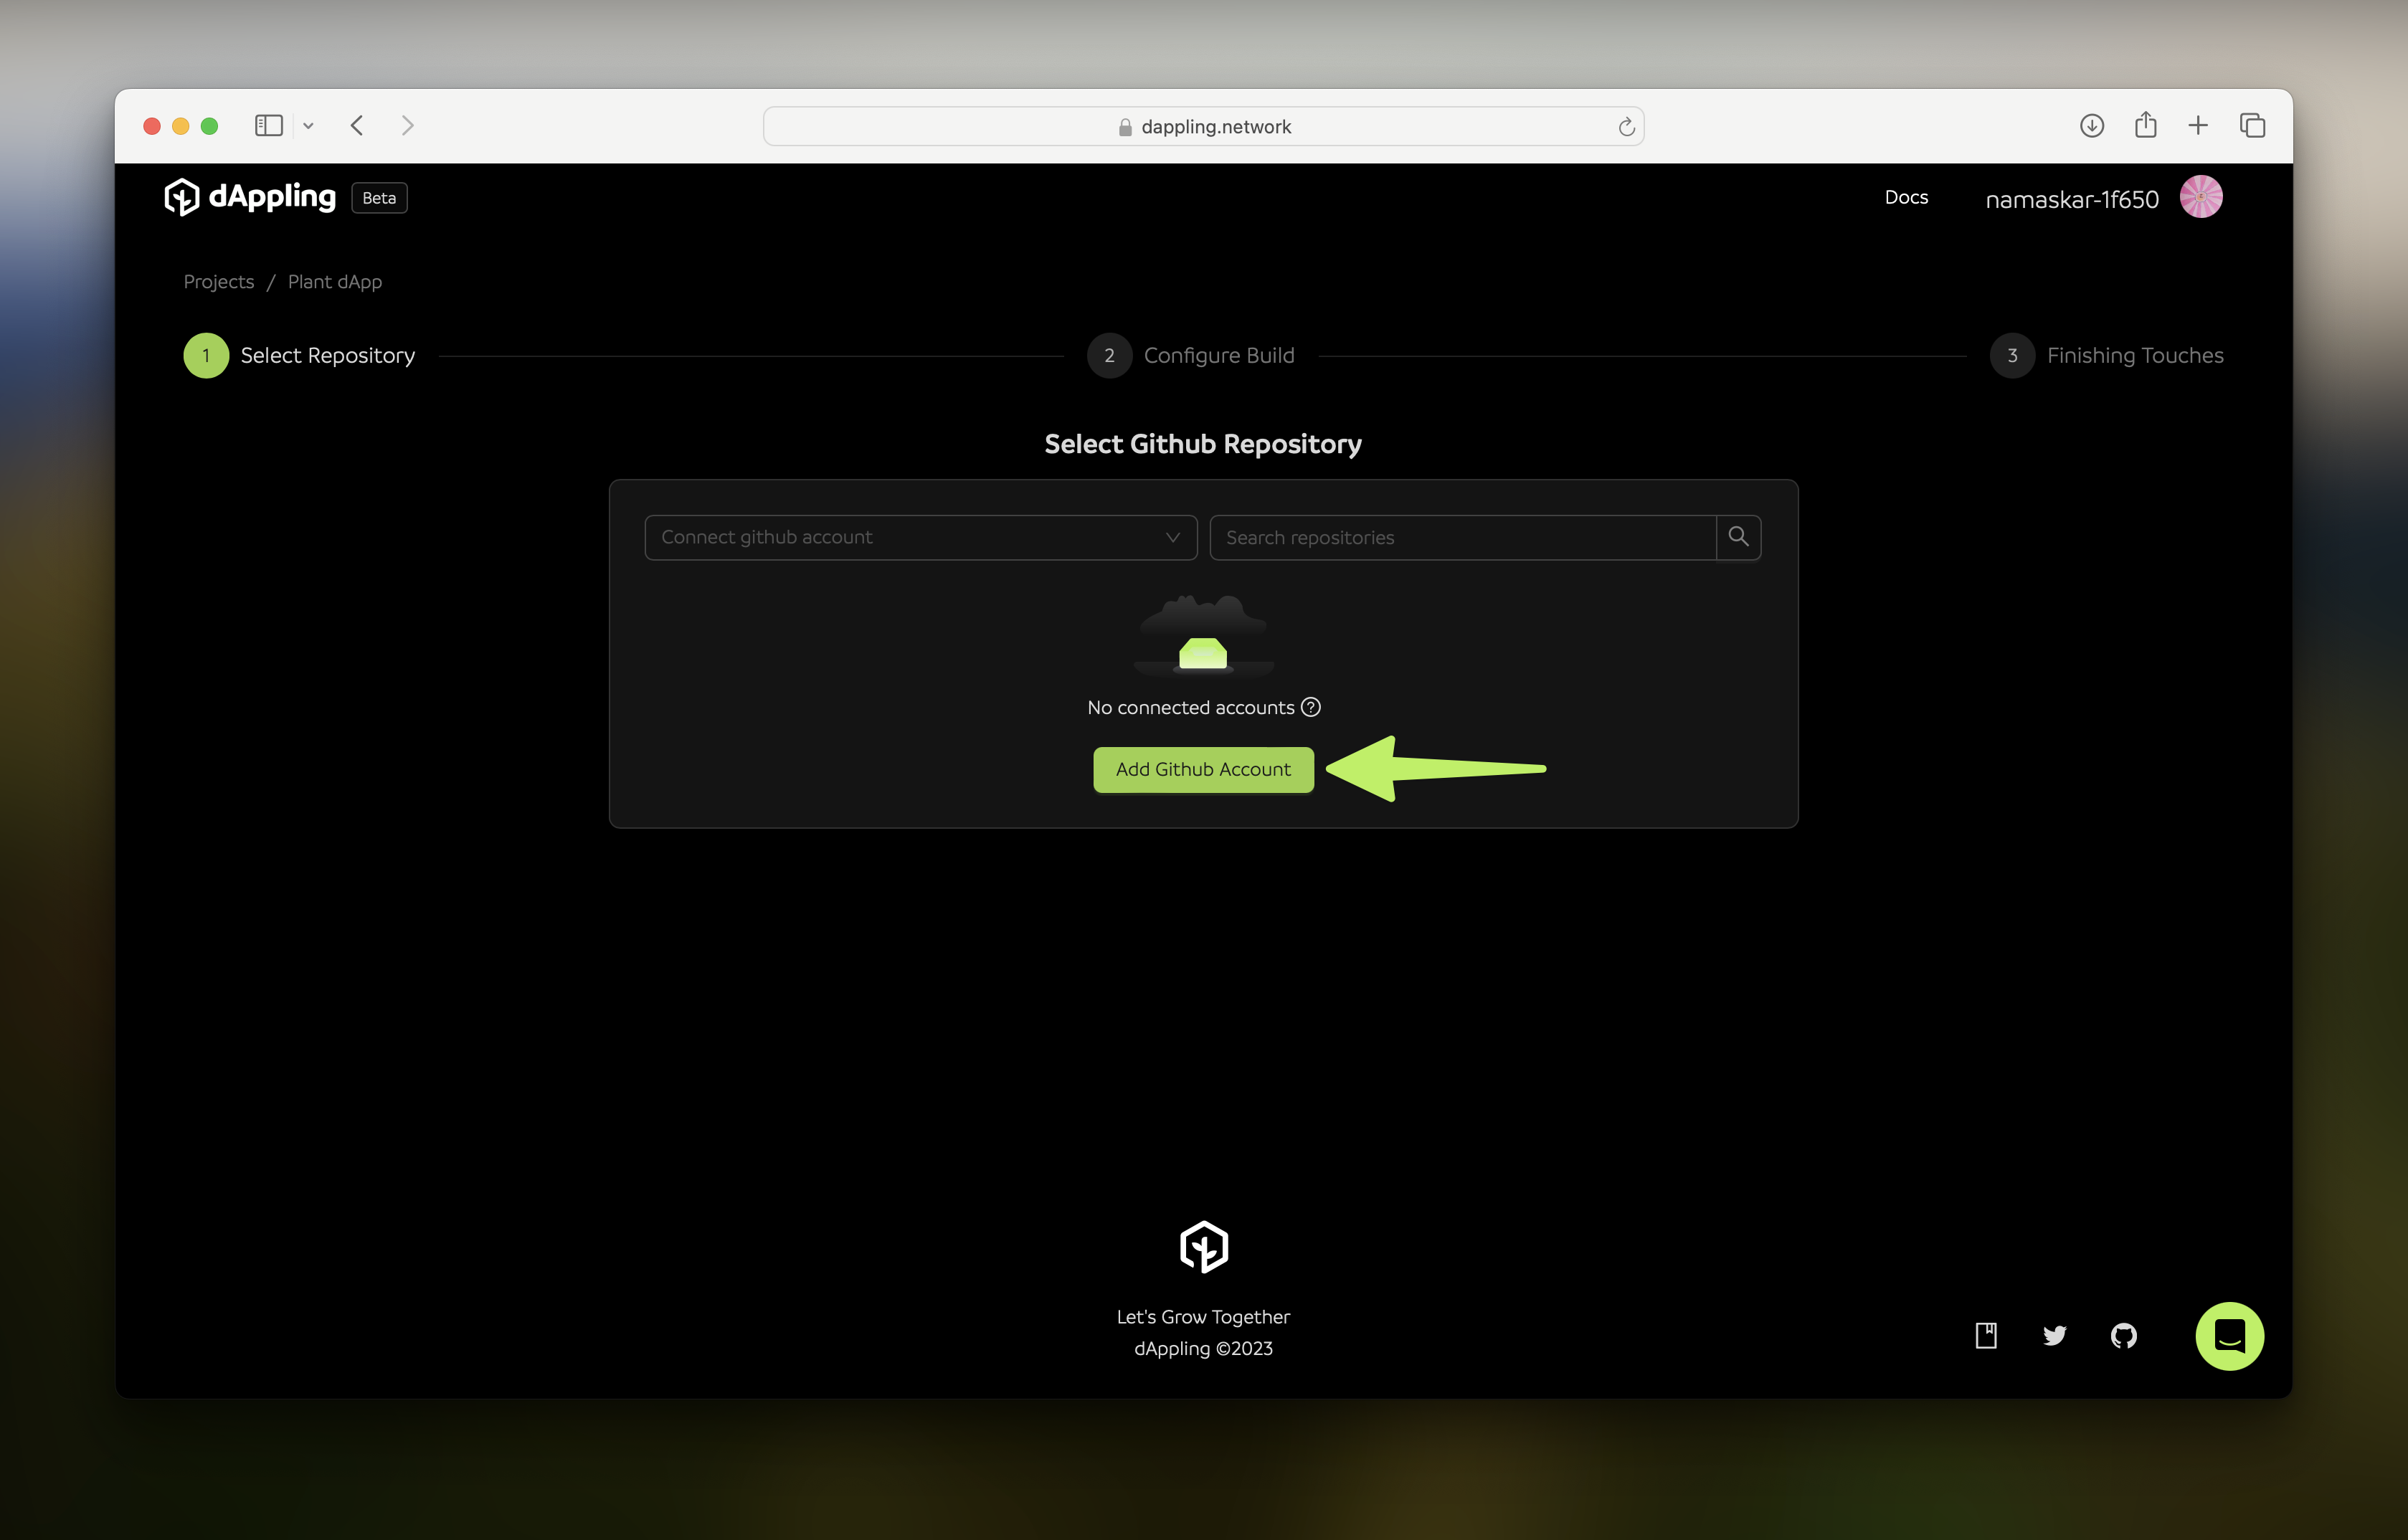
Back on the projects page, click “New Project”. This will take you to our “Select Repository” step.
To allow access to the project, click on “Add GitHub Account”. This will bring up the authorization screen again. This time, we are allowing dAppling to access the repository; this is necessary so we can build your code.
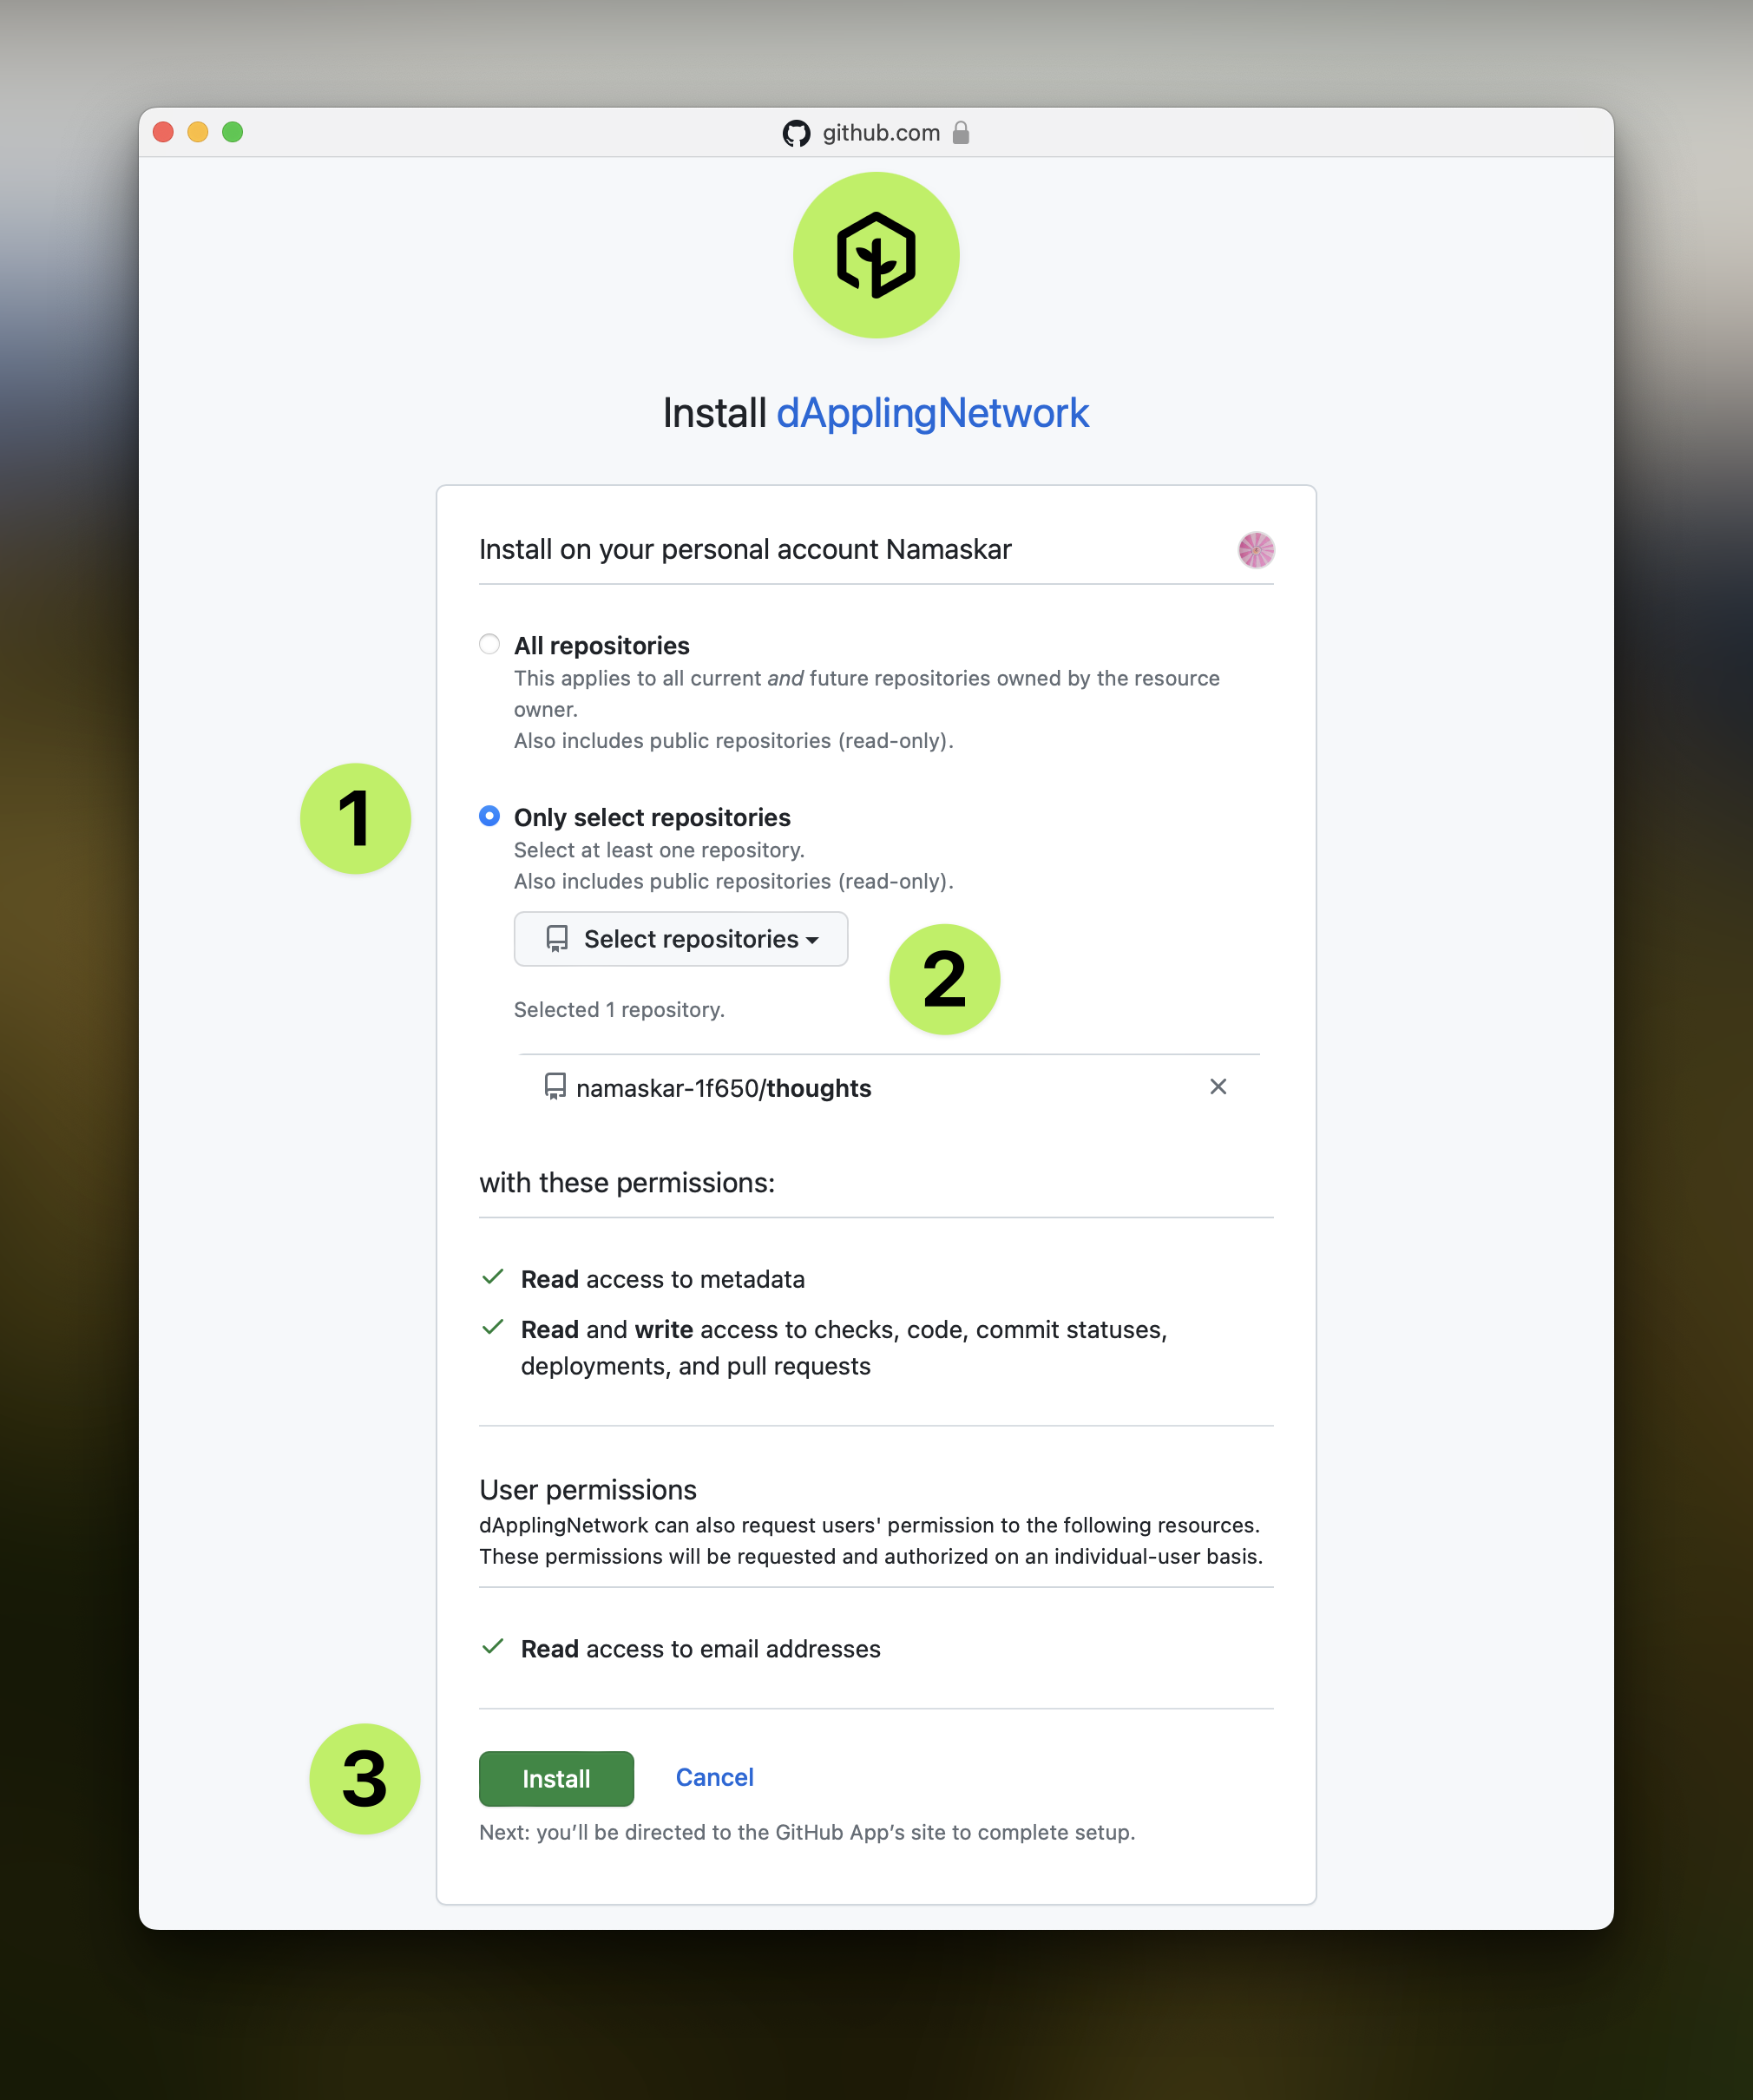
You may first see a screen that asks, “Where do you want to install dApplingNetwork?”. If you just forked the blog template, choose the account you used. Otherwise, pick where your code is located. You can always go back and authorize more or remove authorization to revoke access.
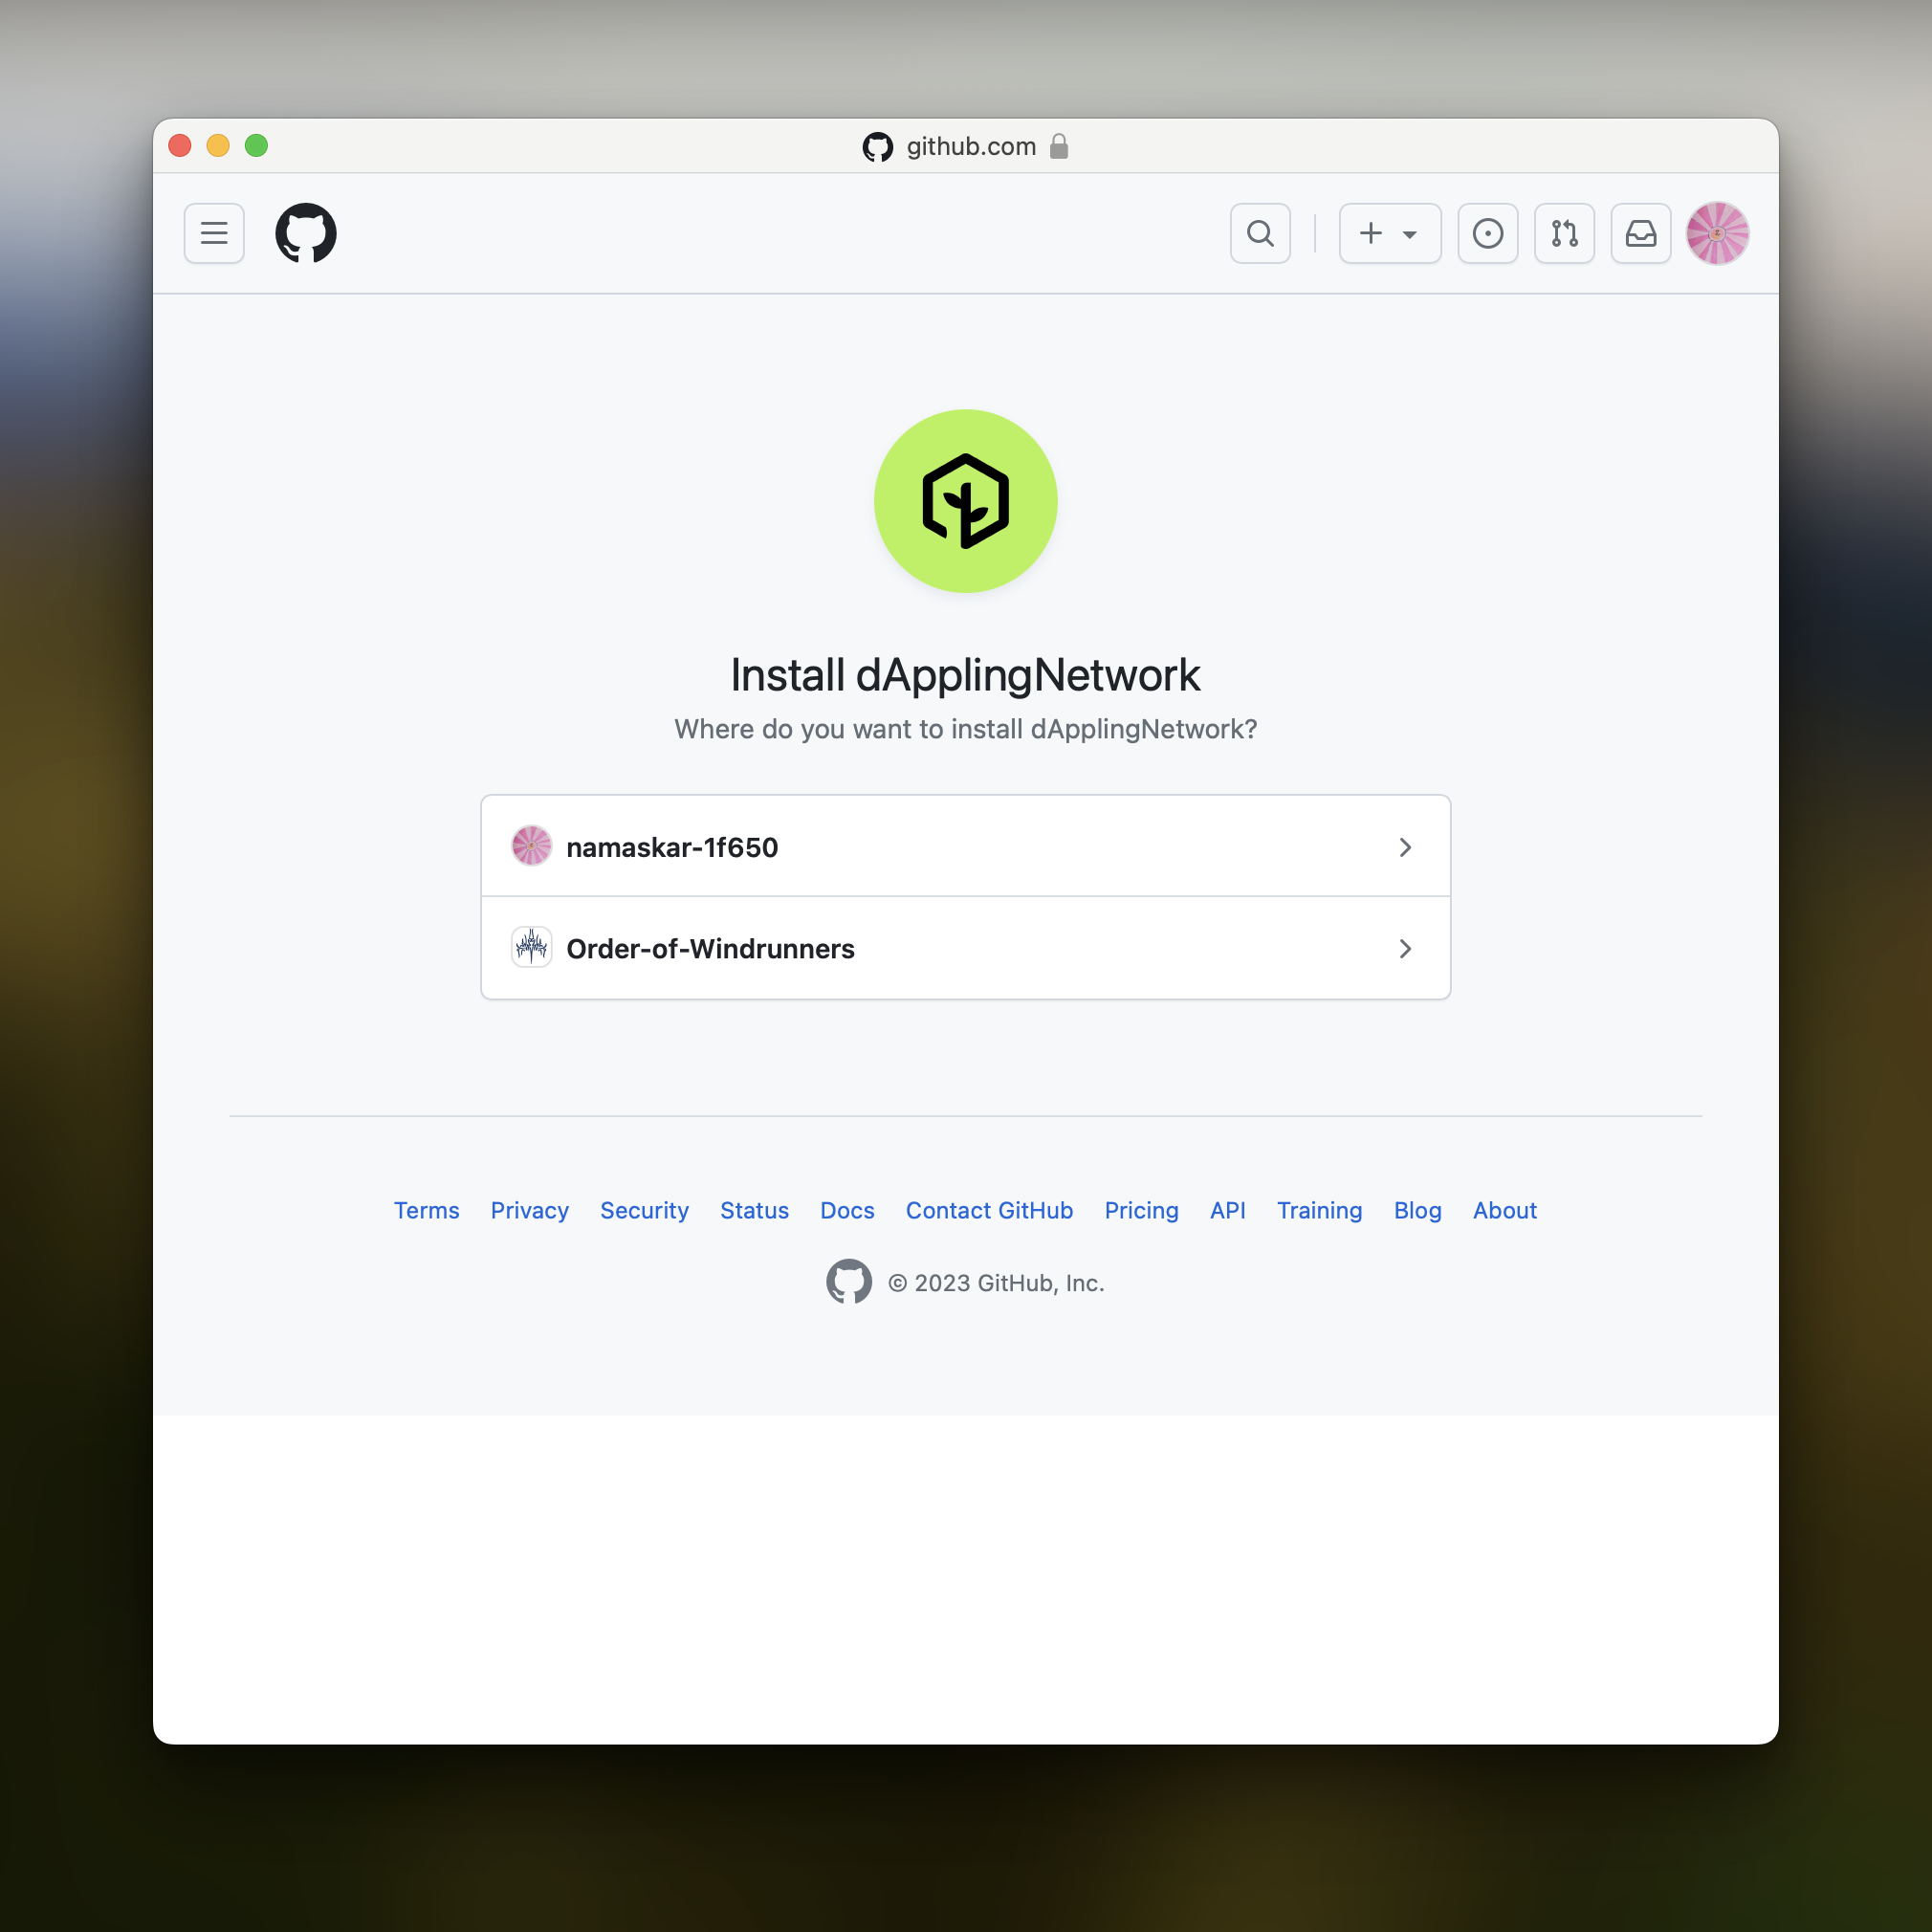
After you select the installation location, or if you only have a personal account, you will see another step. Decide to either provide access to all repositories, so you do not have to repeat this process, or select the specific repositories you want to deploy. Then click “Install”.
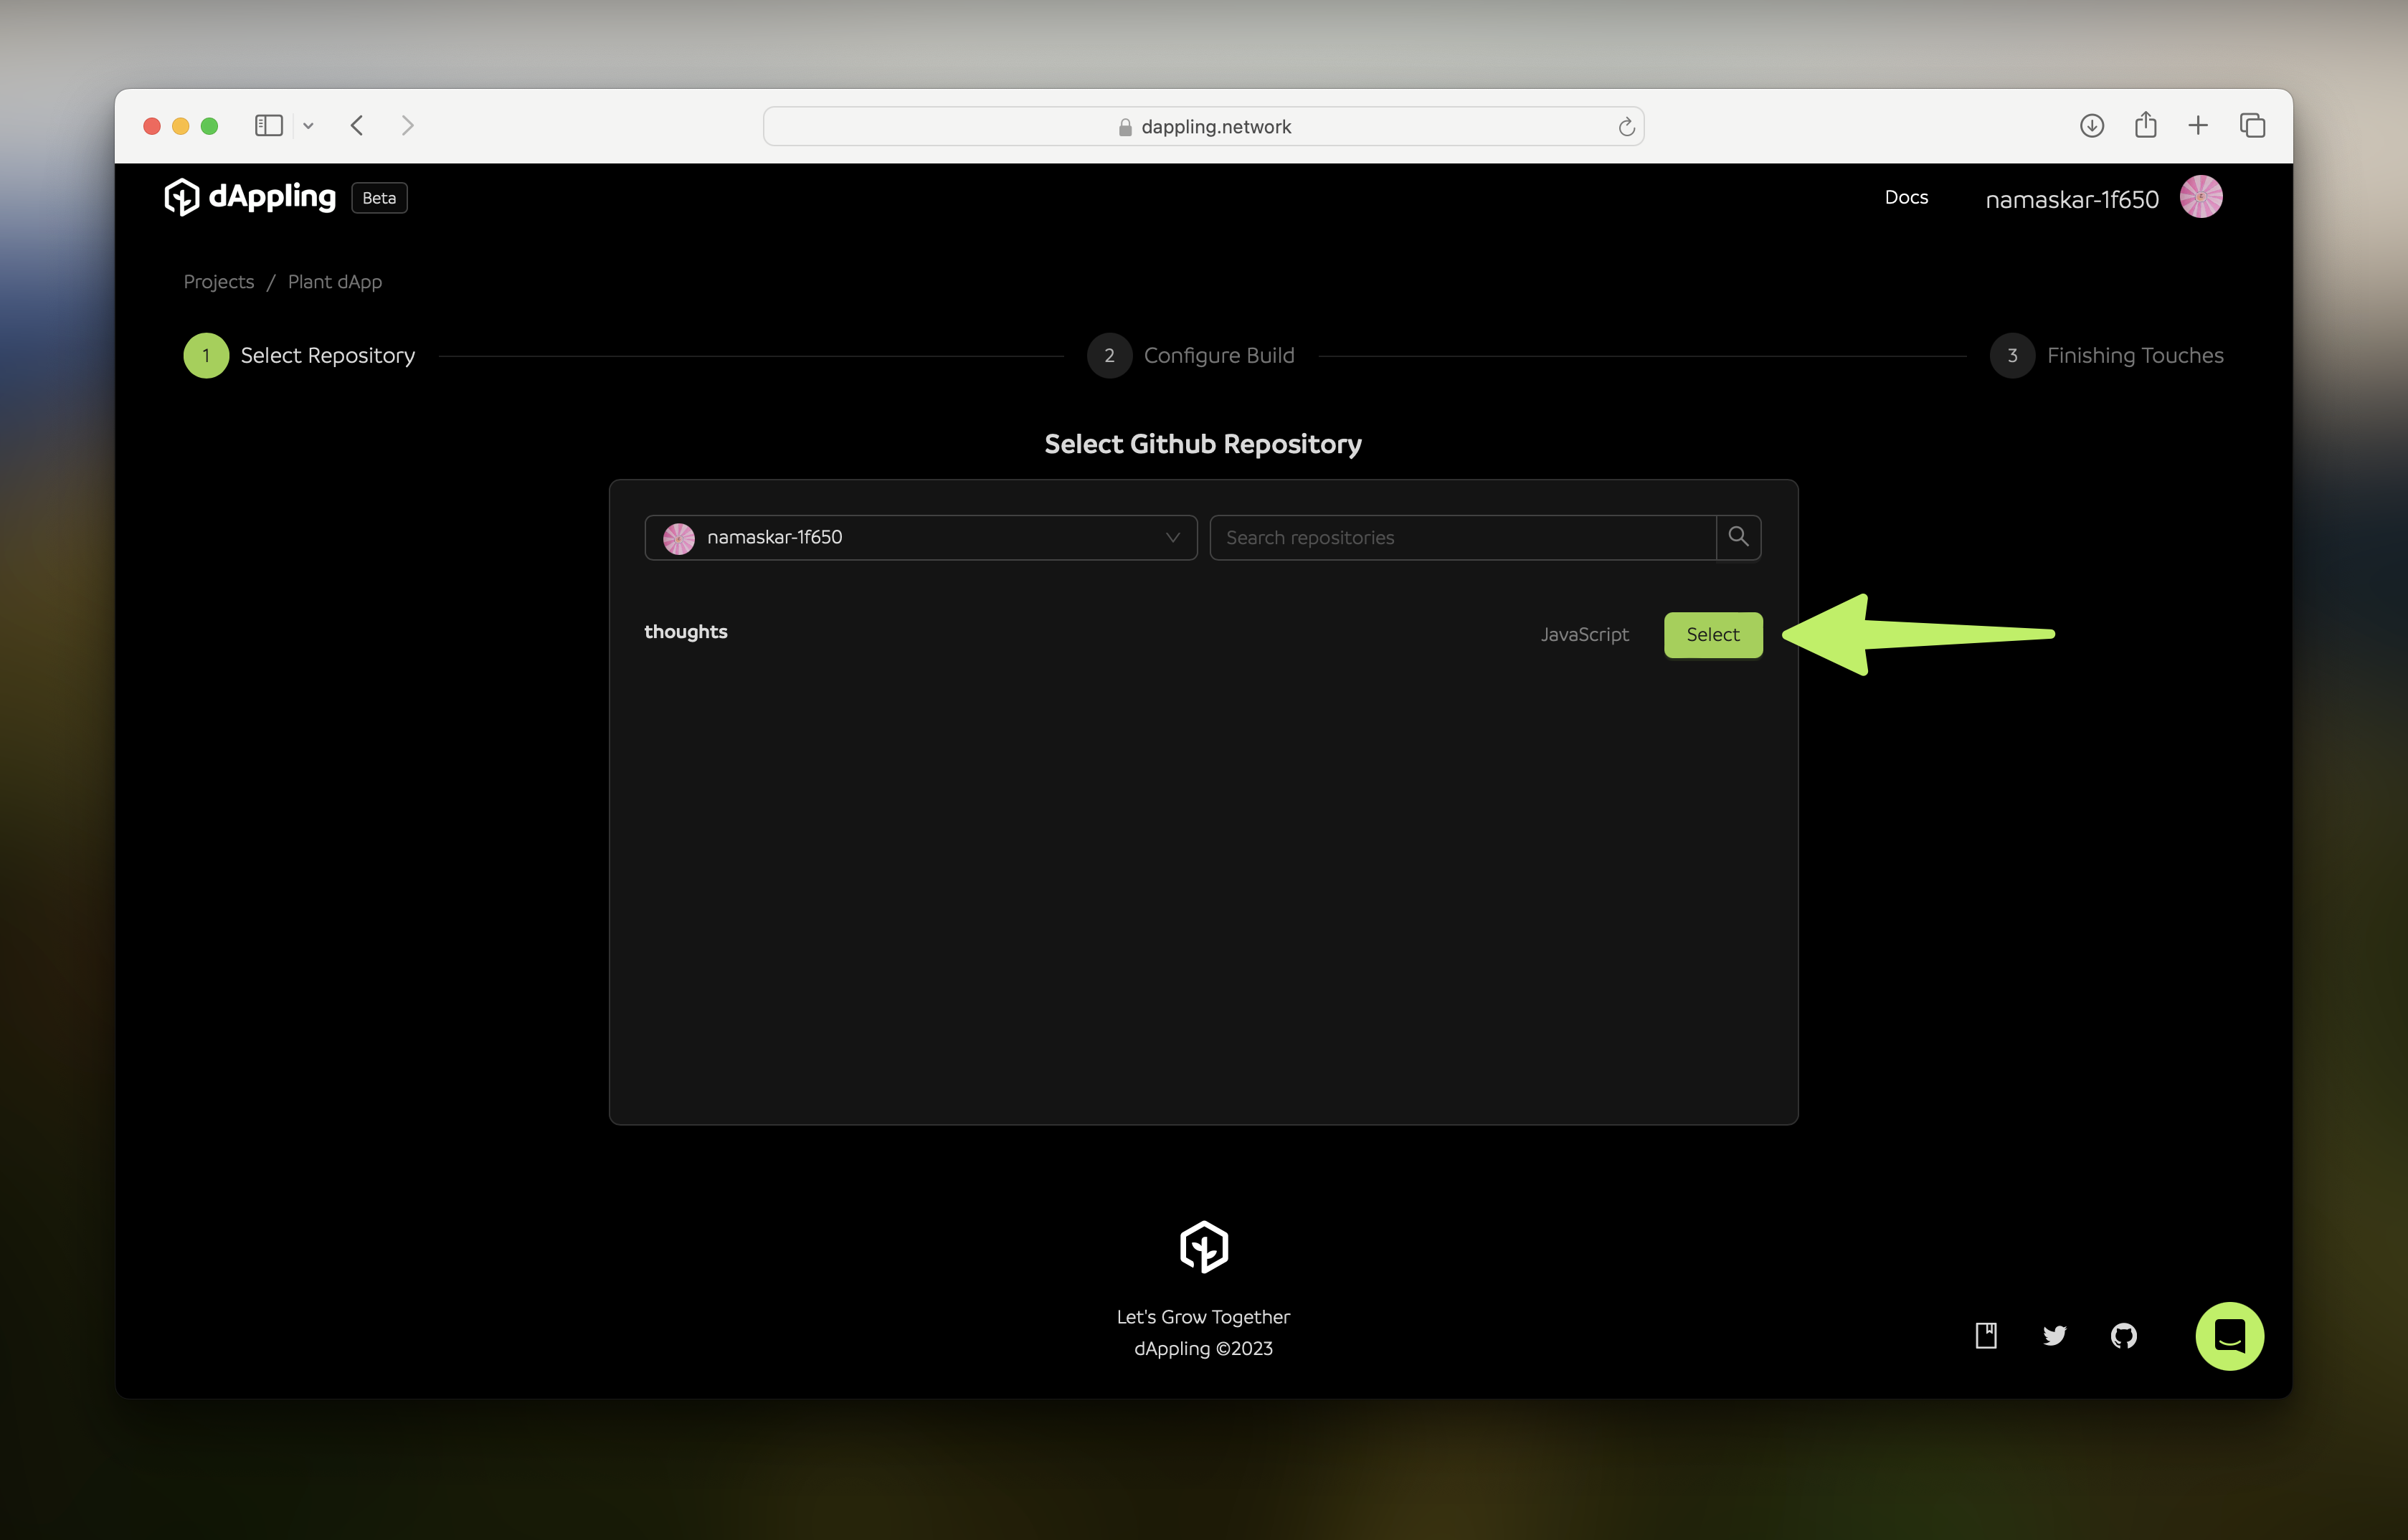
Awesome! Now that we have repository access, you can select it from the list to deploy. Clicking on the “Select” button to the right of the repository you would like to build will move on to the configuration step.
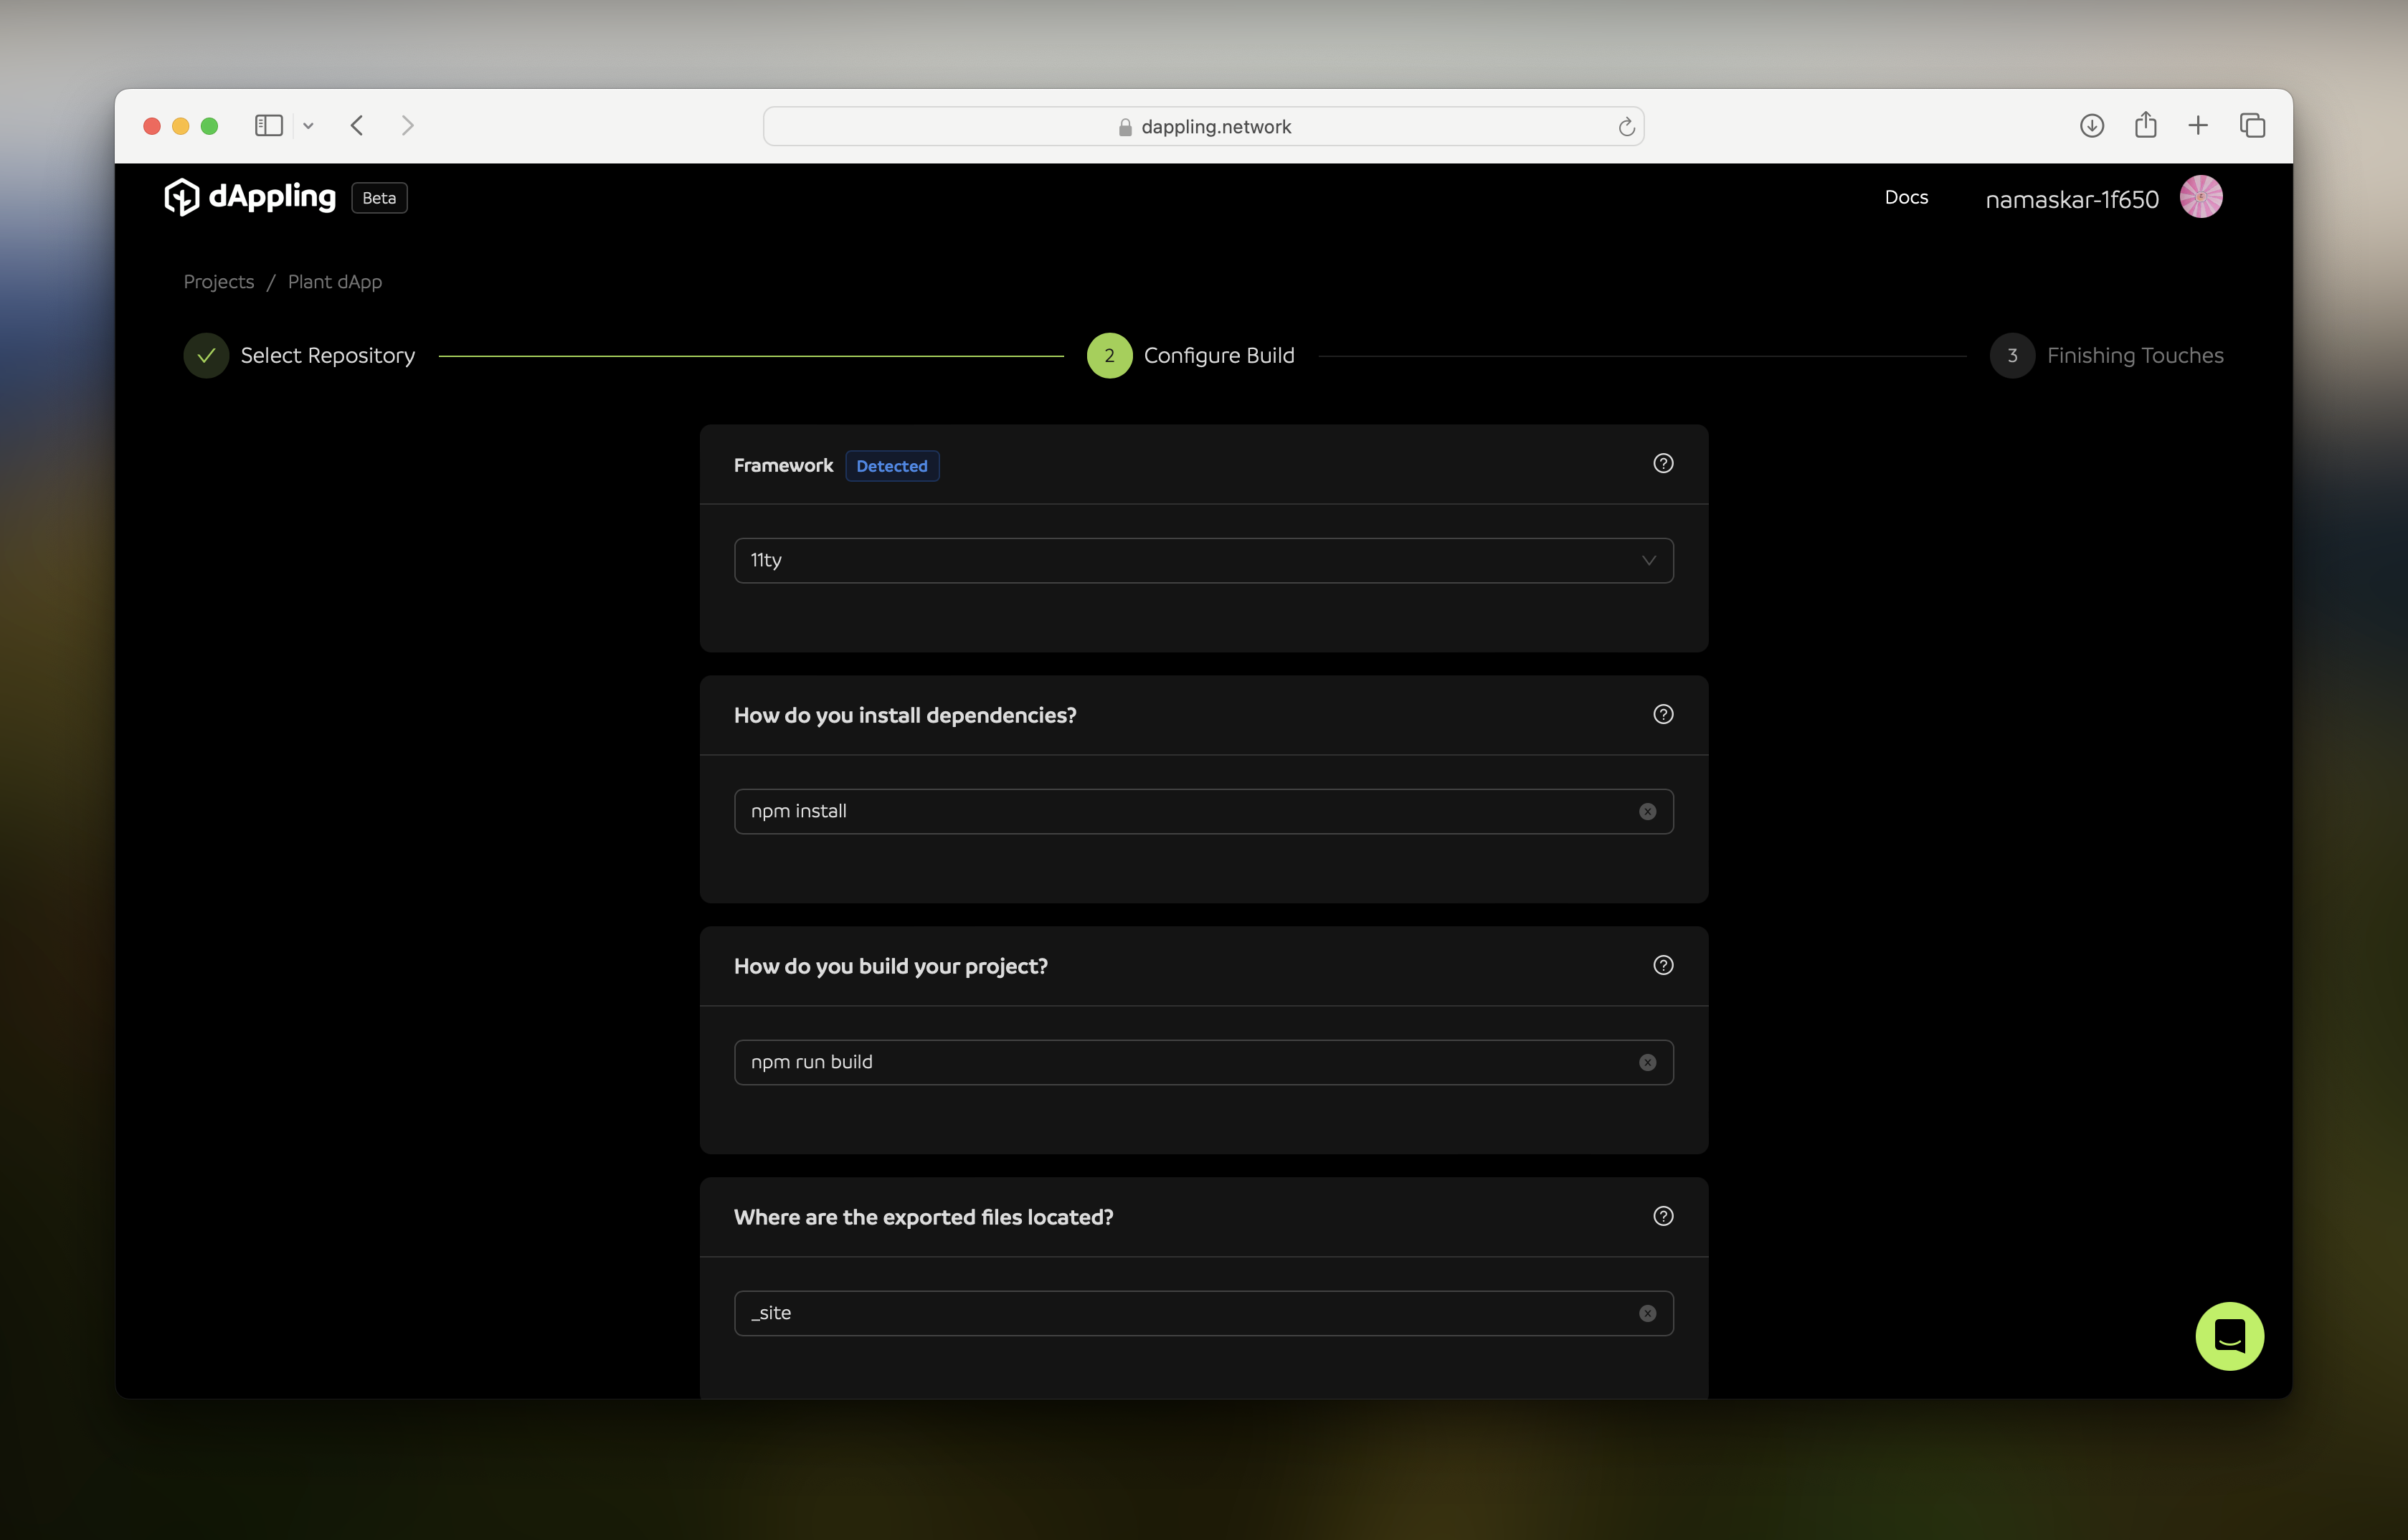
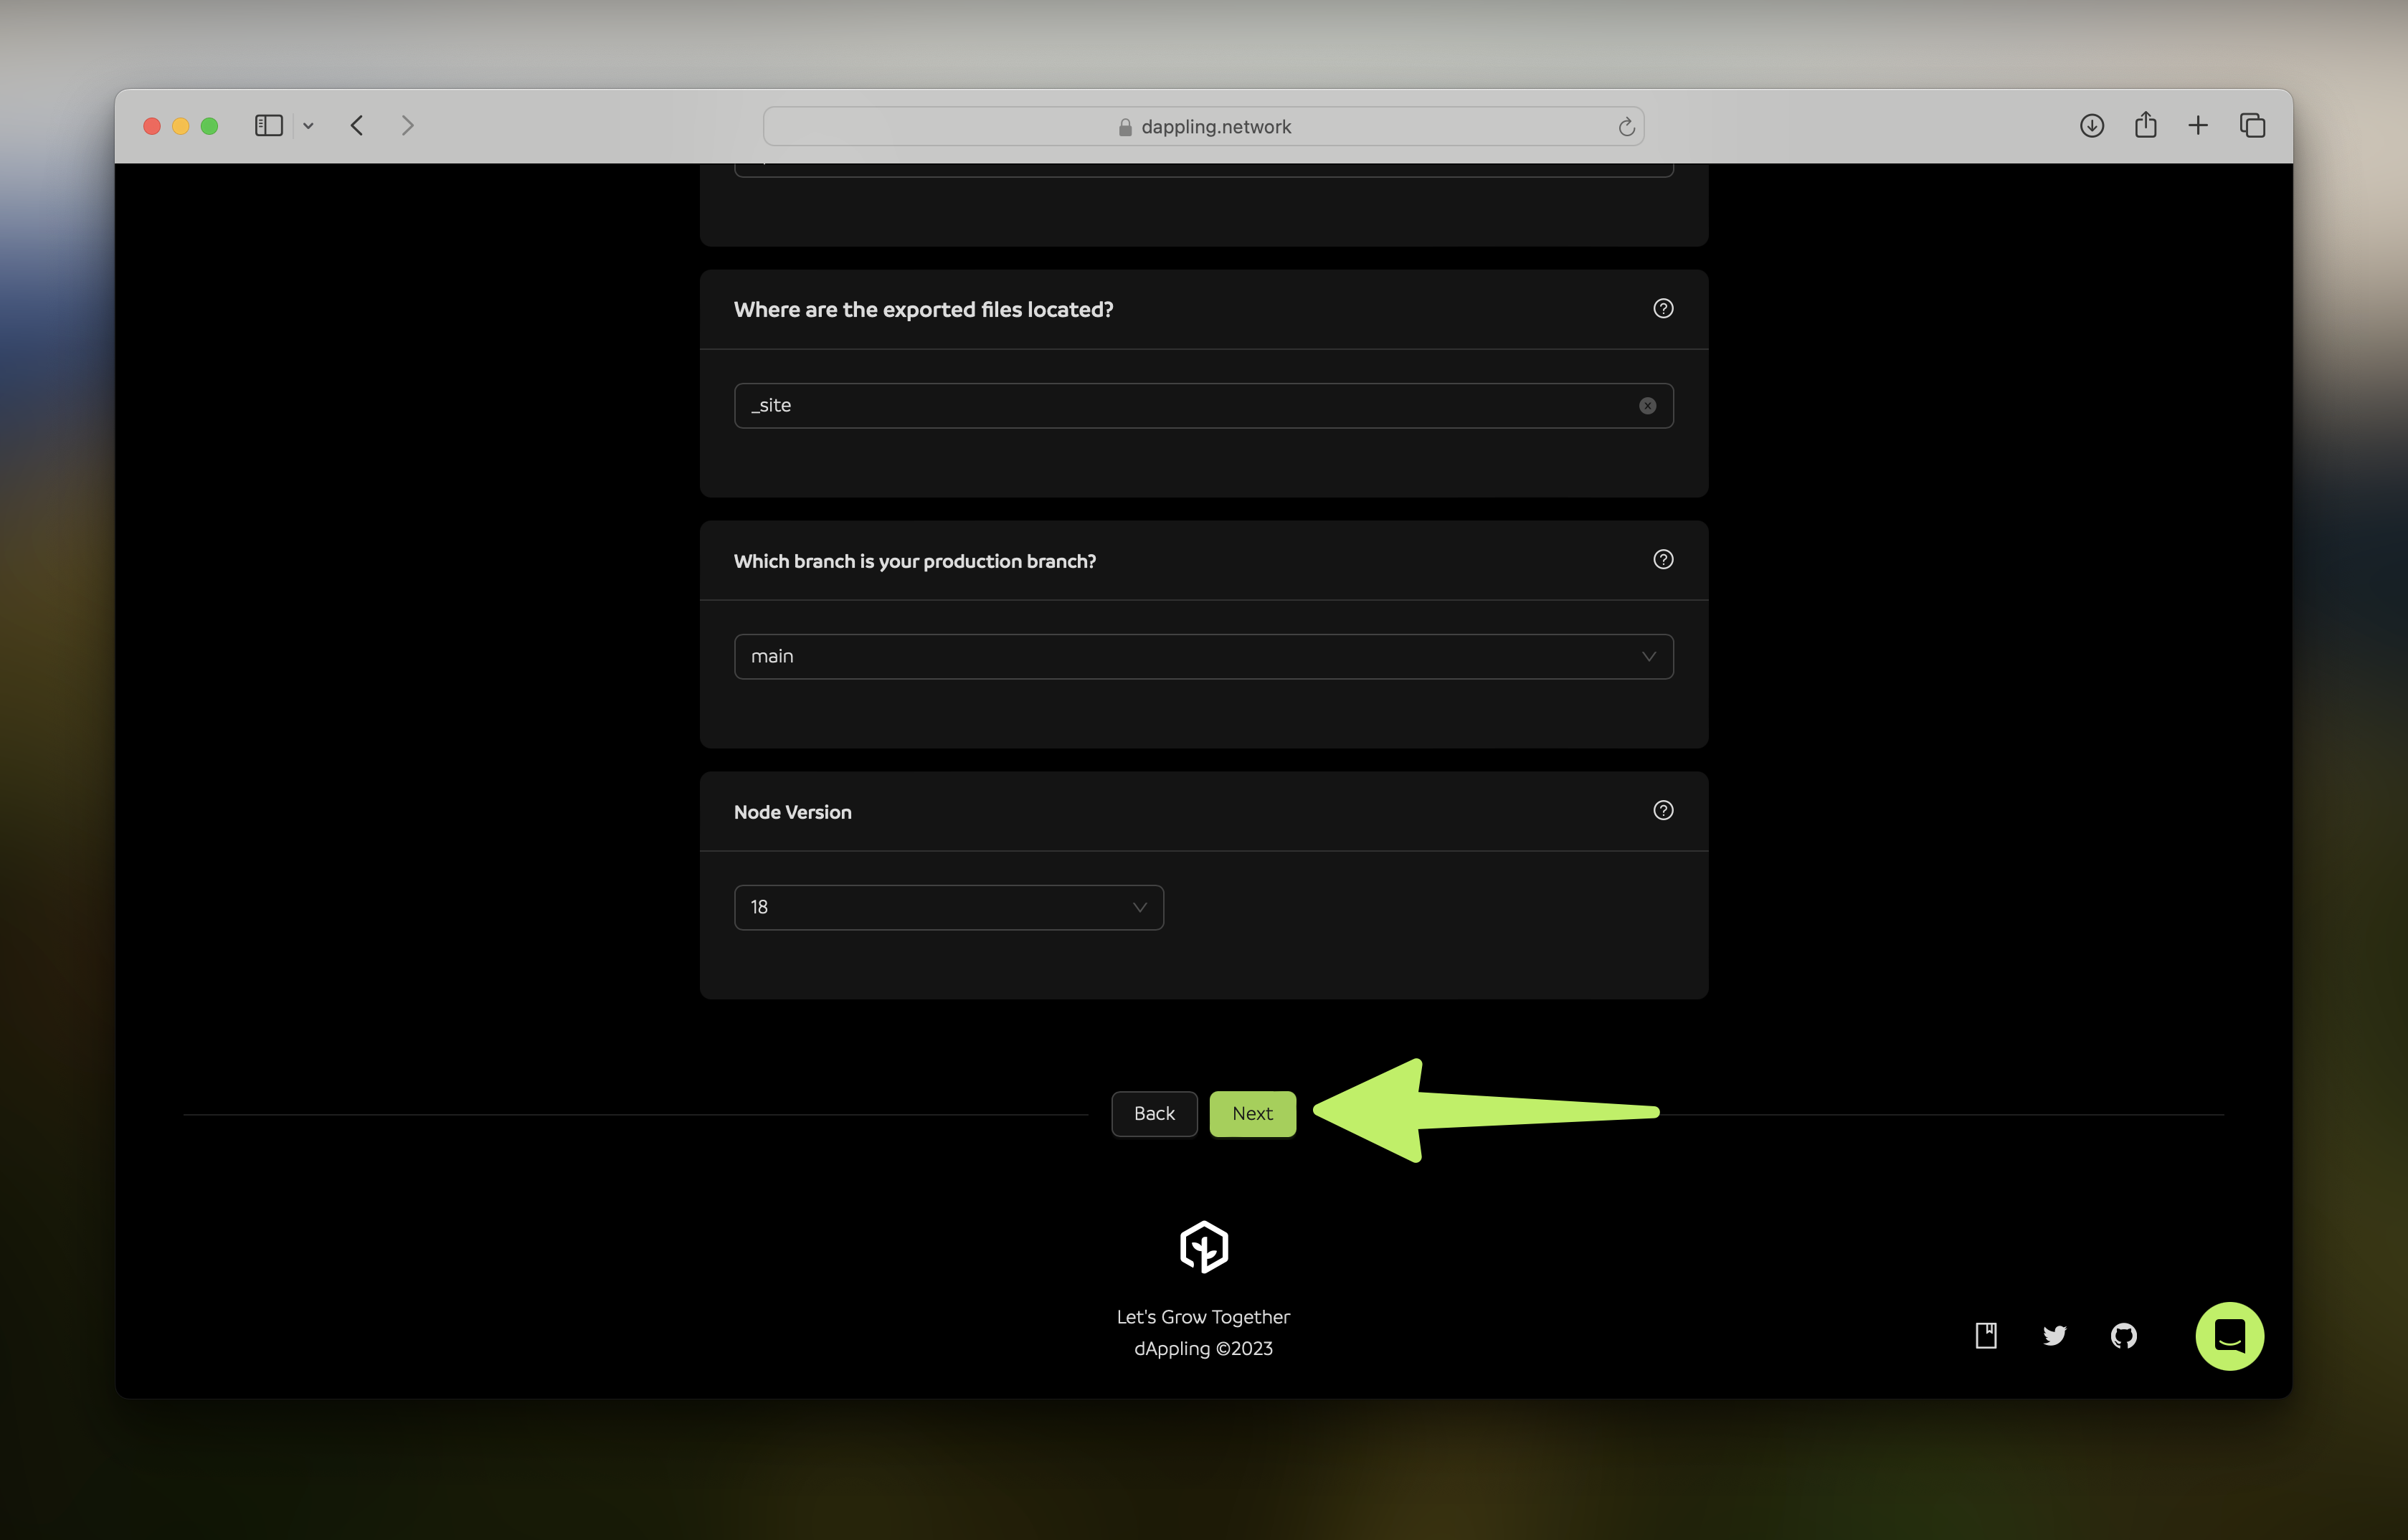
The “Configure Build” step will try to detect the configuration automatically for your app. If you are following along with the blog template, the settings will be correct. Using your code may prove more tricky. If there is no framework detected, you will need to select what type of project it is. Then, continue with each setting. Hover over the “?” to get additional information about each setting.
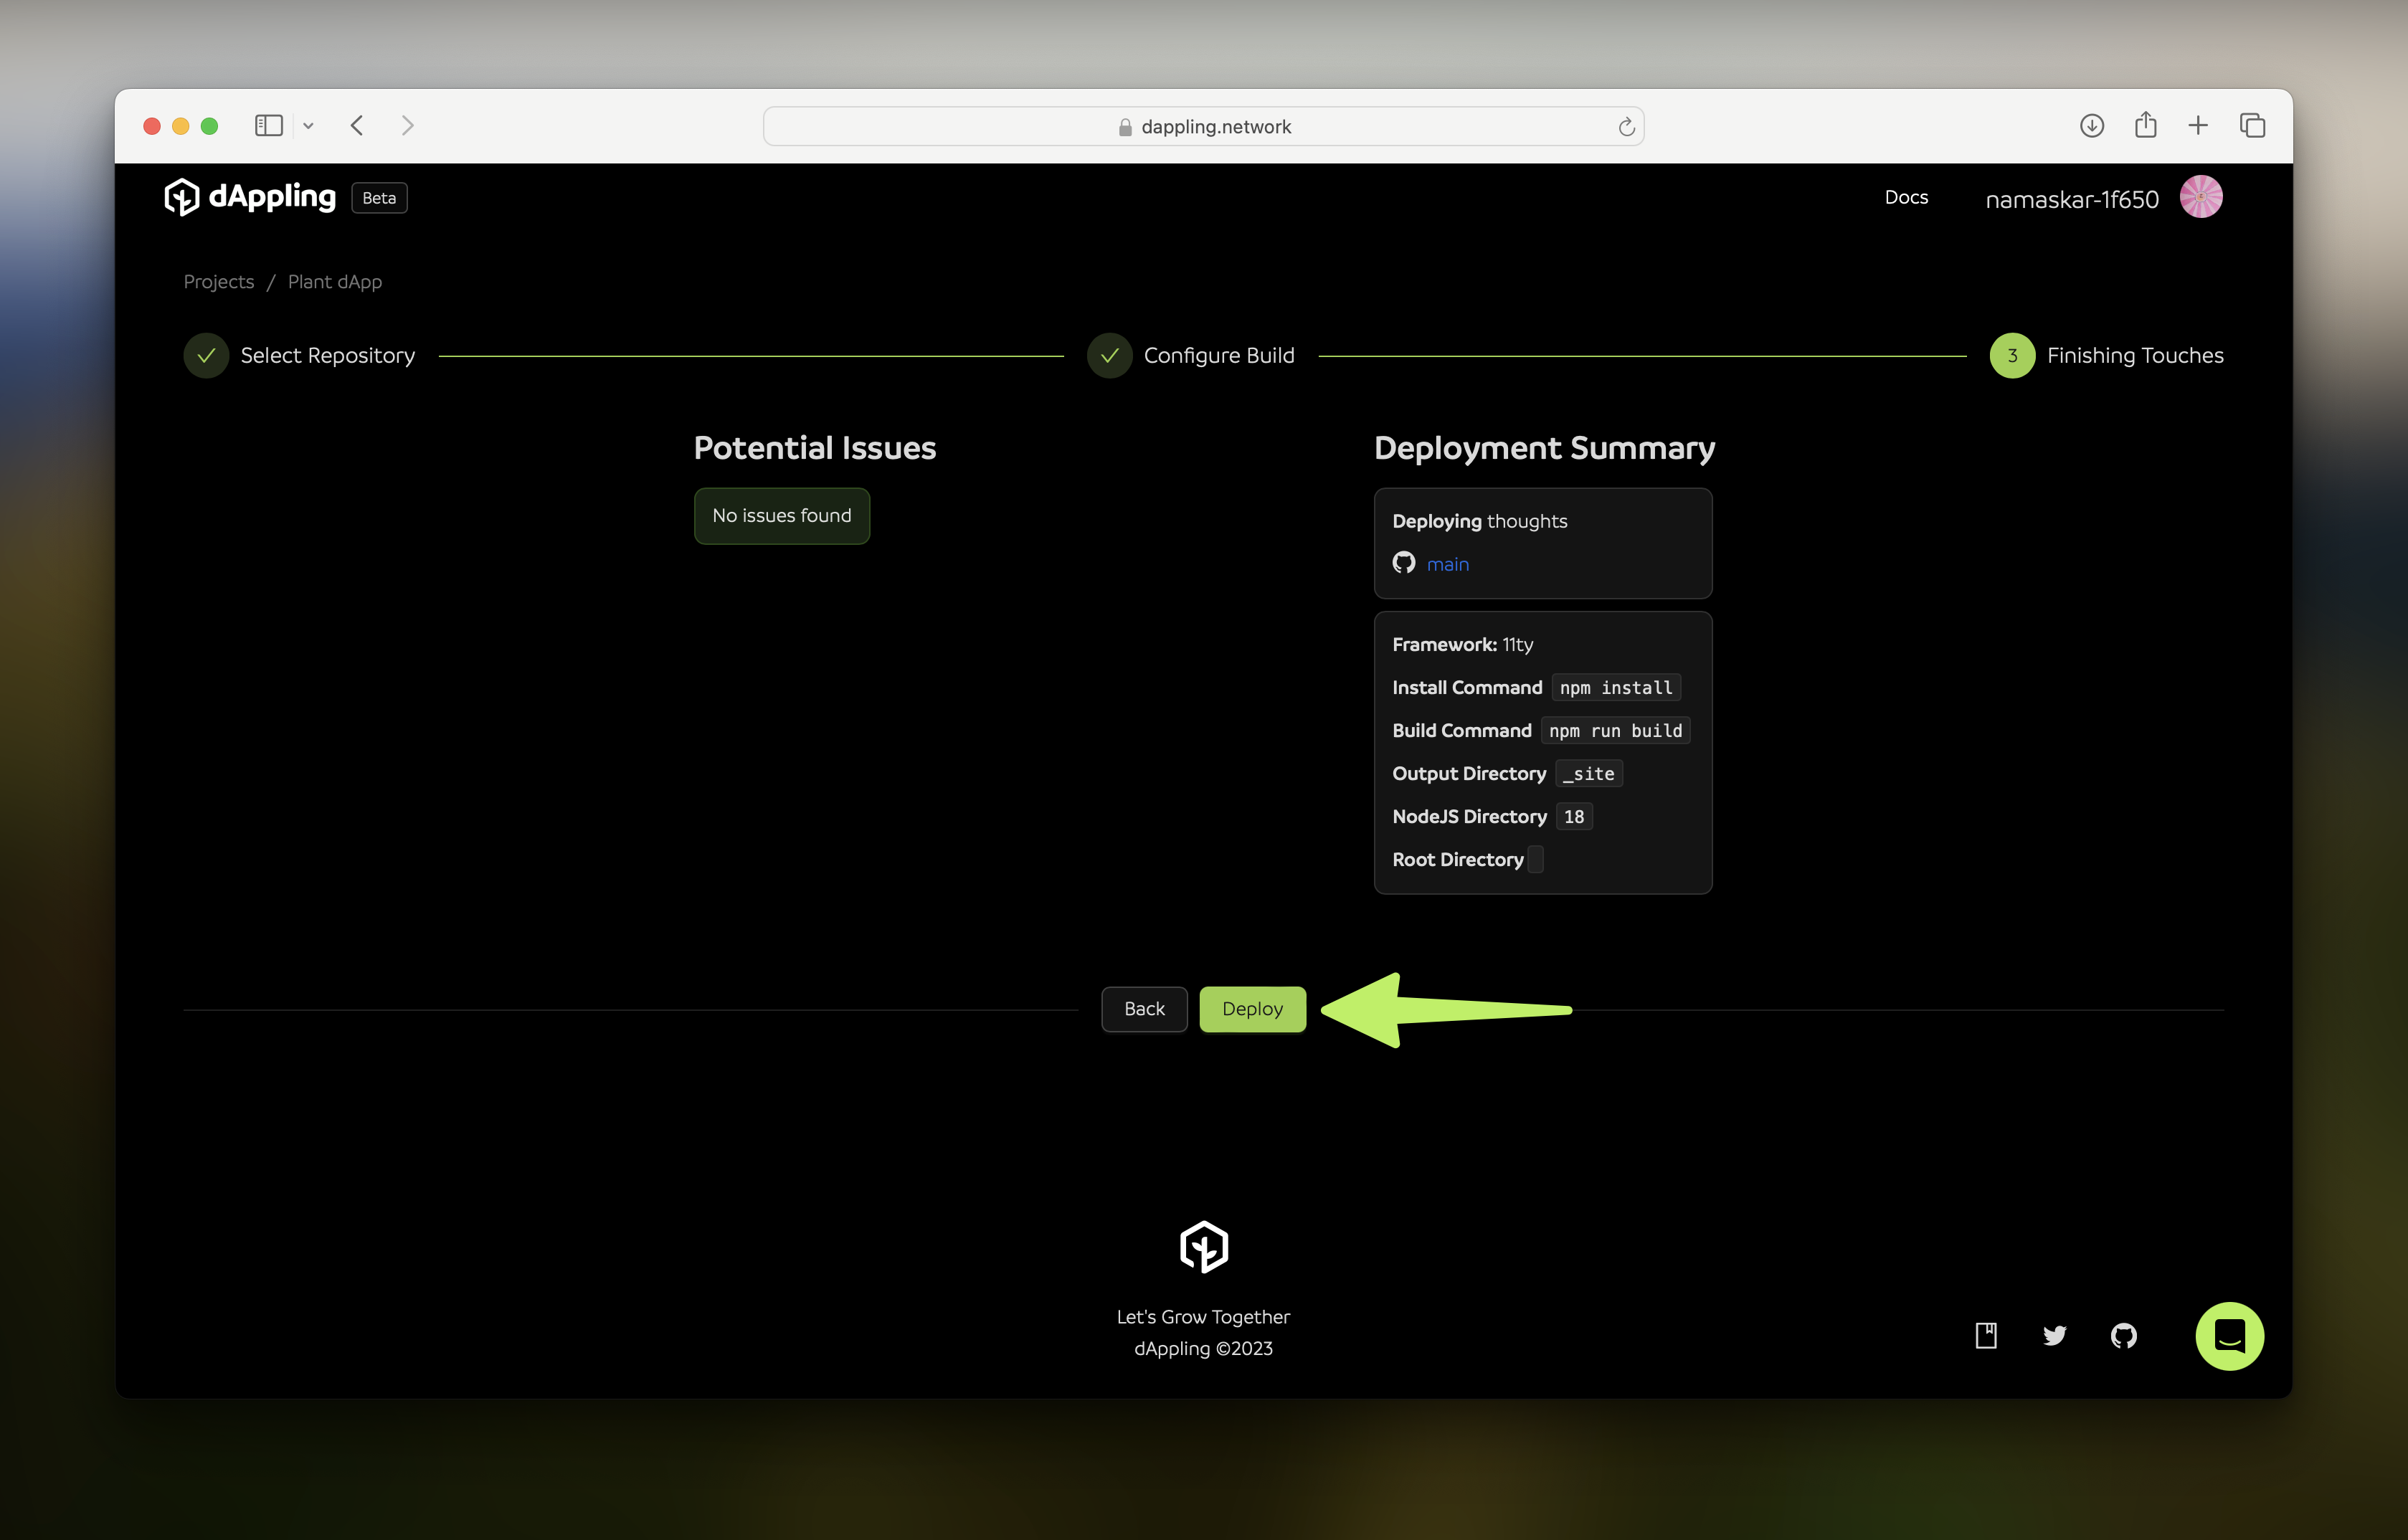
After the configuration looks good, click “Next”. You will be taken to the “Finishing Touches” step where we do last-minute checks.
Deploy!
If everything looks good, click “Deploy”. You will be taken to your new project page.
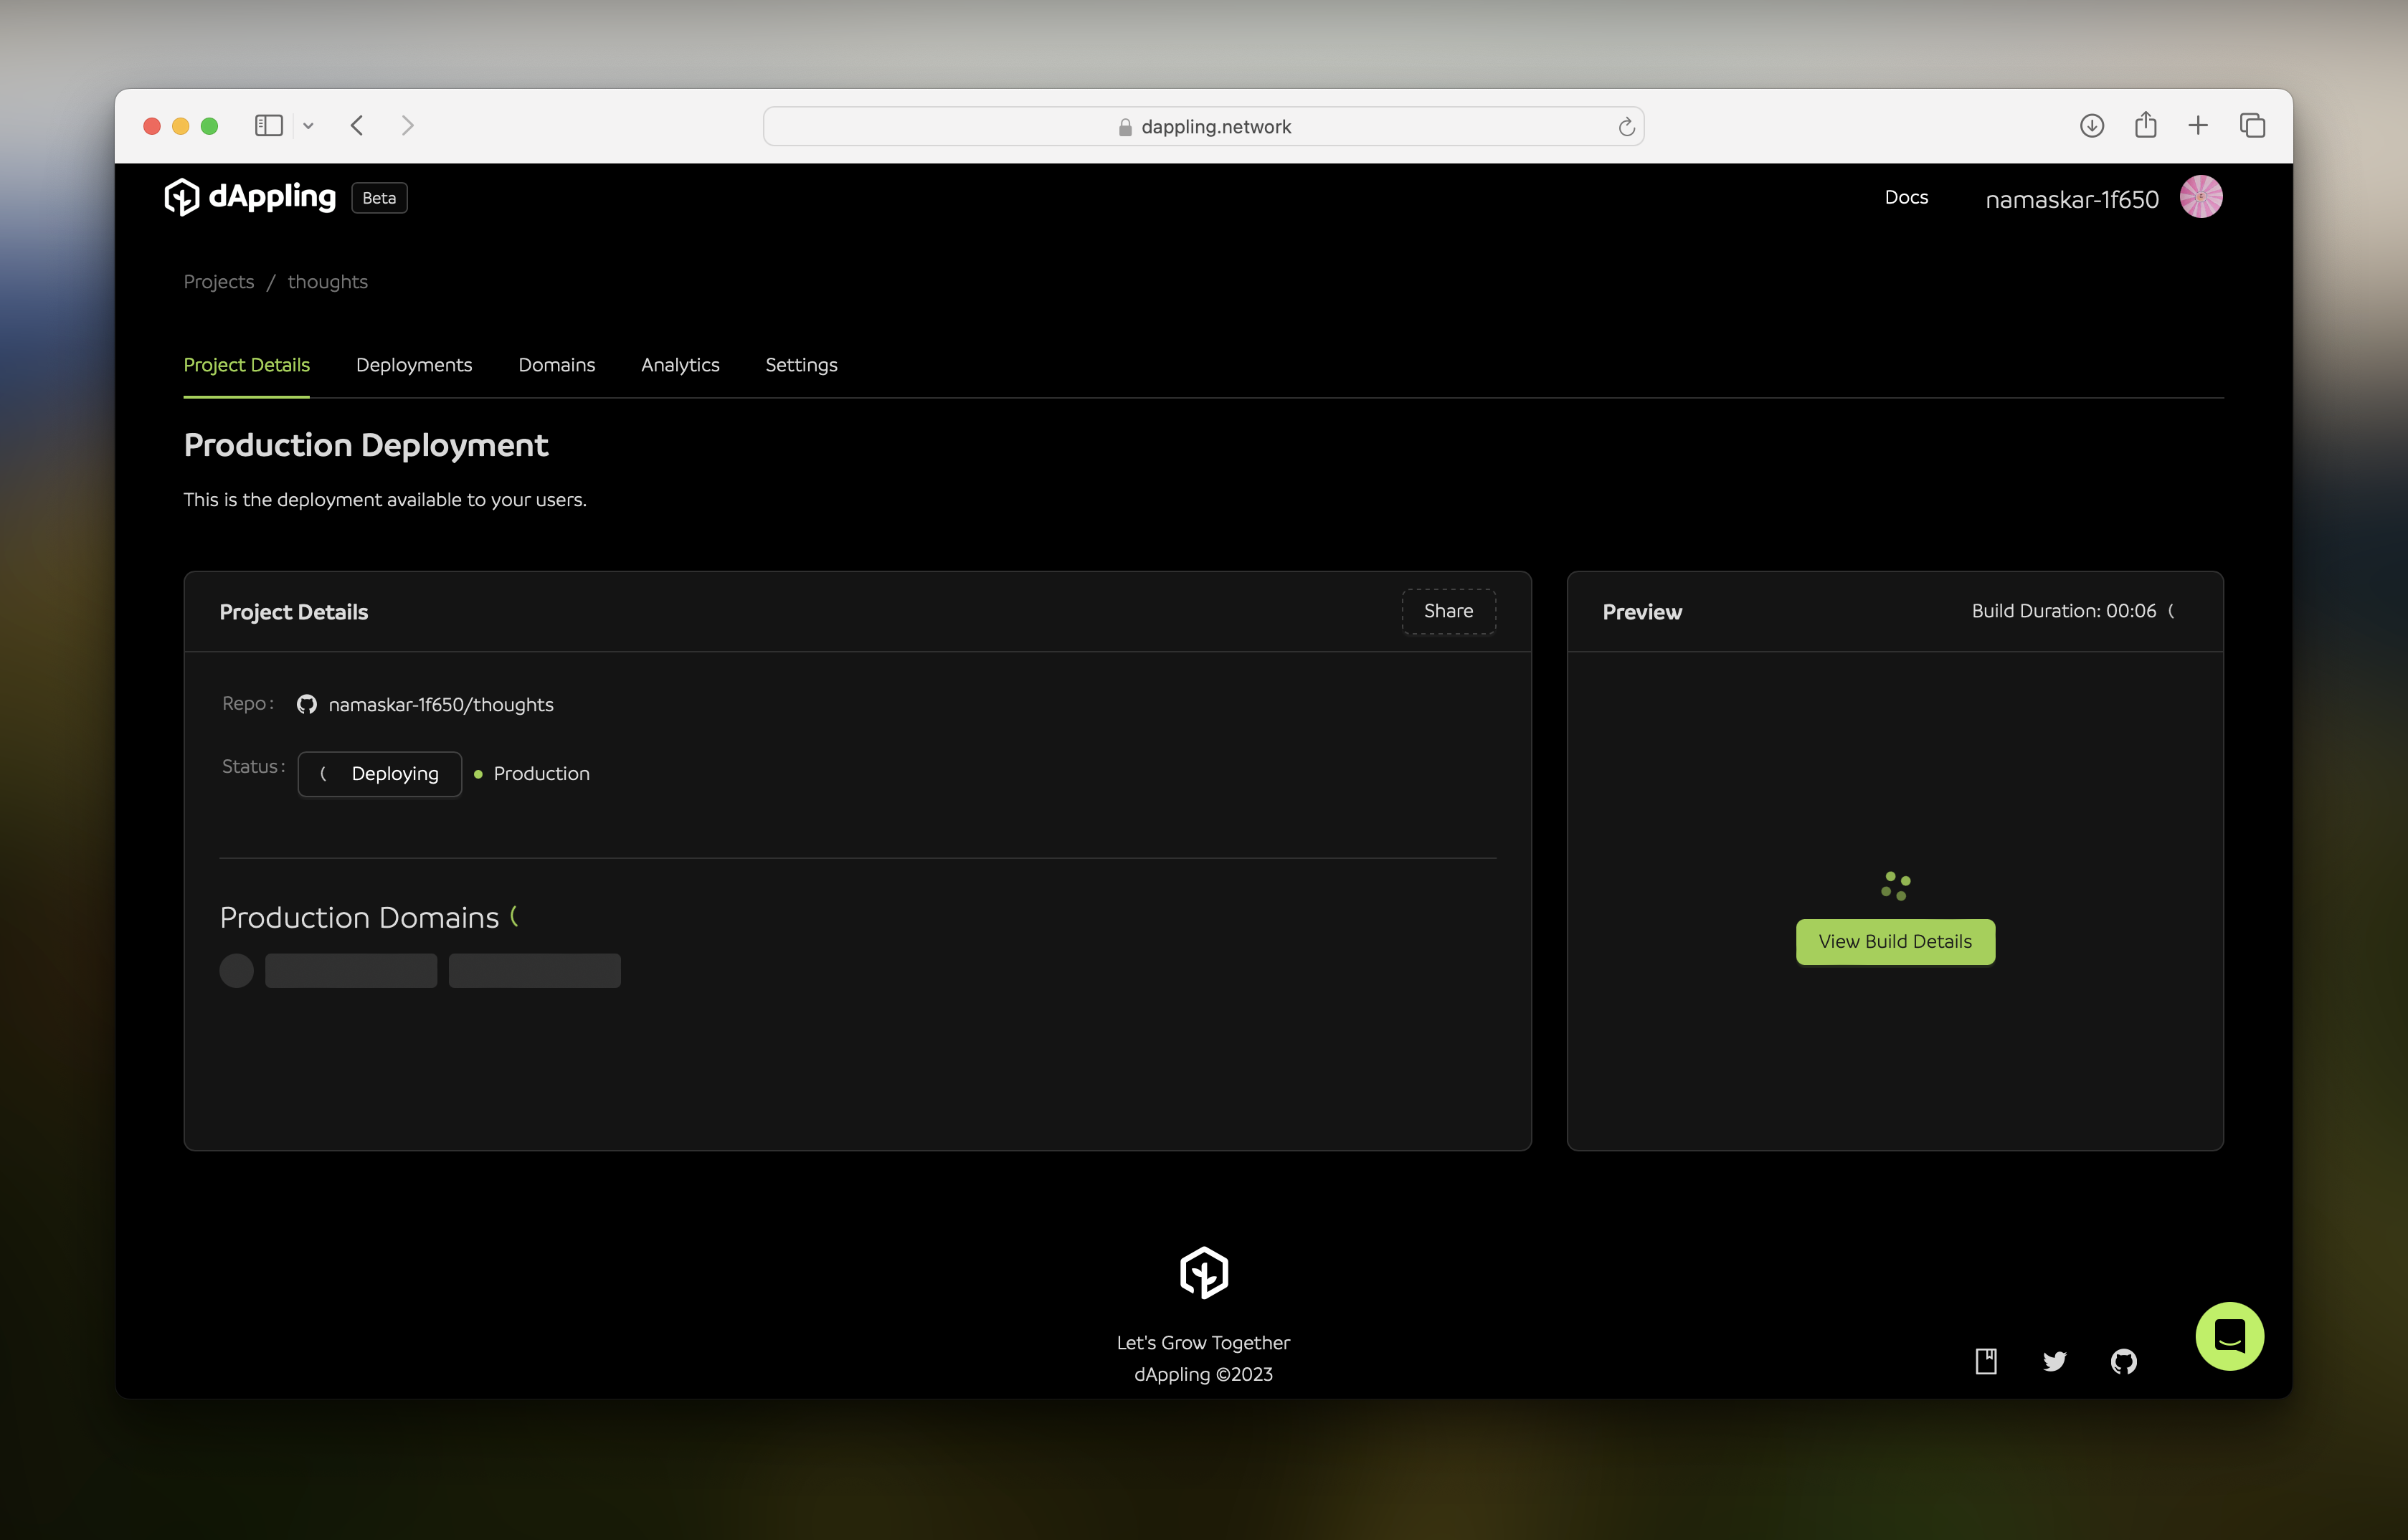
Explore the Project Page
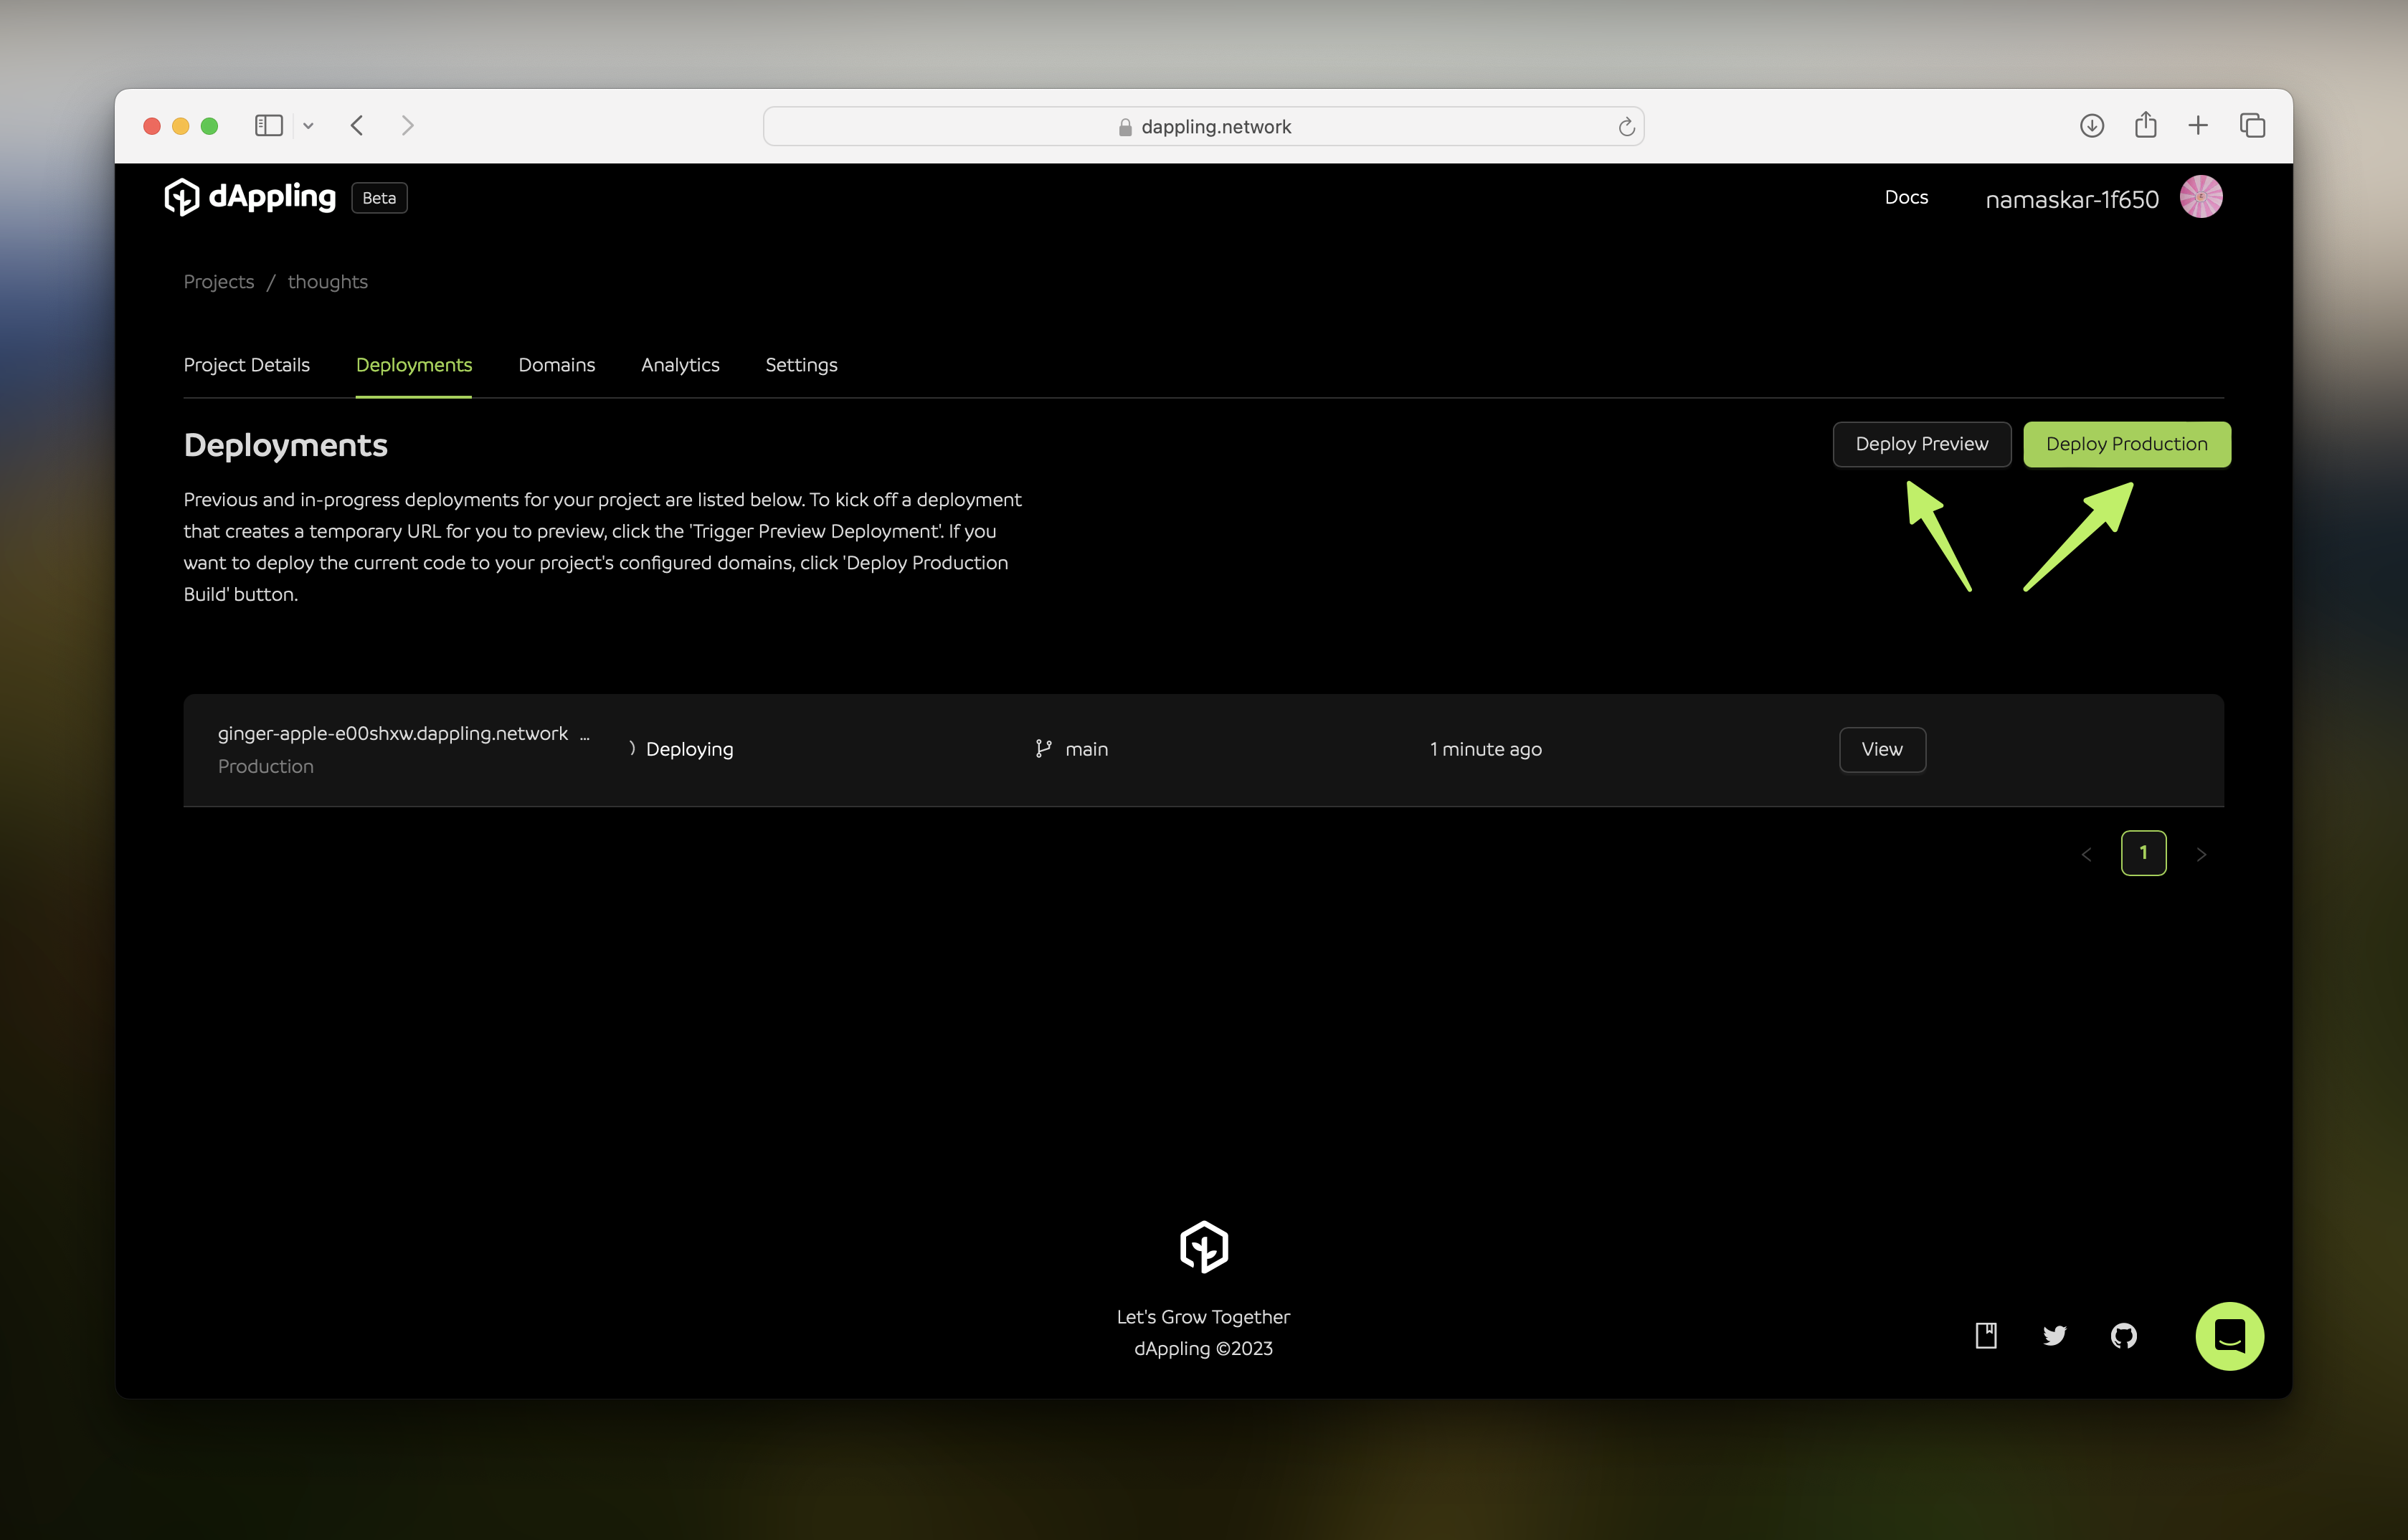
You will now see the project page with plenty of loading indicators! The build process may take a few minutes, so let’s explore the other parts of your project while we wait. Click on the second tab, “Deployments”.
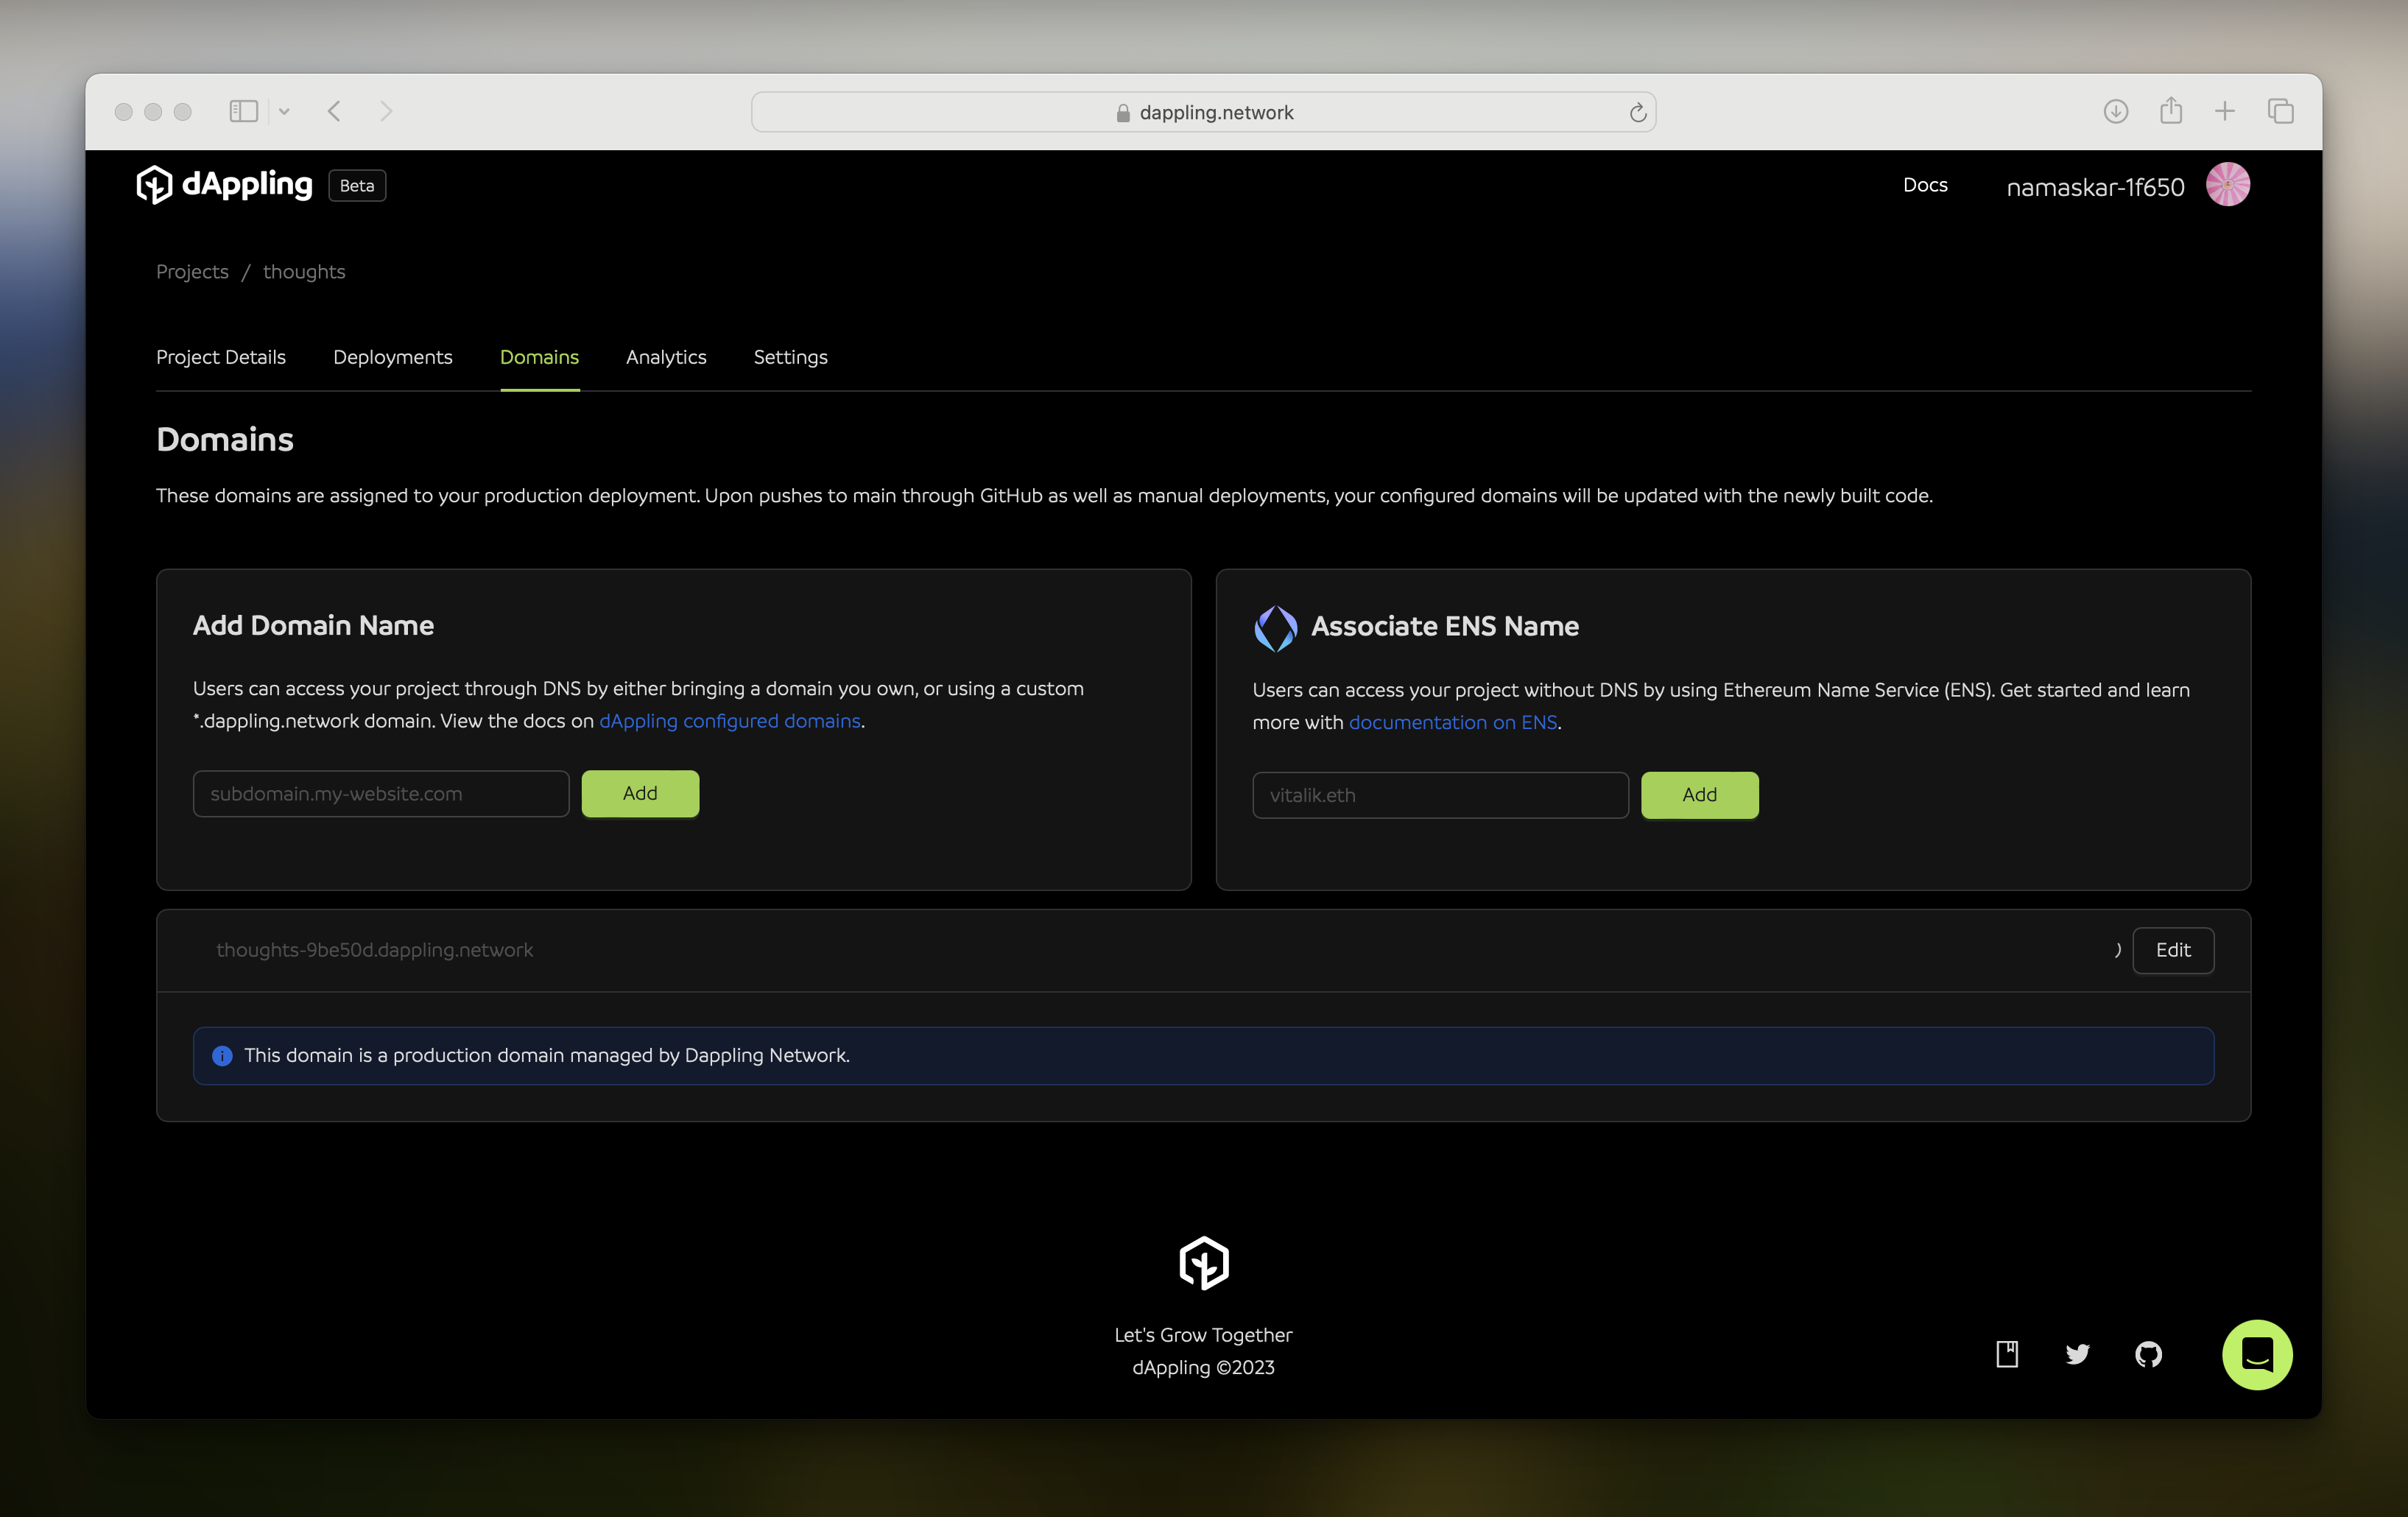
Here you can see your deploying build and also where your historical deployments would be. You can also create a new deployment from this page by clicking on “Deploy Preview” to create a new version that isn’t live, or push a new “Production Deployment” to make your changes live on your domains. Speaking of domains, click on the “Domains” tab.
Here you can see the pre-configured dappling domain, which can be edited to anything you desire, as well as where you could add your ENS name or link to a live domain. Additionally, when adding the ENS domain, you will get a unique IPNS key that will have the latest CID on IPFS. Now let’s look at the “Analytics” tab.
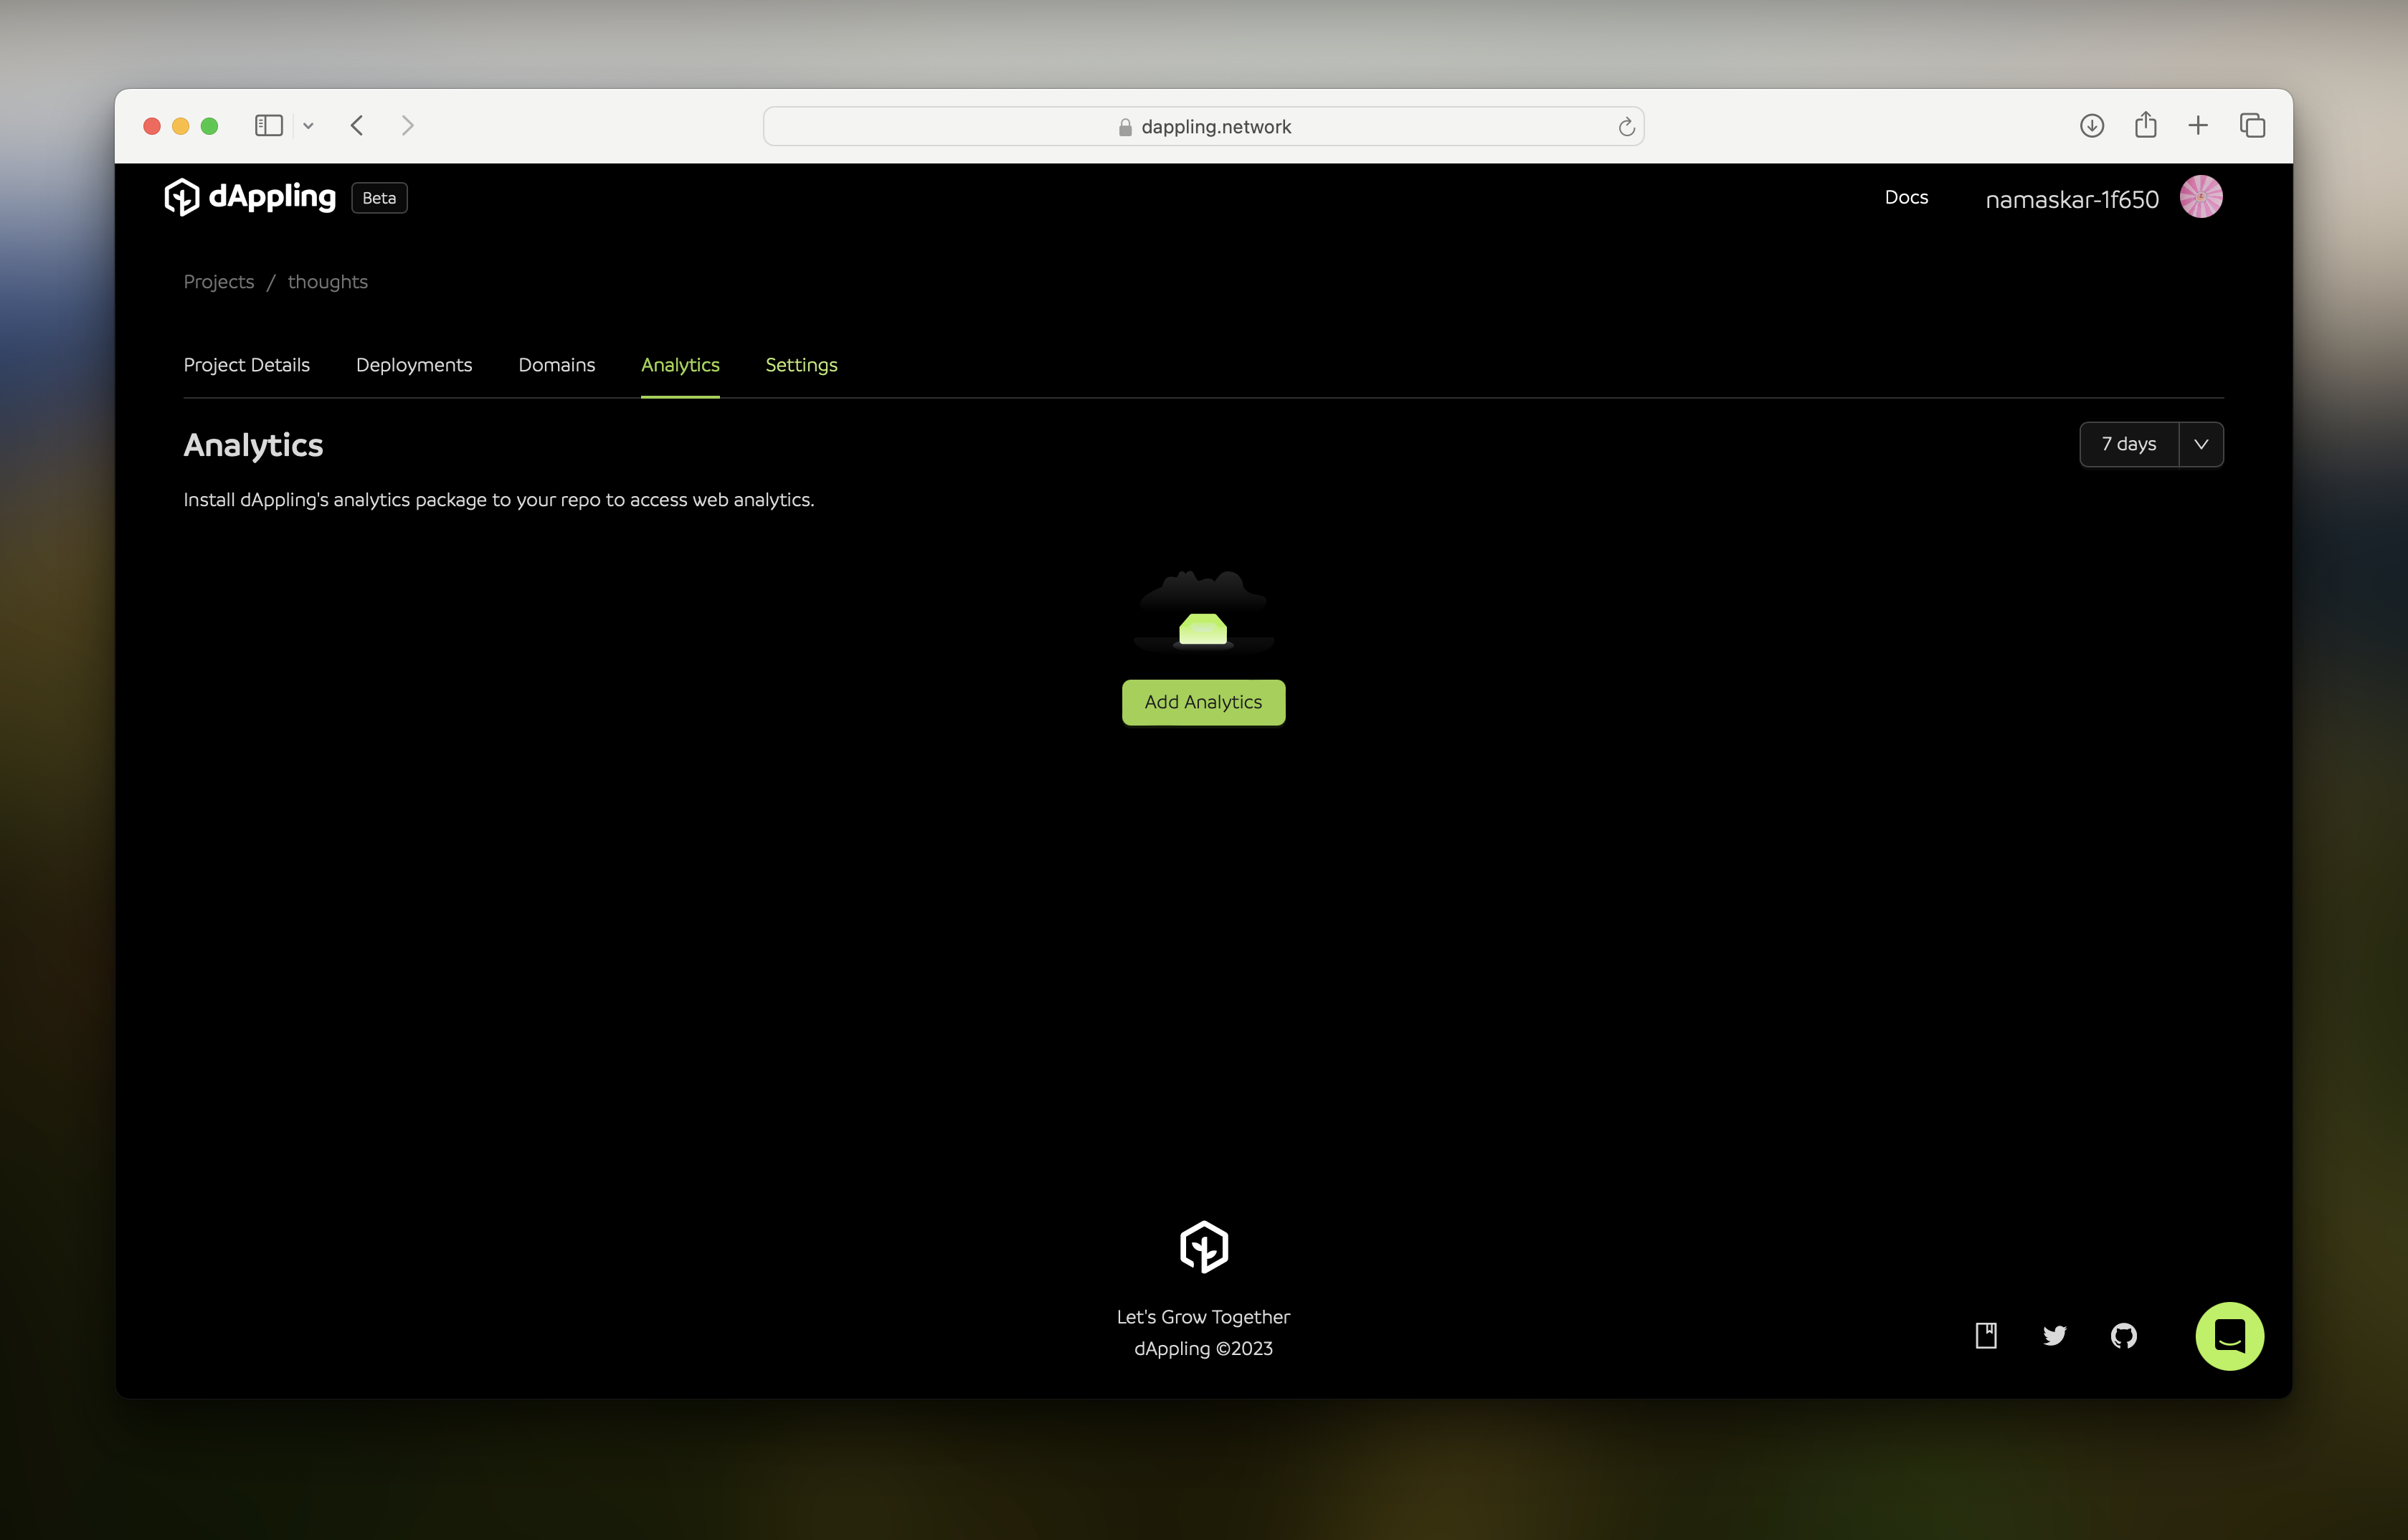
We have an analytics package that will give you unique user and page view counts. We are working on adding more features to this, but for now, it is a great way to see how many people are visiting your site. Finally, let’s look at the “Settings” tab.
You can see the same information you configured earlier. If your deployment failed, this is where you might need to change a setting. You can also add build variables, change the branch to deploy, and delete the project.

Trigger a Deployment from GitHub
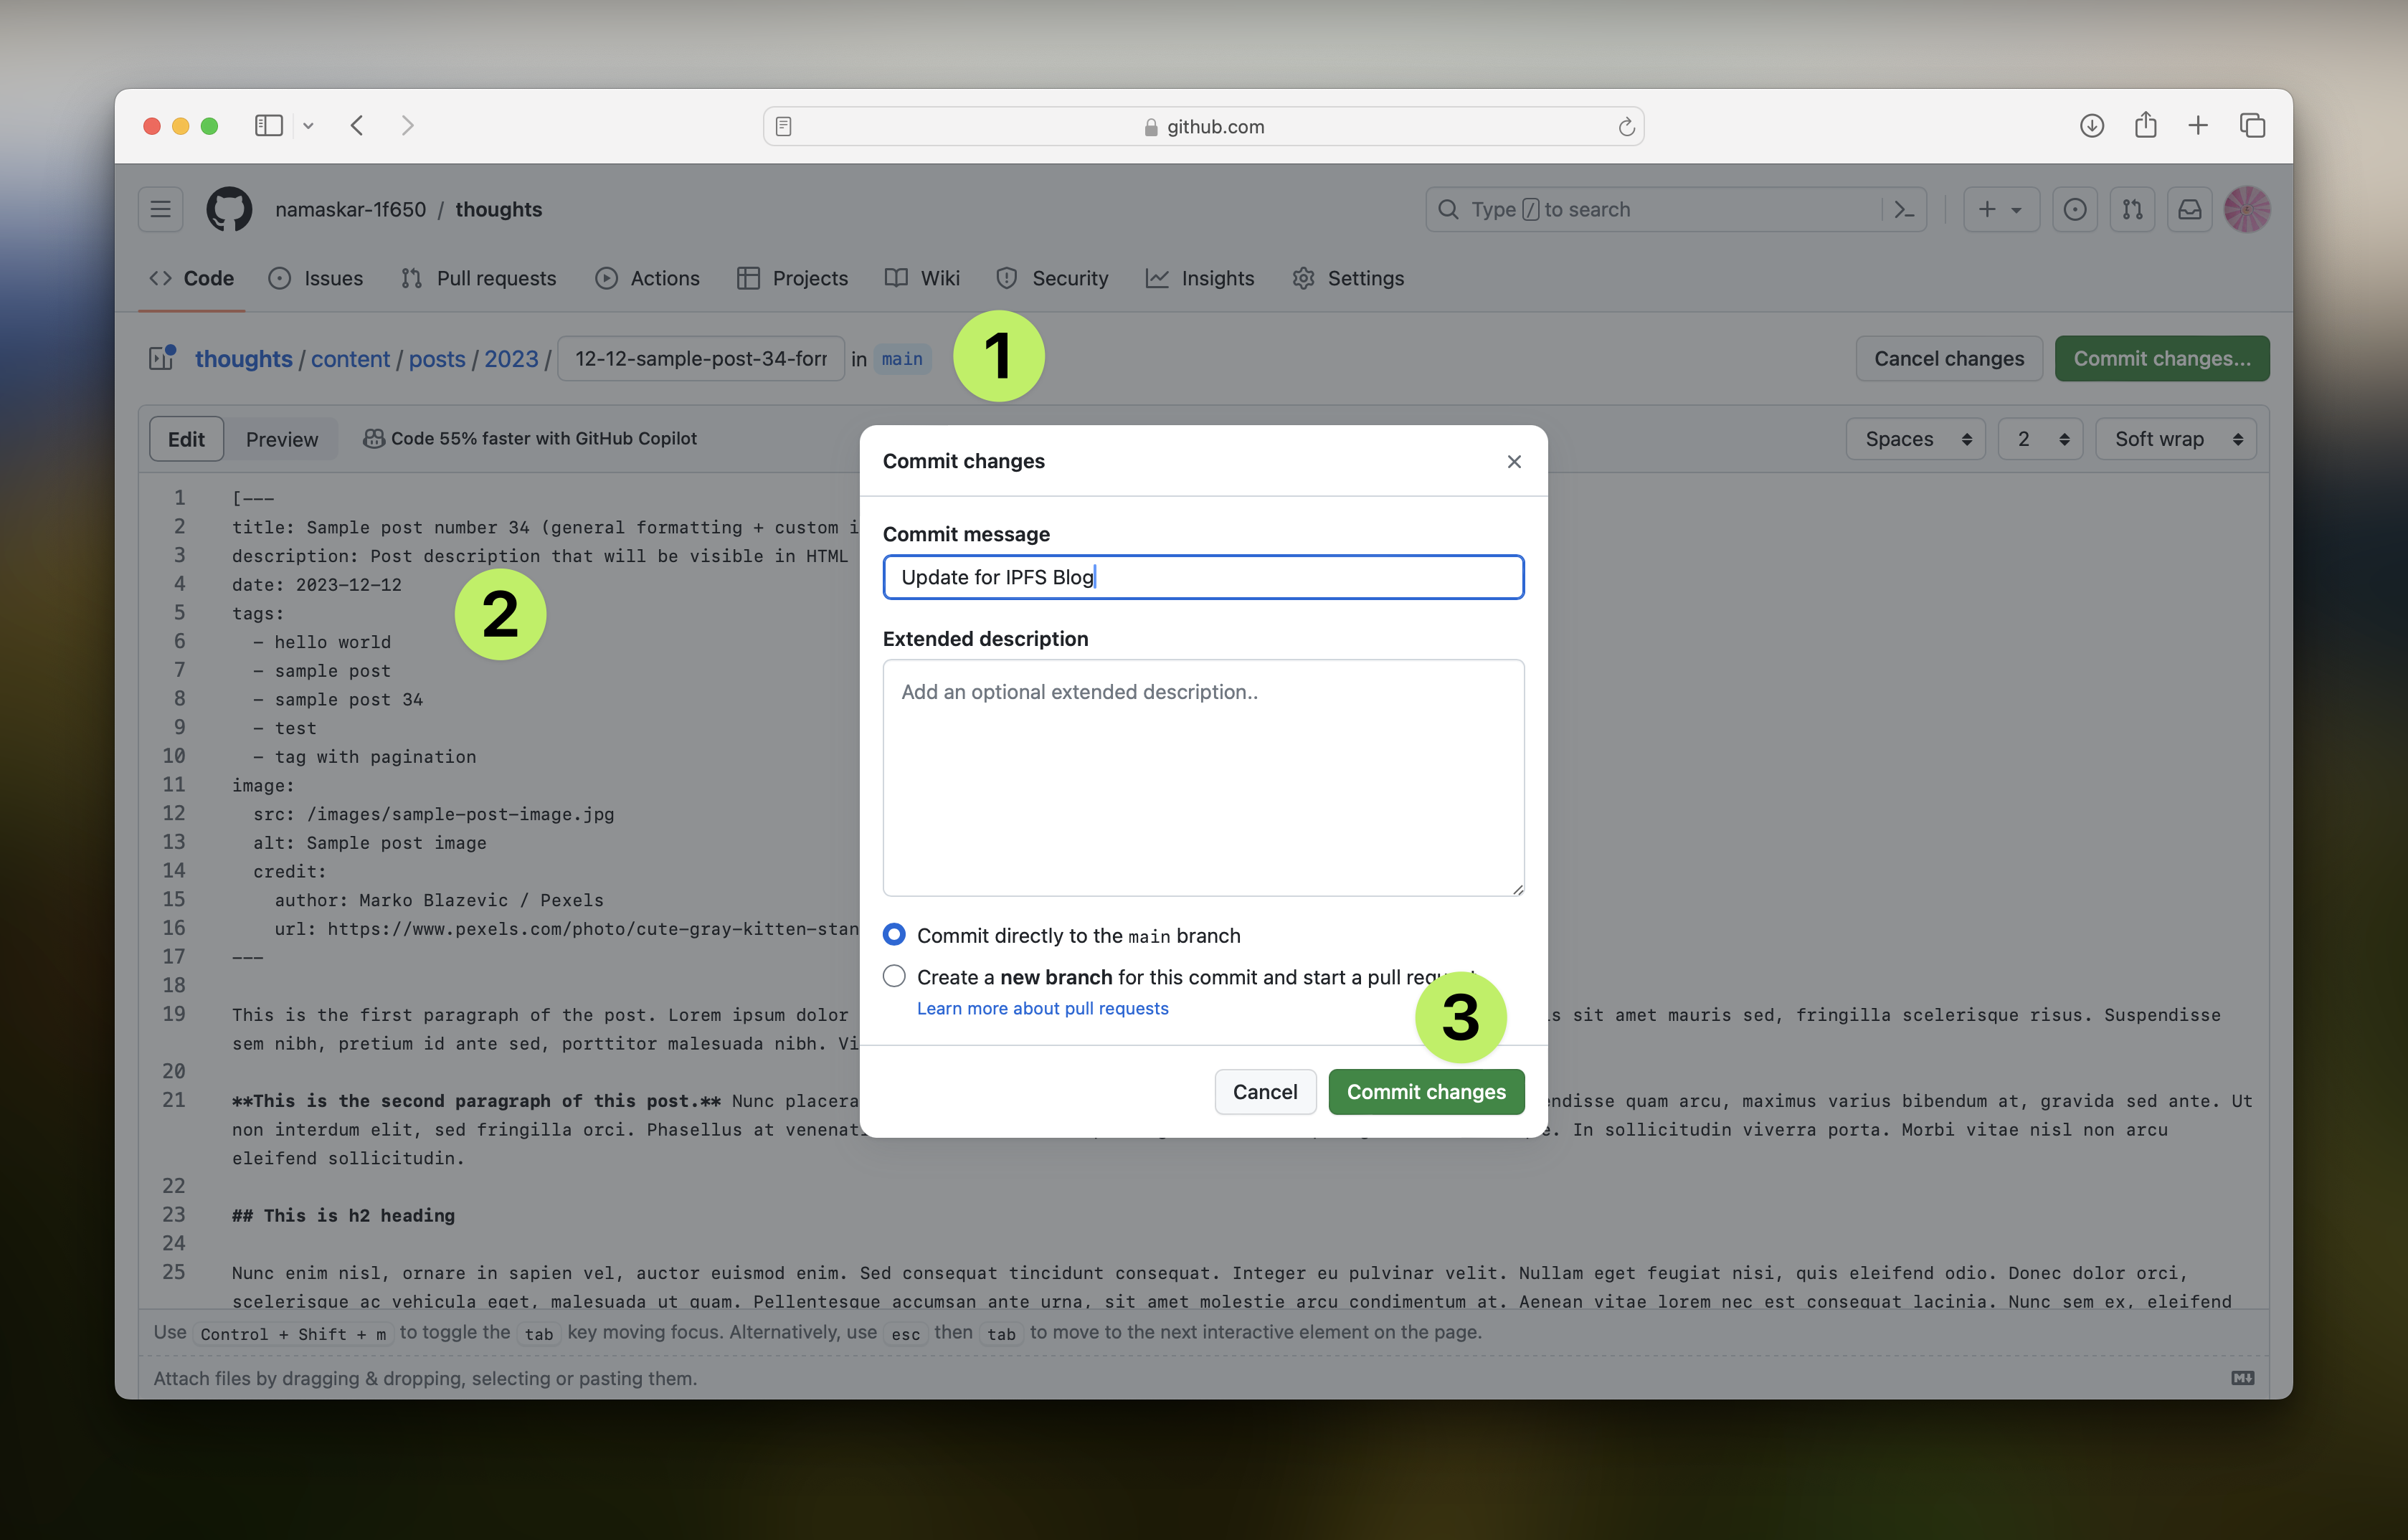
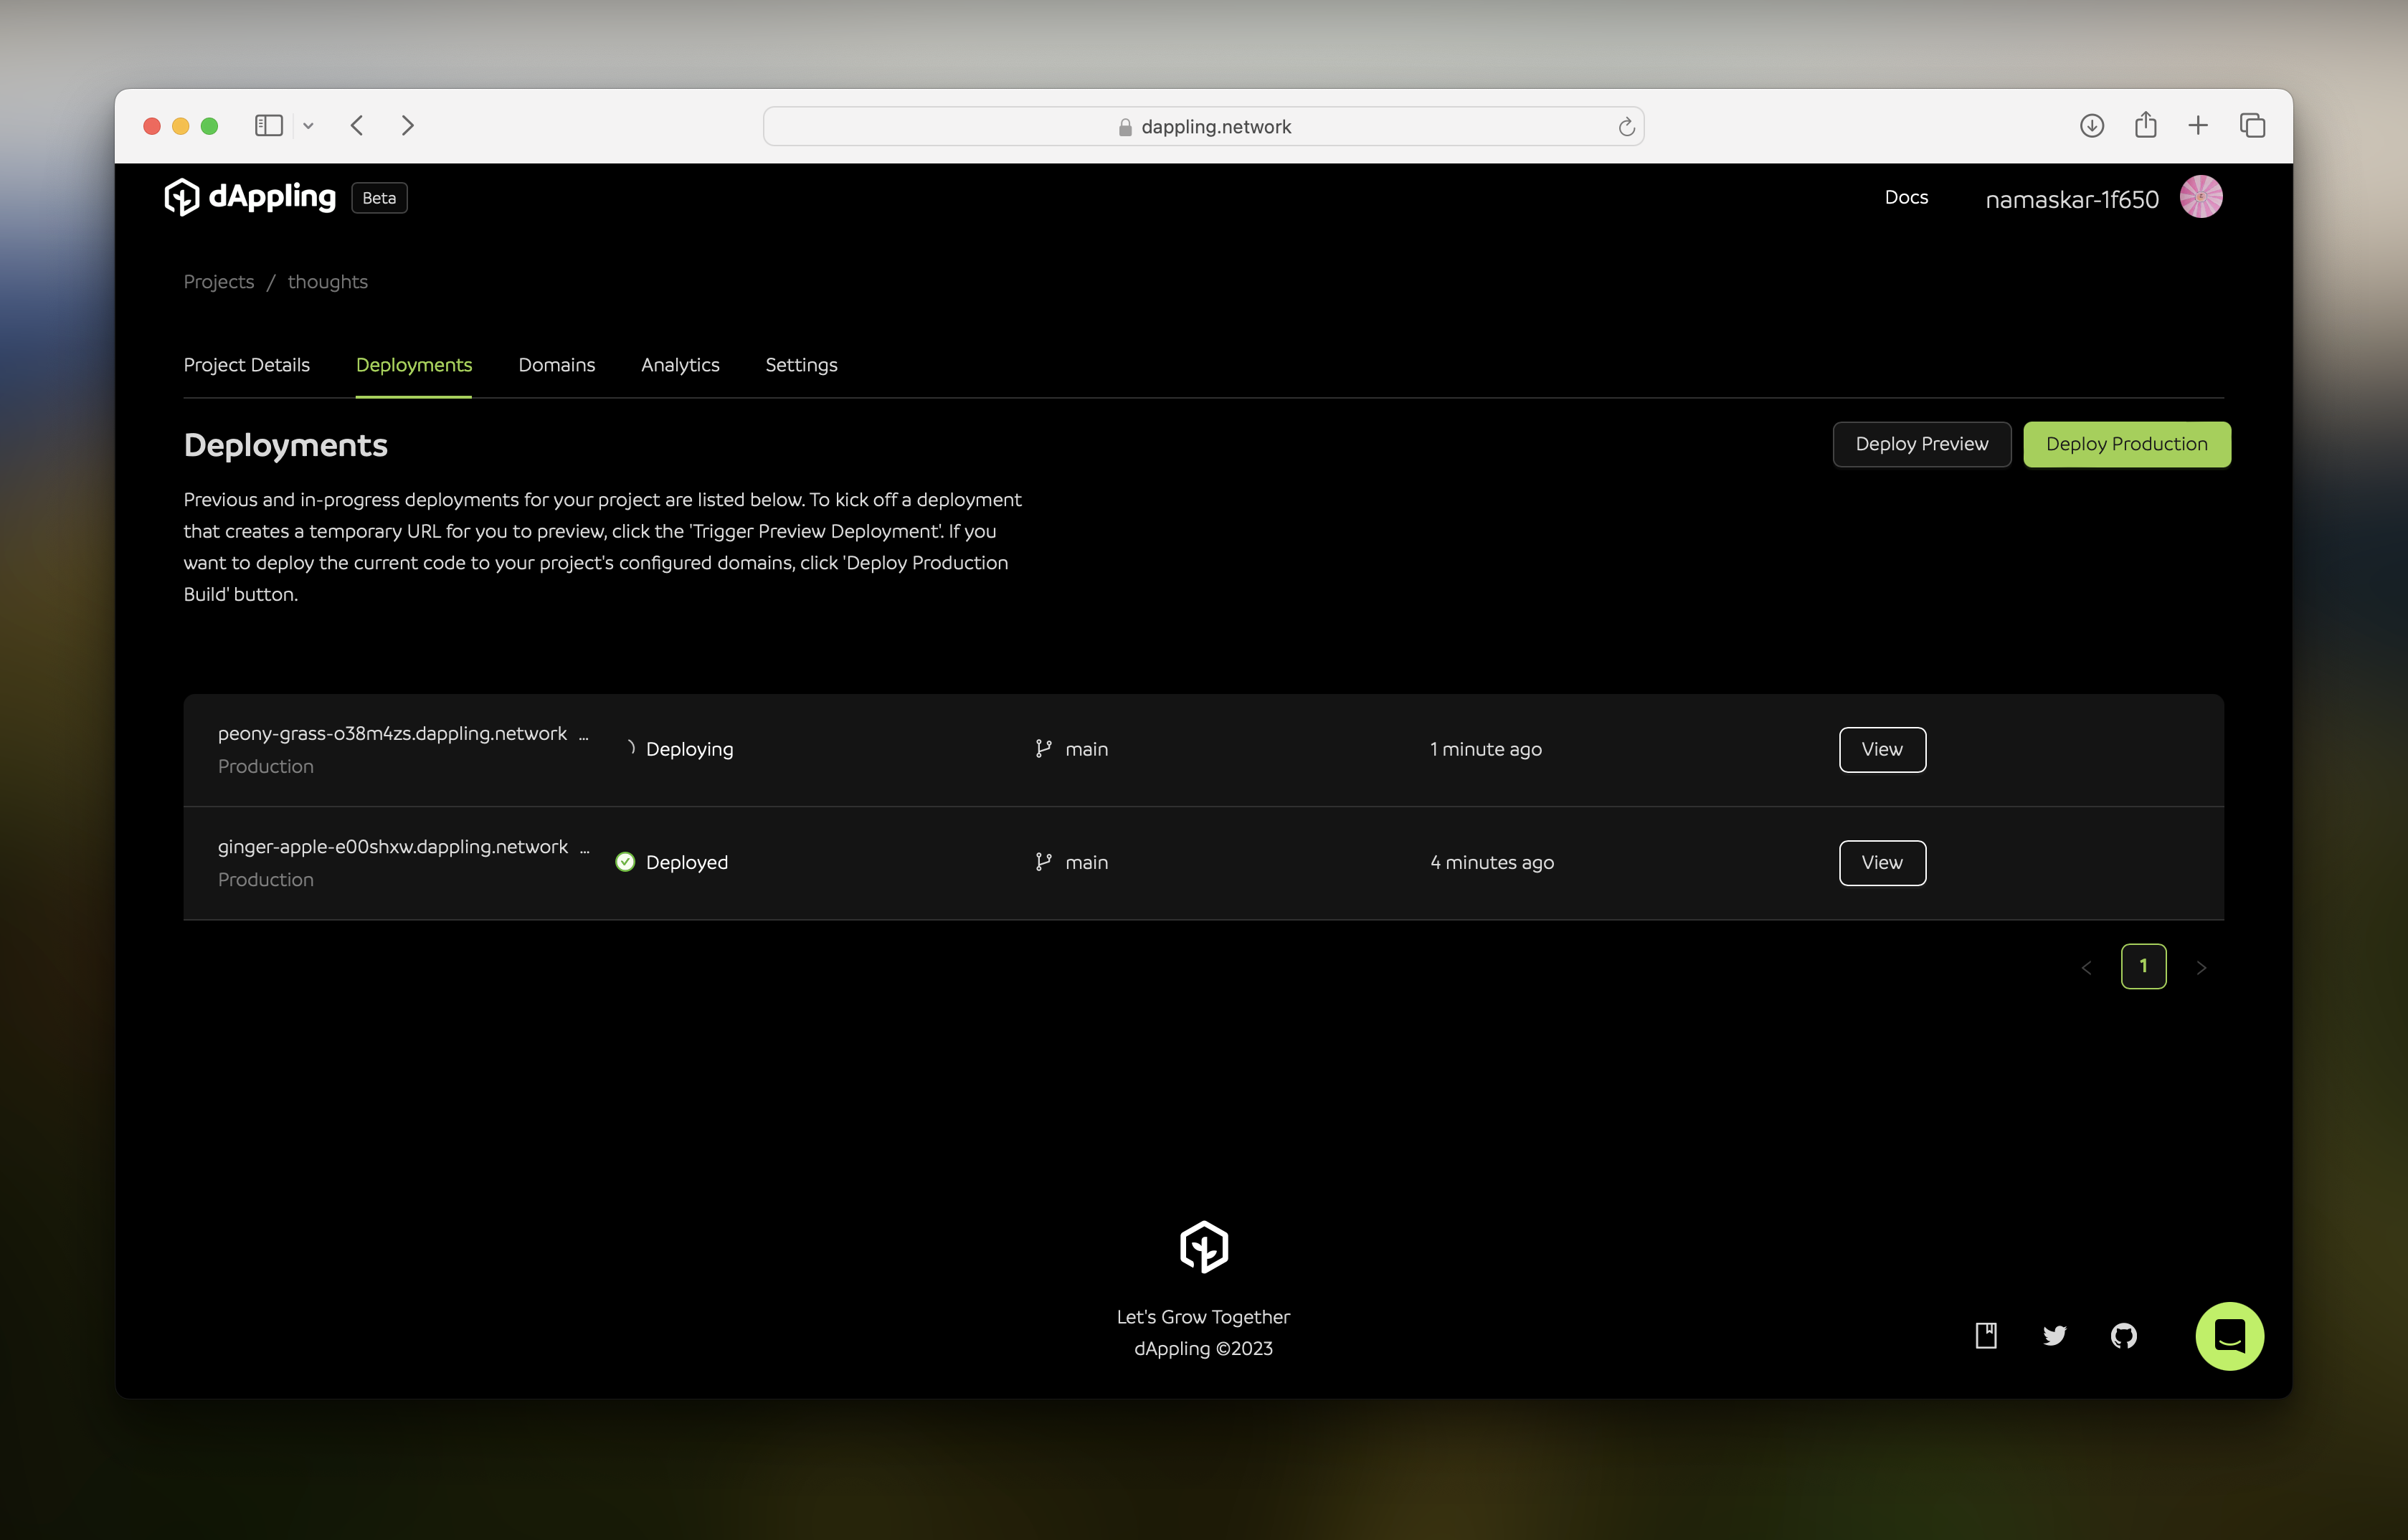
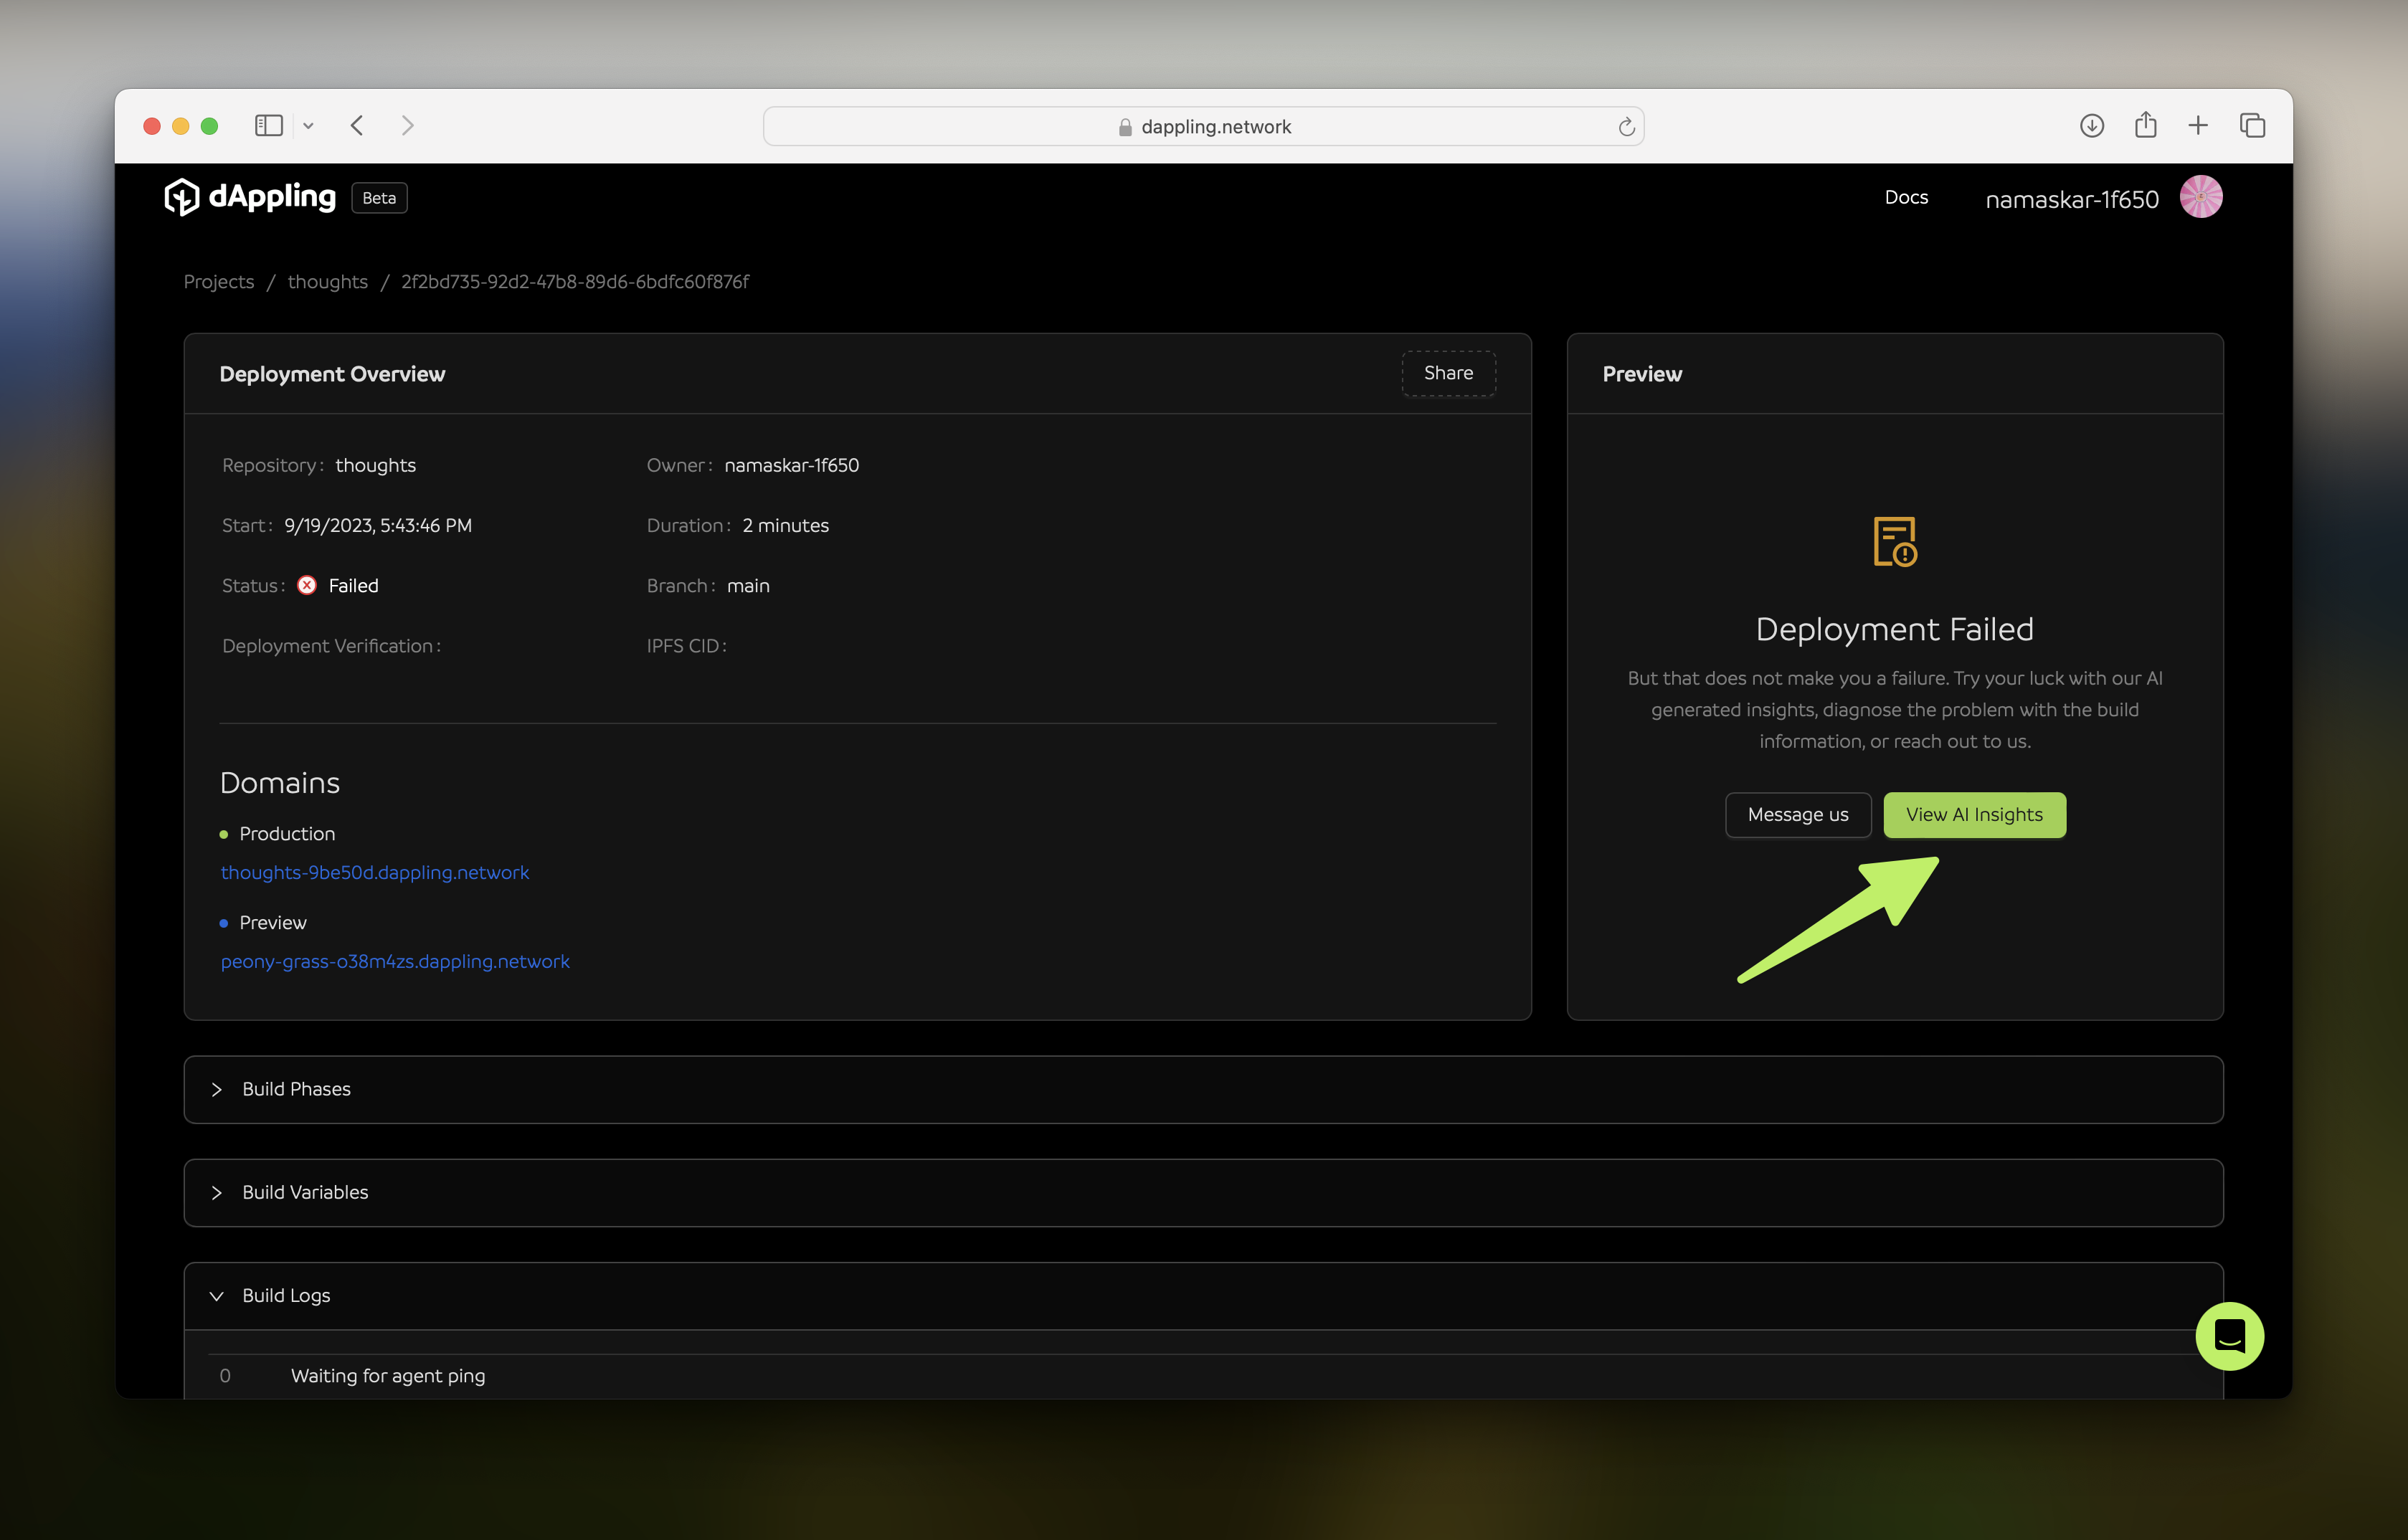
By now, the deployment should be done, which you will be able to see on the “Deployments” tab. Now we will try deploying from GitHub. Head over to your repository on GitHub, choose a file, and make a change to it. Here, I decided to change the content of the latest blog post /content/posts/2023/12-12-sample-post-34-formatting.md. After committing the change, the deployment should already be started in dAppling.
You can see the second deployment. I introduced a bug in my change, however, so this build will fail. A perfect time to see what information you can see upon a failure!
AI-Generated Debugging Insights
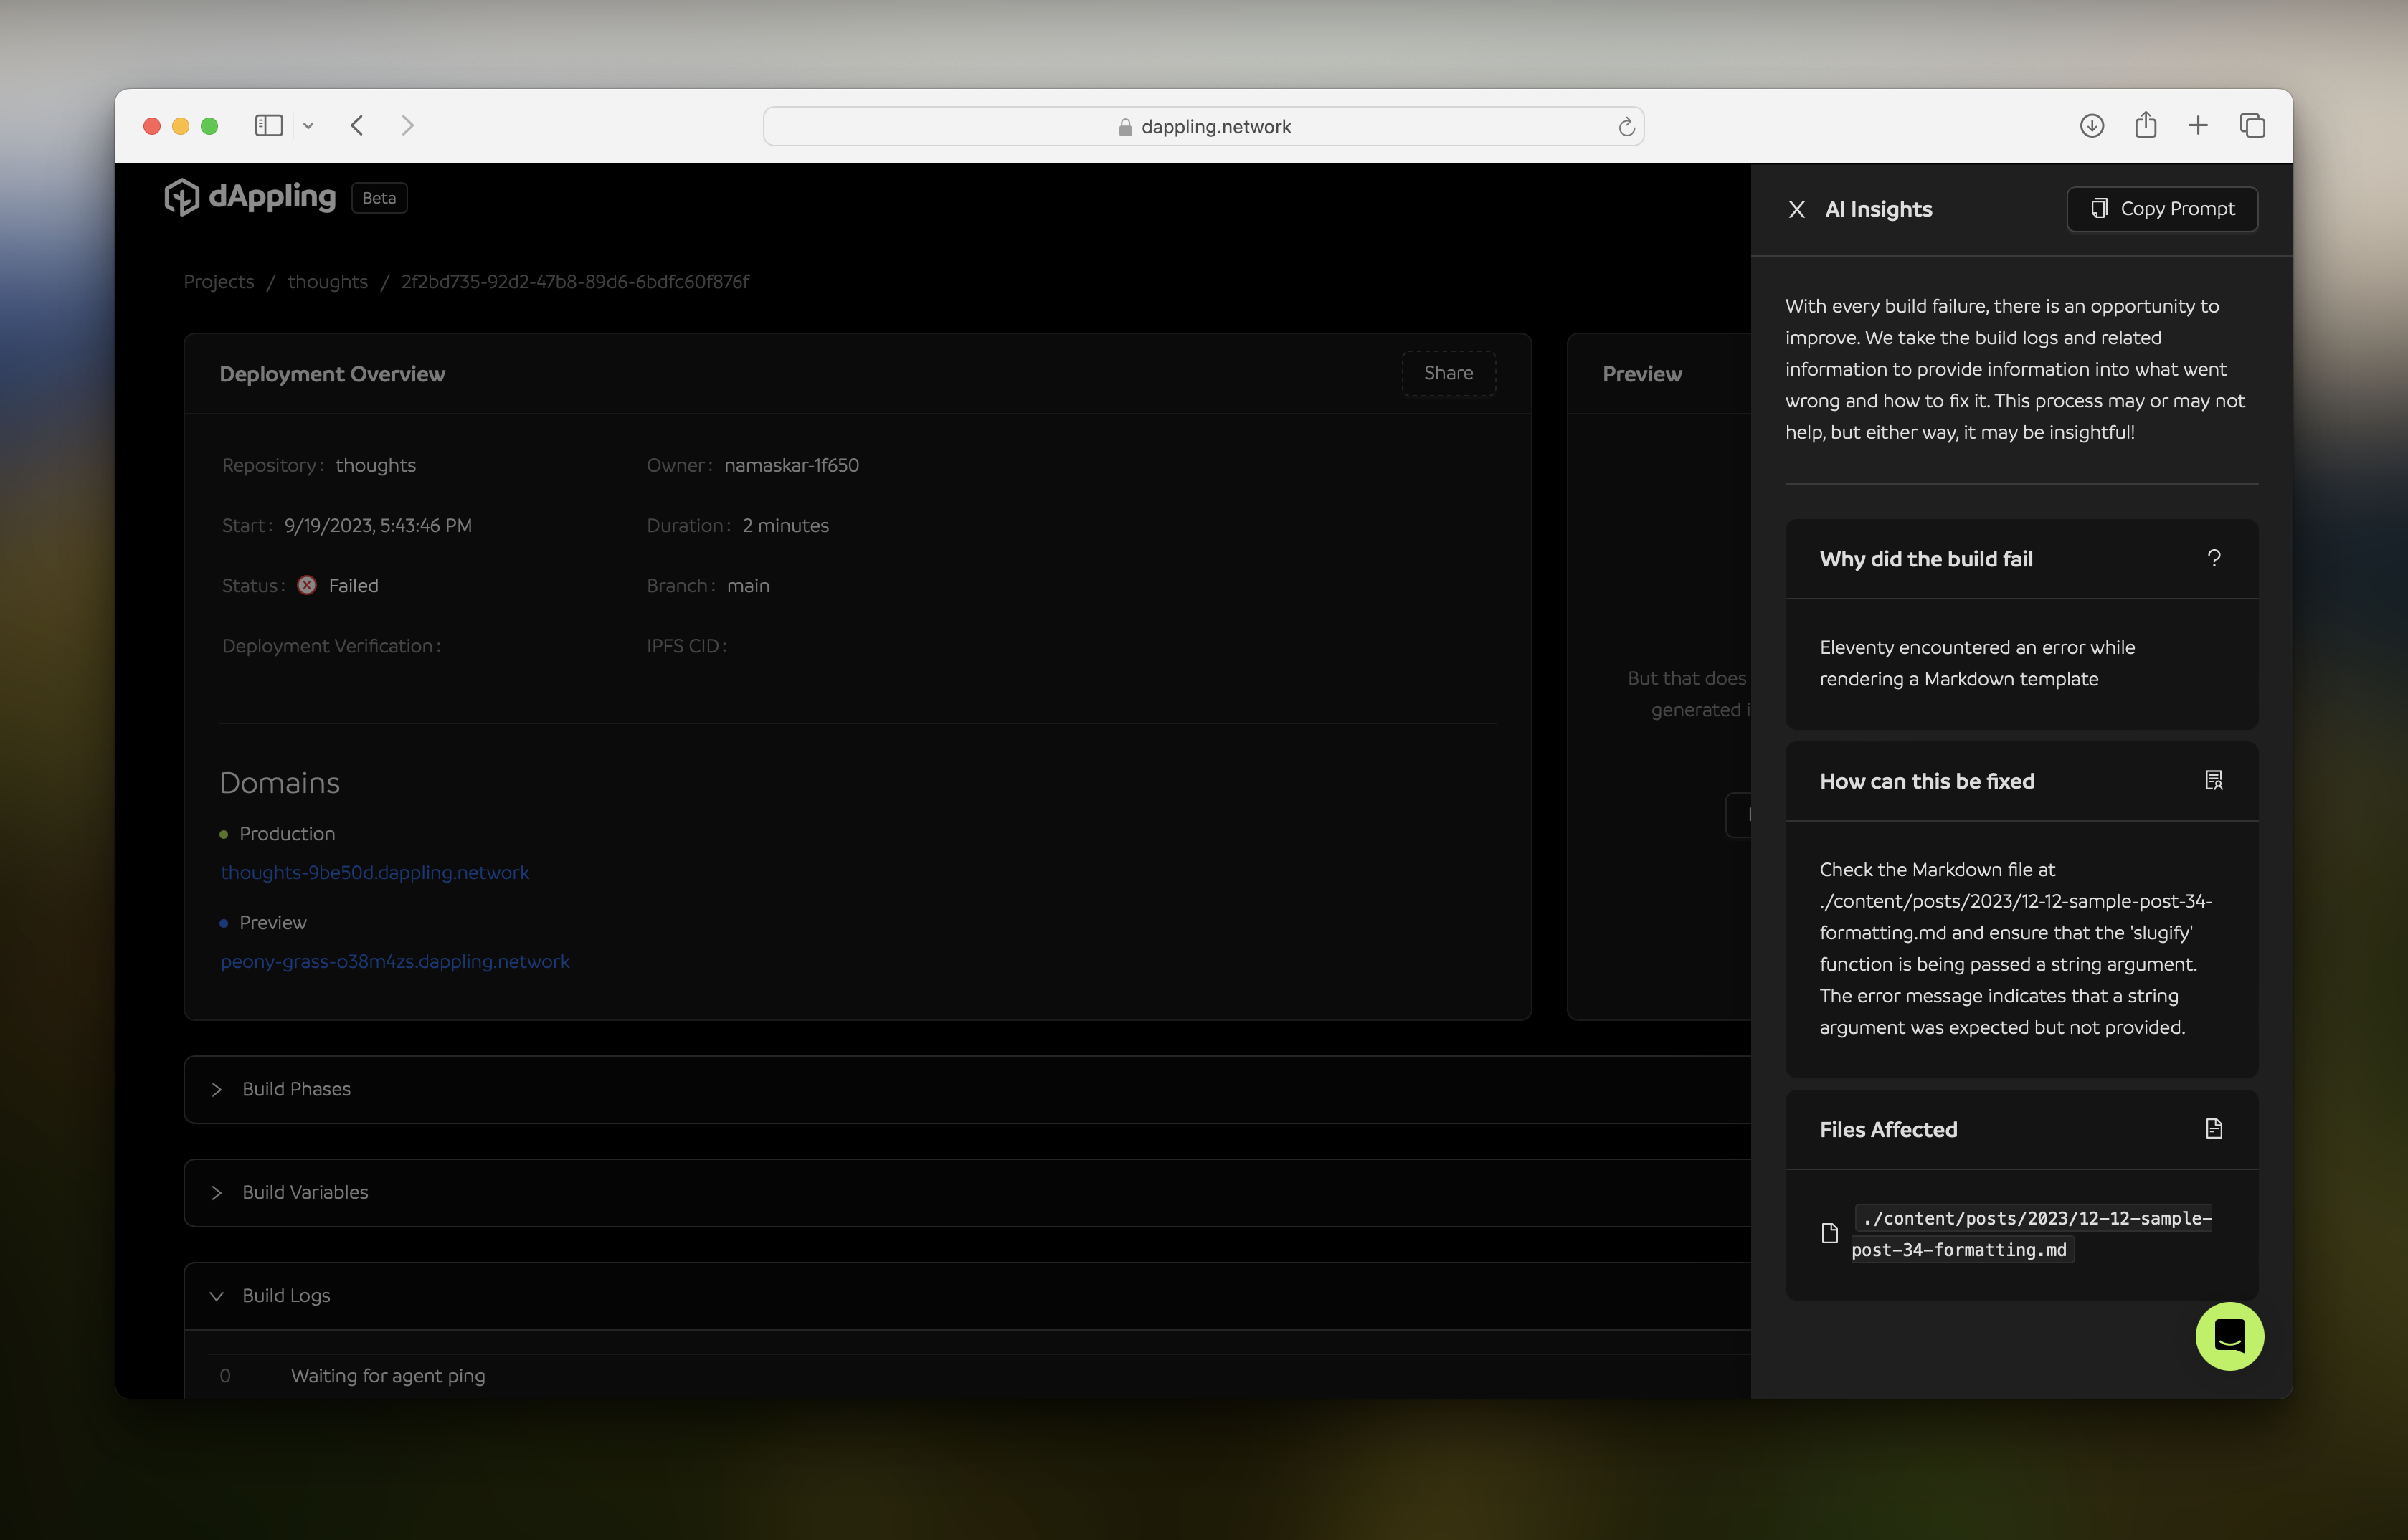
Within the deployment page, you can see the logs, environment variables, and other information about the deployment. There is also a button that will generate debugging insights. It uses AI to analyze the logs and give you a summary of what went wrong. After clicking it, the insights panel will appear.
If your deployment did fail, you can see this; if not, you can check out the insights of my deployment. You can see the reason, potential solution, and files affected. If applicable, a code sample will be provided. I will resolve the problem and push another commit to trigger a new deployment.
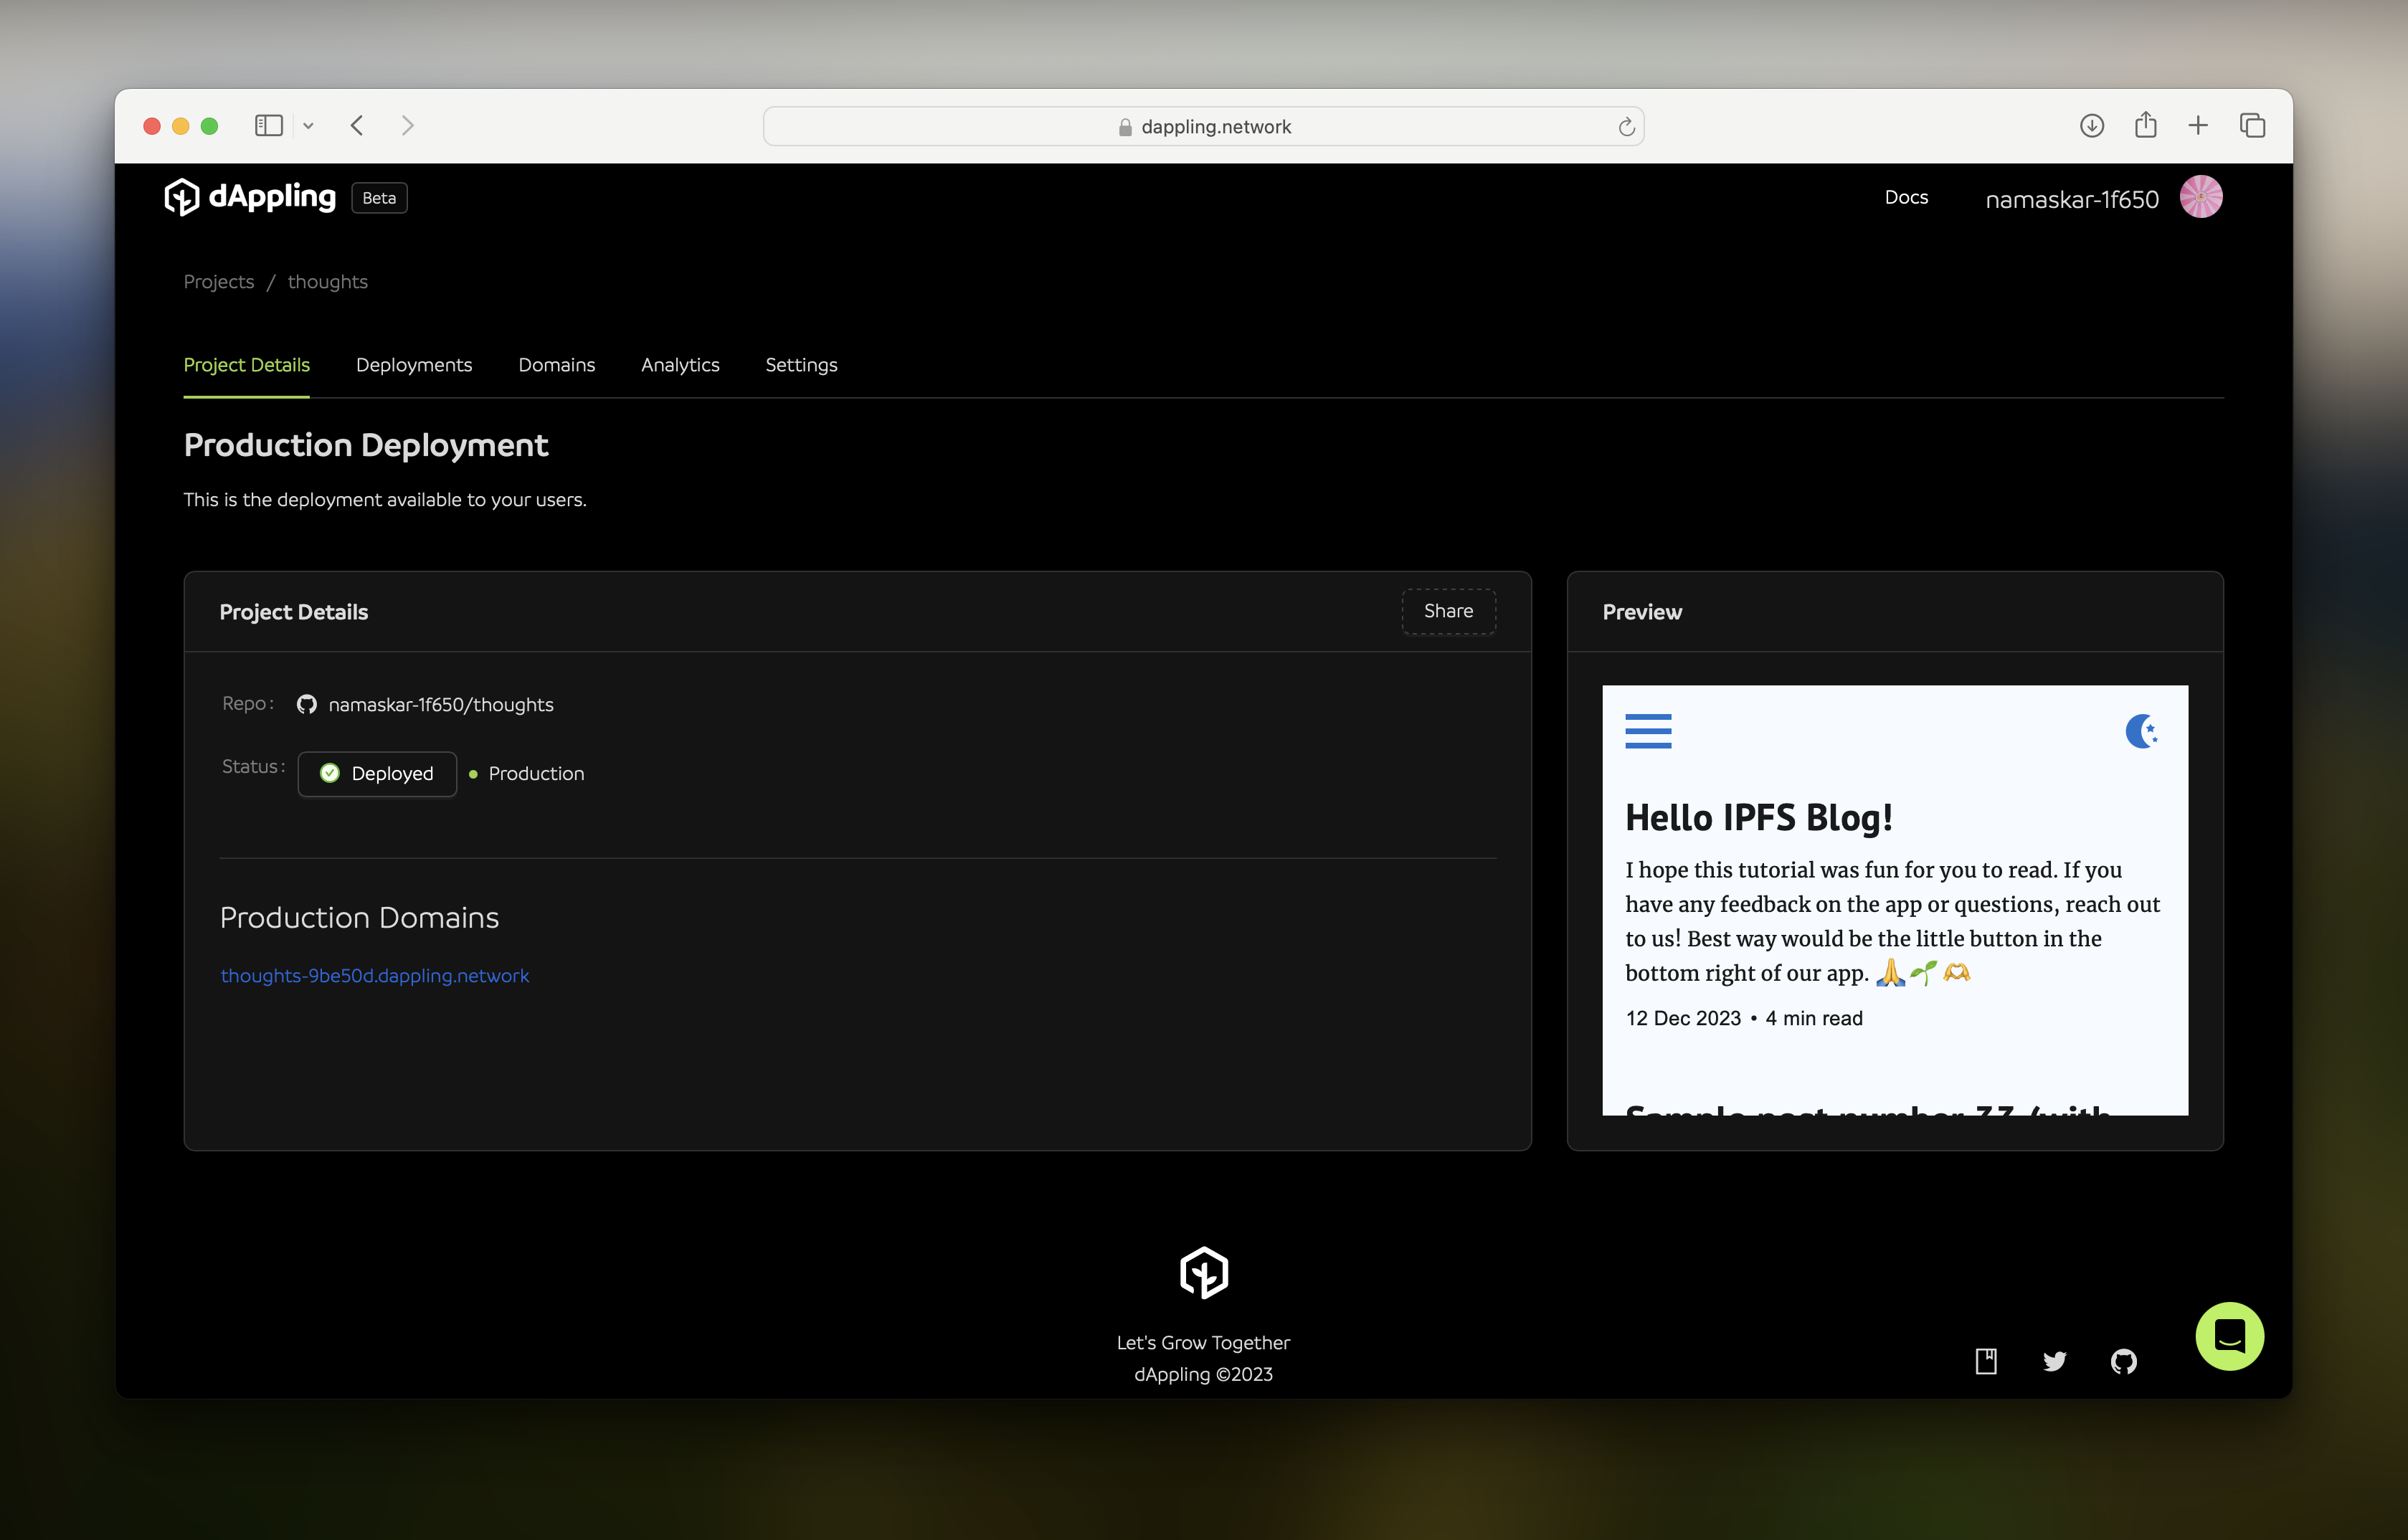
Final Deployment
With those changes, the final deployment succeeded. You made it! Your project page will have a preview of the website, and the domains will be updated with your content.
Thank you for following along, reading, or just looking at the pictures. You can check out my deployed project on dAppling. If there were issues that you ran into, please contact me on 𝕏. For other features and guides, visit our documentation.
If all went well, your project was also deployed successfully. That means you now have a live domain, an ENS subdomain, automatic deployments, and an IPNS key that will always point to the latest version of your site. Well done! Welcome to the decentralized future of IPFS. Post this acomplishment and tag us @dApplingNetwork!
🙏